
Kia Stinger CK: Front Driveshaft Assembly / TJ Joint
Repair procedures
| Replacement |
|

| 1. |
Remove the Front Driveshaft. (Refer to Driveshaft Assembly - “Front Driveshaft”) |
| 2. |
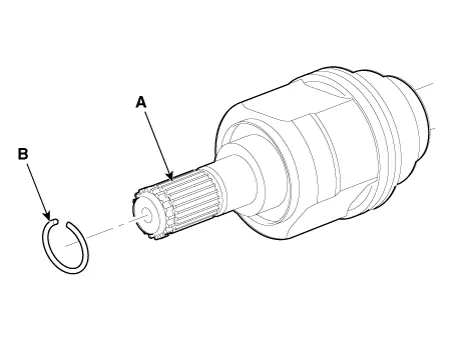
Remove the BJ circlip (B) from the TJ housing (A).
|
| 3. |
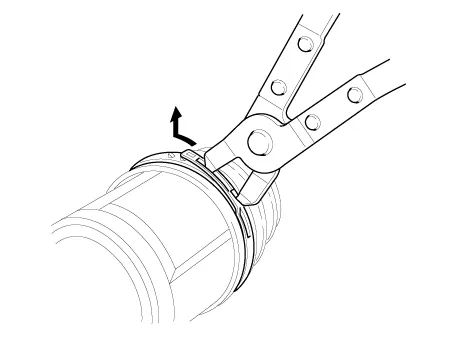
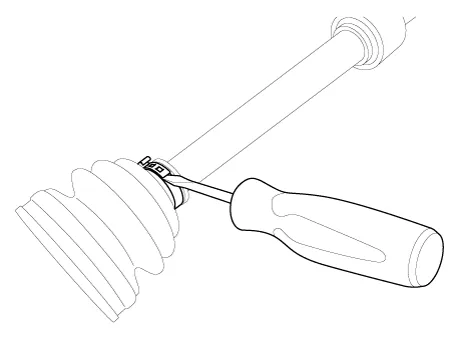
Remove both boot bands from the TJ housing.
|
| 4. |
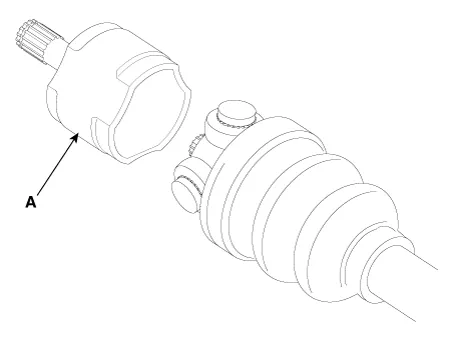
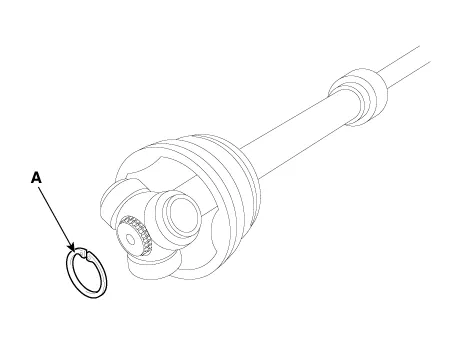
Remove the TJ circlip (A).
|
| 5. |
Remove the snap ring (A) from the shaft.
|
| 6. |
Clean the spider assembly. |
| 7. |
Remove the TJ boot (A).
|
| Inspection |
| 1. |
Check the spider assembly for roller rotation, wear or corrosion. |
| 2. |
Check the groove inside the joint case for wear or corrosion |
| 3. |
Check the TJ boots for damage and deterioration. |
| Installation |
| 1. |
Wrap tape around the driveshaft spline(TJ) to prevent damage to the boot. |
| 2. |
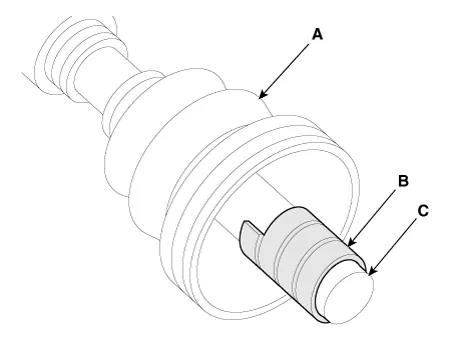
Using the alignment marks (D) made during disassembly as a guide, install the spider assembly (A) and snap ring (B) on the driveshaft splines (C).
|


| 3. |
Add specified grease to the joint boot as much as it was wiped away at inspection. |
| 4. |
Install the both boot band. |
| 5. |
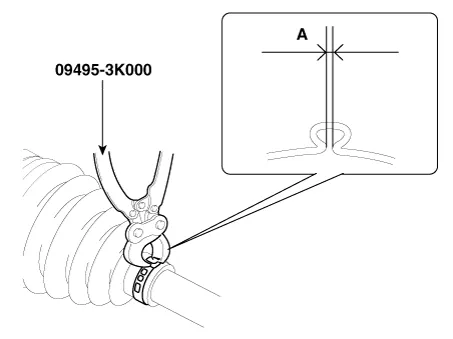
To control the air in the TJ boot, keep the specified distance between the boot bands when they are tightened.
|
||||||||||||||

| 6. |
Using the SST(09495-3K000), secure the TJ boot bands.
|
| 7. |
Install the Front Driveshaft. (Refer to Driveshaft Assembly - “Front Driveshaft”) |
| 8. |
Check the front alignment. (Refer to Suspension System - "Alignment") |


Other information:
Kia Stinger (CK) 2018-2023 Service Manual: Active hood actuator assembly
Repair procedures Replacement 1. Disconnect the negative battery terminal. After disconnecting the cables, wait at least 30 seconds. 2. Remove the cowl top cover. (Refer to Body - "Cowl Top Cover") 3.Repair procedures Automatic Transmission Fluid (ATF) Level Check 1. Start the engine to warm up the ATF. Do not step on the brake and accelerator simultaneously to warm up the ATF. 2.Categories
- Manuals Home
- Kia Stinger Owners Manual
- Kia Stinger Service Manual
- New on site
- Most important about car
