Kia Stinger CK: Cylinder Block / Crankshaft
Repair procedures
| Disassembly |
In case of removing the high pressure fuel pump, high pressure fuel pipe, delivery pipe, and injector, there may be injury caused by leakage of the high pressure fuel. So don’t do any repair work right after engine stops. |

|

Mark all wiring and hoses to avoid misconnection |

| 1. |
Remove the engine and transmission assembly. (Refer to Engine and Transmission Assembly - "Engine and Transmission Assembly") |
| 2. |
Remove the automatic transmission. (Refer to Automatic Transmission System - "Automatic Transmission") |
| 3. |
Remove the drive plate. (Refer to Cylinder Block - "Drive Plate") |
| 4. |
Remove the front driveshaft. (If equipped with AWD system) (Refer to Driveshaft and Axle - "Front Driveshaft") |
| 5. |
Remove the front differential assembly. (If equipped with AWD system) (Refer to Driveshaft and Axle - "Front Differential Carrier") |
| 6. |
Remove the rear oil seal. (Refer to Cylinder Block - "Rear Oil Seal") |
| 7. |
Install the engine assembly to engine stand for disassembly. |
| 8. |
Remove the intake manifold. (Refer to Intake and Exhaust System - "Intake Manifold") |
| 9. |
Remove the exhaust manifold. (Refer to Intake and Exhaust System - "Turbocharger & Exhaust Manifold") |
| 10. |
Remove the timing chain. (Refer to Timing System - “Timing Chain”) |
| 11. |
Remove the A/C compressor. (Refer to Heating, Ventilation Air conditioning - "Compressor") |
| 12. |
Remove the alternator. (Refer to Engine Electrical System - "Alternator") |
| 13. |
Remove the water temperature control assembly. (Refer to Cooling System - "Water Temperature Control Assembly") |
| 14. |
Remove the cylinder head assembly. (Refer to Cylinder Head Assembly - "Cylinder Head") |
| 15. |
Remove the balance shaft & oil pump. (Refer to Lubrication System - "Balance Shaft & Oil Pump") |
| 16. |
Remove the ladder frame. (Refer to Cylinder Block -"Cylinder Block") |
| 17. |
Check the connecting rod end play. |
| 18. |
Remove piston and connecting rod assemblies. (Refer to Cylinder Block - "Piston and Connecting Rod") |
| 19. |
Remove crankshaft bearing cap and check oil clearance.
|
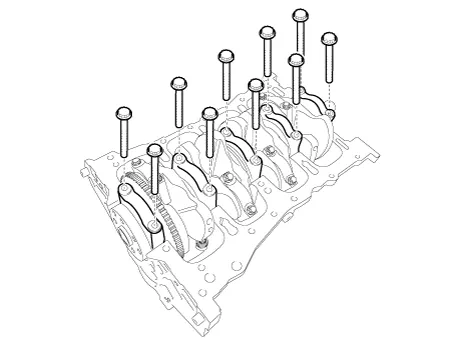
| 20. |
Check the crankshaft end play. |
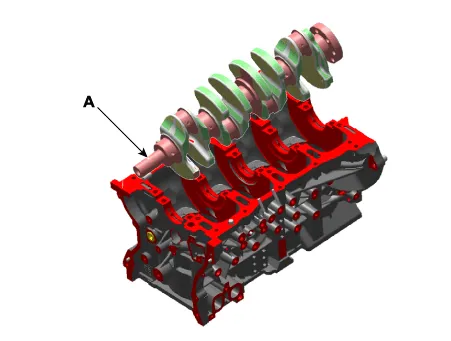
| 21. |
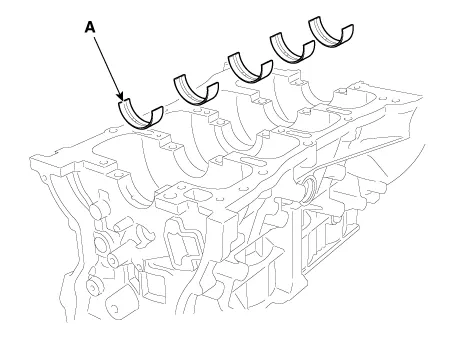
Lift the crankshaft (A) out of the engine, being careful not to damage journals.
|
| Inspection |
| 1. |
Check the crankshaft bearing oil clearance.
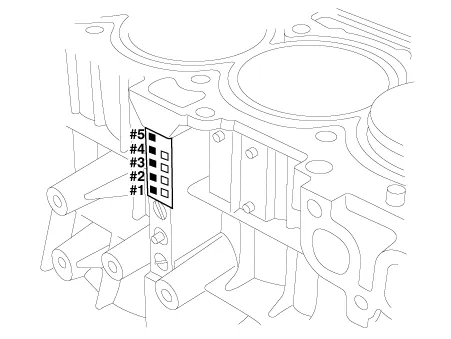
Crankshaft Bore Identification Mark
Letters have been stamped on the block as a mark for the size of each of the 5 main journal bores. Use them, and the numbers or bar stamped on the crank (marks for main journal size), to choose the correct bearings. Cylinder Block Specifications
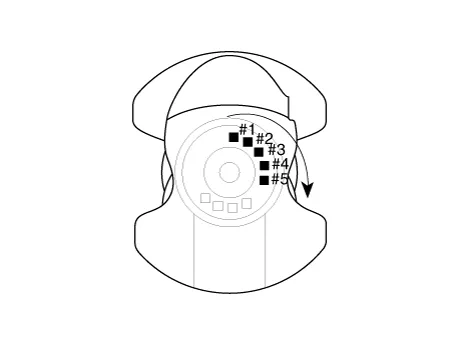
Crankshaft Journal Identification Mark
Crankshaft Specifications
Crankshaft Bearing Identification Mark
Crankshaft Bearing Specifications
Selection Chart For Crankshaft Bearings
|

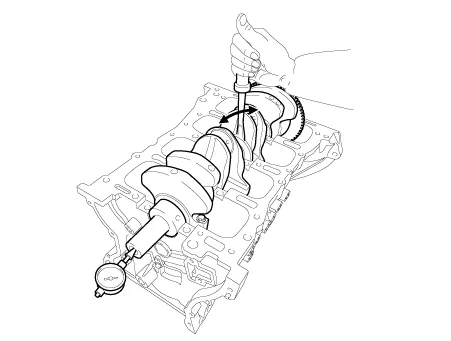
| 2. |
Check crankshaft end play. Using a dial indicator, measure the thrust clearance while prying the crankshaft back and forth with a screwdriver.
If the end play is greater than maximum, replace the thrust bearings as a set.
|
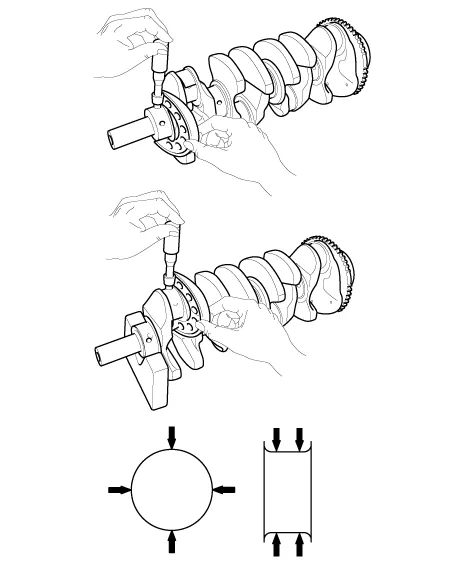
| 3. |
Inspect main journals and crank pins. Using a micrometer, measure the diameter of each main journal and crank pin.
|
| Reassembly |
| 1. |
Install the main bearings.
|
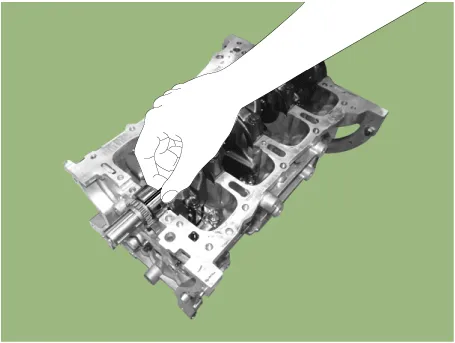
| 2. |
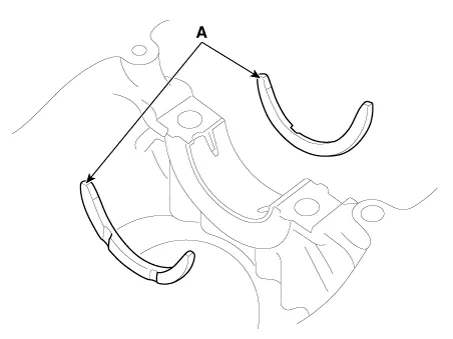
Install the thrust bearings. Install the 2 thrust bearings (A) under the No.3 journal position of the cylinder block with the oil grooves facing outward.
|
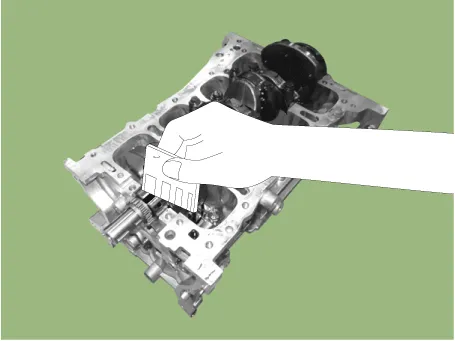
| 3. |
Place the crankshaft (A) on the cylinder block.
|
| 4. |
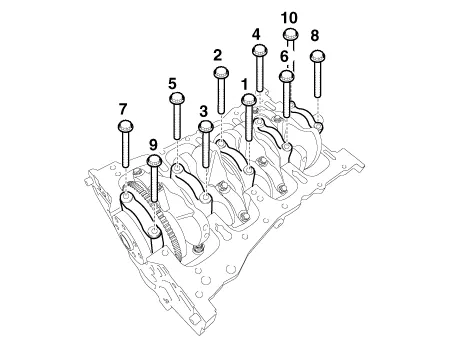
Place the main bearing caps on cylinder block. |
| 5. |
Install the main bearing cap bolts.
|
| 6. |
Check crankshaft end play. |
| 7. |
Assemble the other parts in the reverse order of disassembly.
|


Other information:
Kia Stinger (CK) 2018-2023 Service Manual: Audio Remote Control
Components and components location Components 1. Left Remote Control Switch (Audio + Bluetooth + Voice) 2. Right Remote Control Switch (Trip Computer + ACC + SCC) Schematic diagrams Circuit Diagram [Audio + Bluetooth + Voice] [Trip + ACC] [Trip + ACC + SCC] Repair procedures Removal 1.Description and operation Description For various control units installed on the vehicle to function based on the signals from various sensors, stable power supply is essential. ECM controls generating voltage by duty cycle based on the signals on voltage, current and temperature of battery from battery sensor mounted to negative (-) battery terminal.Categories
- Manuals Home
- Kia Stinger Owners Manual
- Kia Stinger Service Manual
- New on site
- Most important about car
