Kia Stinger CK: Body / Climate Control Air Filter
Repair procedures
| Filter inspection |
The climate control air filter should be replaced according to the maintenance schedule.
If the vehicle is operated in severely polluted city or on dusty rough roads for a long period, it should be inspected more frequently and replaced earlier than schedule.
When replacing the climate control air filter, replace in the following procedure and be careful not to damage other components.
| Cleaning |
| 1. |
Remove the climate control air filter. |
| 2. |
Check that the climate control air filter is not excessively dirty.
|

| 3. |
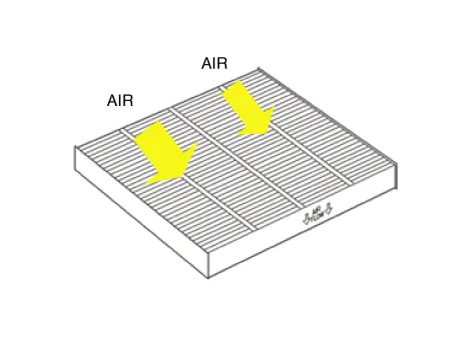
When cleaning the climate control air filter, blow compressed air as shown in the illustration to clean it.
|

| Replacement |
| 1. |
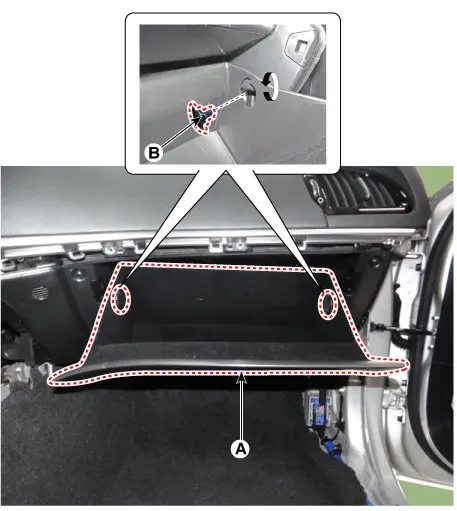
Disconnect the stopper (B) from the glove box (A).
|
| 2. |
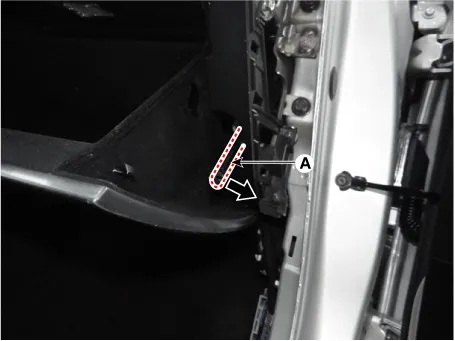
Disconnect the air damper (A) from the glove box (B).
|
| 3. |
Remove the filter cover (A) by pressing the knob.
|

| 4. |
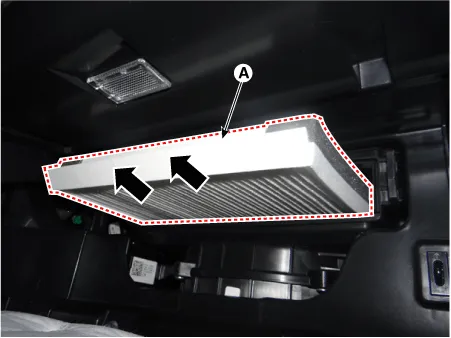
Replace the air filter (A) with a new one according to the direction of air filter.
|
| 5. |
Install in the reverse order of removal. |


Other information:
Kia Stinger (CK) 2018-2023 Service Manual: Integrated Body Control Unit (IBU)
Specifications Specifications Items Specifications Rated voltage DC 12 V Operating voltage DC 9 - 16 V Operating temperature -40 - 176°F (-40 - 80°C) Dark current Max. 4.0 mA Components and components location Components Connector Pin Information No.Service data Service Data Front Suspension Item Specification Suspension type Macpherson multi link Shock absorber Type HPD (High Performance Damper) ECS(Electronic Control Suspension) Rear Suspension Item Specification Suspension type Multi link Shock absorber Type HPD (High Performance Damper) ECS(Electronic Control Suspension) Wheel & Tire Item Specification Front Rear Aluminum 7.Categories
- Manuals Home
- Kia Stinger Owners Manual
- Kia Stinger Service Manual
- New on site
- Most important about car
