Kia Stinger CK: Propeller Shaft Assembly / Front Propeller Shaft
Repair procedures
| Removal |
| 1. |
Raise the vehicle, and make sure it is securely supported. |
| 2. |
Remove the engine room side cover. D 2.2 R VGT (Refer to Engine Mechanical System - "Engine Room Under cover") G 2.0 T-GDI THETA II (Refer to Engine Mechanical System - "Engine Room Under cover") G 3.3 T-GDI LAMBDA II (Refer to Engine Mechanical System - "Engine Room Under cover") |
| 3. |
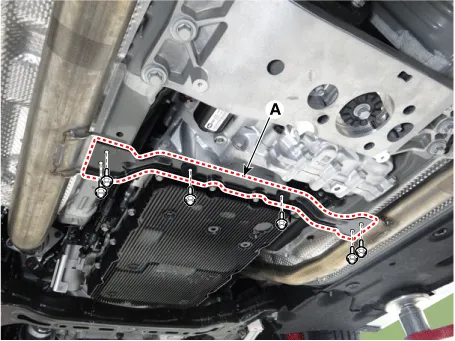
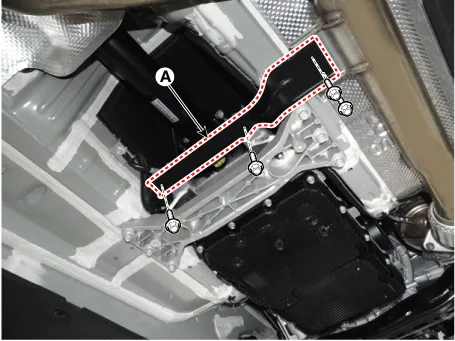
Remove the front muffler stay (A).
[3.3 T-GDI LAMBDA II]
[2.0 T-GDI THETA II, 2.2 R VGT]
|
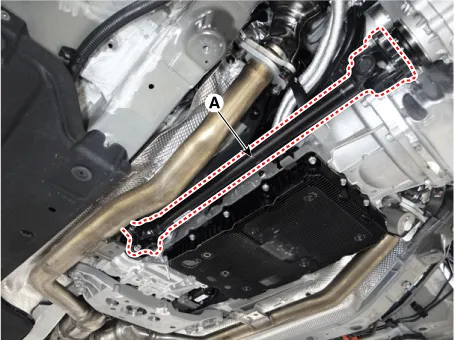
| 4. |
Remove the front propeller shaft (A).
|

| 5. |
Install in the reverse order of removal. |


Other information:
Kia Stinger (CK) 2018-2023 Service Manual: Timing Chain
Repair procedures Removal 1. Remove the cylinder head cover. (Refer to Cylinder Head Assembly - "Cylinder Head Cover") 2. Turn the crankshaft pulley and align its groove with the timing mark of the timing chain cover to set the piston of No.1 cylinder to the top dead center on compression stroke.Kia Stinger (CK) 2018-2023 Service Manual: How does the air bag system operate?
Air bags are activated (able to inflate if necessary) only when the Engine Start/Stop button is turned to the ON or engine is running. The appropriate air bags inflate instantly in the event of a serious frontal collision or side collision in order to help protect the occupants from serious physical injury. There is no single speed at which the air bags will inflate.Categories
- Manuals Home
- Kia Stinger Owners Manual
- Kia Stinger Service Manual
- New on site
- Most important about car
