Kia Stinger CK: Hydraulic System / P Position Solenoid Valve (ON/OFF)
Specifications
| Specifications |
|
Item |
Specification |
|
Control type |
ON/OFF |
|
Control pressure kpa (kgf/cm², psi) |
539.36 (5.5, 78.23) |
|
Current (mA) |
0 - 600 |
|
Coil resistance (Ω) |
10.5 ± 0.5 |
Components and components location
| Components Location |
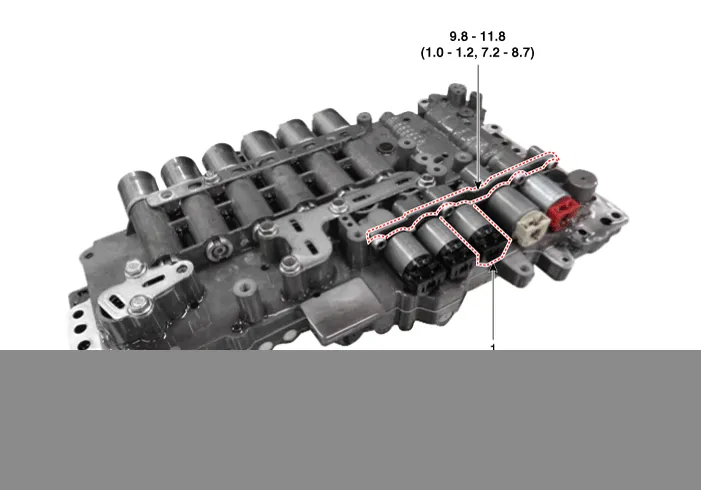
| 1. P position solenoid valve
|
2. Solenoid valve support bracket
|
Description and operation
| Description |
| • |
P position solenoid valve is ON/OFF type. |
| • |
When TCM supplies current to solenoid valve, the solenoid valve operates and controls the P range. |

Solenoid Valve Operation Table
|
|
ON/OFF |
|
(P) |
|
|
P |
|
|
N |
● |
|
1 |
● |
|
2 |
● |
|
3 |
● |
|
4 |
● |
|
5 |
● |
|
6 |
● |
|
7 |
● |
|
8 |
● |
|
REV |
● |
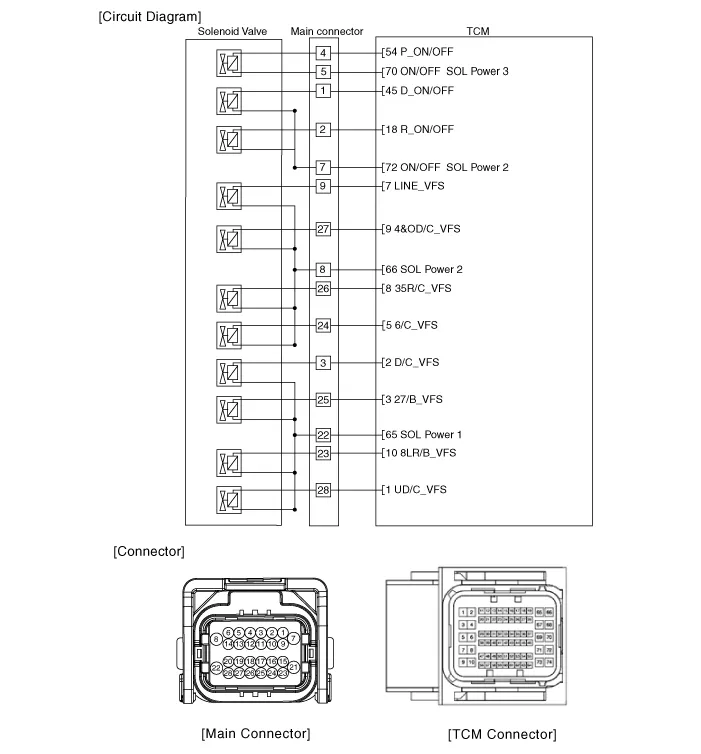
Schematic diagrams
| Circuit Diagram |
Repair procedures
| Inspection |
| 1. |
Switch "OFF" ignition |
| 2. |
Disconnect the main connector (A).
|

| 3. |
Measure the resistance between power terminal (5) and signal terminal (4).
|
| Removal |
|

| 1. |
Remove the under cover. (Refer to Engine Mechanical System - "Engine Room Under Cover"). |
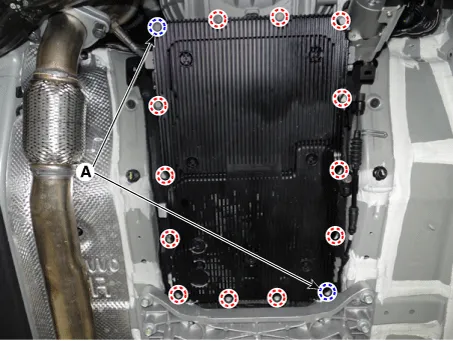
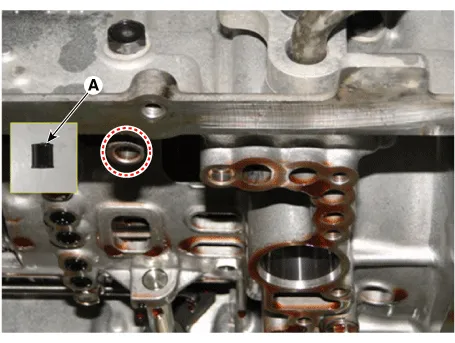
| 2. |
Remove the ATF drain plug (A), allow the fluid to drain out and then reinstall the drain plug.
|


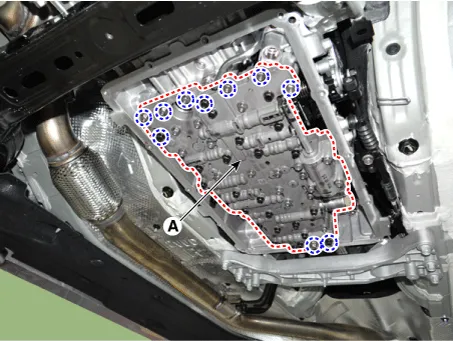
| 3. |
Disconnect the main connector (A).
|
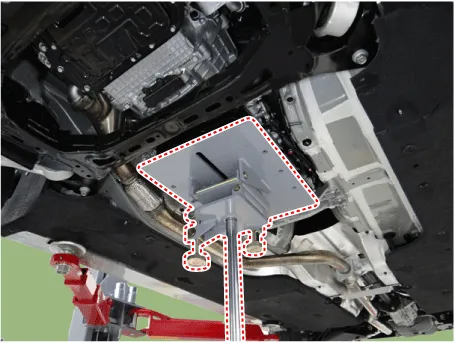
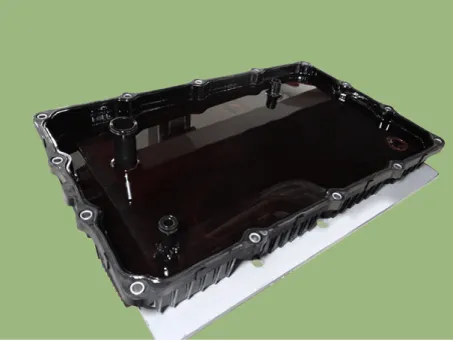
| 4. |
Remove the valve body cover.
|
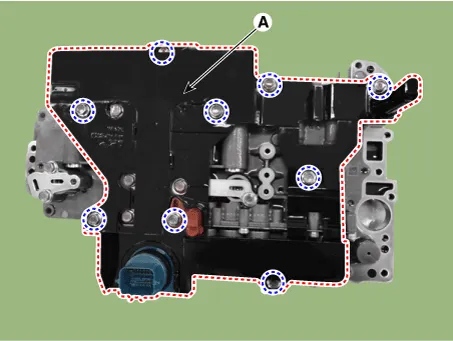
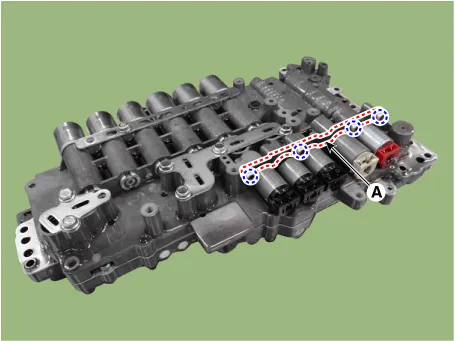
| 5. |
Remove the valve body assembly (A) after loosening the bolts.
|
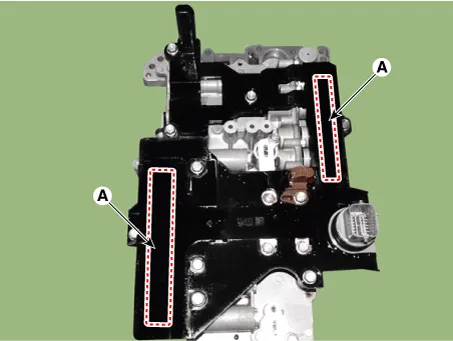
| 6. |
Remove the E-module (A) after loosening the bolts.
|
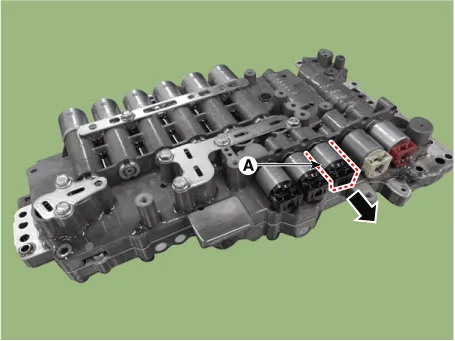
| 7. |
Remove the solenoid valve support bracket (A).
|
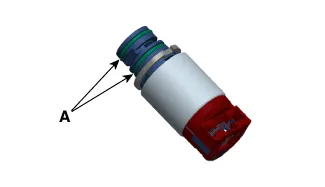
| 8. |
Remove the P position solenoid valve (A).
|
| Installation |
| 1. |
Install in the reverse order of removal.
|
| 2. |
Perform the procedures below after installing.
|


Other information:
Kia Stinger (CK) 2018-2023 Service Manual: Electric Waste Gate Actuator (EWGA)
Description and operation Desrcription Installed on the turbocharger, the Electric Waste Gate Actuator (EWGA) operates the vane in the Waste Gate Turbocharger (WGT) and regulates the compressed air amount based on the PWM signal from the ECM. This actuator consists of a DC motor which actuates the vane, a 2-step gear which increases torque of the DC motor, a position sensor which detects status of the vane, and an electric control unit which drives the DC motor.Kia Stinger (CK) 2018-2023 Service Manual: Parking distance warning - reverse
The rear parking distance warning - reverse assists the driver during backward movement of the vehicle by chiming if any object is sensed within a distance of 120 cm (47 in.) behind the vehicle. This system is a supplemental system and it is not intended to nor does it replace the need for extreme care and attention of the driver. The sensing range and objects detectable by the back sensors (1) are limited.Categories
- Manuals Home
- Kia Stinger Owners Manual
- Kia Stinger Service Manual
- New on site
- Most important about car
