Kia Stinger CK: Lighting / Lighting control
Contents:
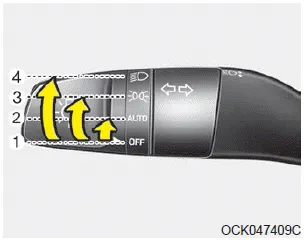
The light switch has a Headlight and a Parking light position.
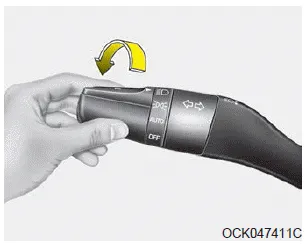
To operate the lights, turn the knob at the end of the control lever to one of the following positions:
(1) OFF position
(2) Auto light position
(3) Parking & Tail light
(4) Headlight position
Parking & Tail light


When the light switch is in the parking light position, the tail, license and parking lights will turn ON.
Headlight position

When the light switch is in the headlight position, the head, tail, license lights will turn ON.
✽ NOTICE
The ignition switch must be in the ON position to turn on the headlights.
Auto light/DBL position

When the light switch is in the AUTO light position, the taillights and headlights will turn ON or OFF automatically depending on the amount of light outside the vehicle.
If your vehicle is equipped with the dynamic bending light (DBL), it will also operate when the headlamp is ON.
CAUTION
- Never place anything over the sensor (1) located on the instrument panel, this will ensure better auto-light system control.
- Don’t clean the sensor using a window cleaner, the cleaner may leave a light film which could interfere with sensor operation.
- If your vehicle has window tint or other types of metallic coating on the front windshield, the Auto light system may not work properly.


Other information:
Kia Stinger (CK) 2018-2023 Owner's Manual: LKA system operation
To activate/deactivate the LKA system: With the ignition switch in the ON position, press the LKA system button located on the instrument panel on the lower left hand side of the driver. The indicator in the cluster display will initially illuminate white. When the indicator (white) activated in the previous ignition cycle, the system turns on without any control.Kia Stinger (CK) 2018-2023 Owner's Manual: Turbocharger & Exhaust Manifold
Components and components location Components 1. Turbo manifold module 2. Turbo manifold module gasket 3. Heat protector 4. Warm-up catalytic converter (WCC) heat protector 5. Oil feed pipe 6. Turbo manifold module stay 7. Oil drain pipe 8. Turbocharger oil drain pipe gasket A 9.Categories
- Manuals Home
- Kia Stinger Owners Manual
- Kia Stinger Service Manual
- New on site
- Most important about car
Contents
