Kia Stinger: Body (Interior and Exterior) / Fender
Components and components location
| Component Location |
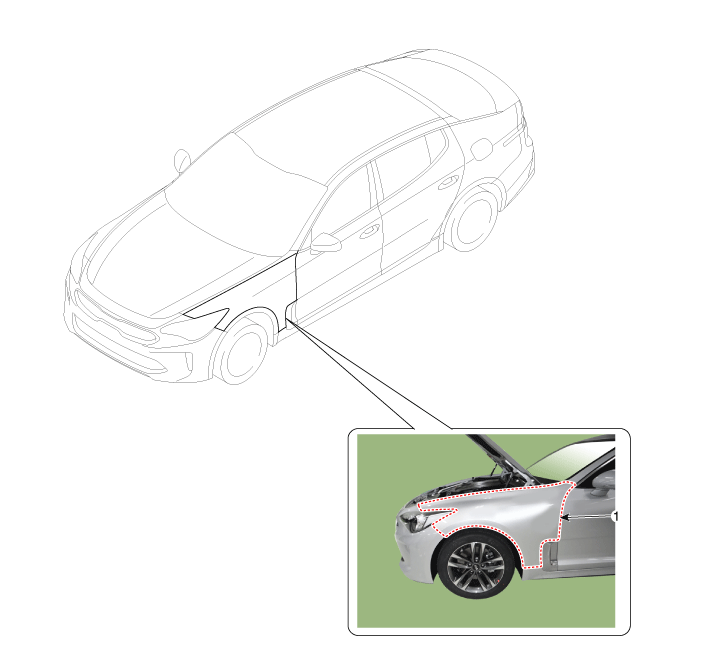
| 1. Fender assembly |
Repair procedures
| Replacement |
Be careful not to damage the fender and body. |

When removing the clips, use a clip remover. |

| 1. |
Remove the front bumper. (Refer to Front Bumper - "Front Bumper Assembly") |
| 2. |
Remove the headlamps. (Refer to Body Electrical System - "Headlamps") |
| 3. |
Remove the side sill molding. (Refer to Body Side Molding - "Side Sill Molding") |
| 4. |
Remove the front wheel guard. (Refer to Body Side Molding - "Front Wheel Guard") |
| 5. |
Remove the fender garnish. (Refer to Body Side Molding - "Fender Garnish") |
| 6. |
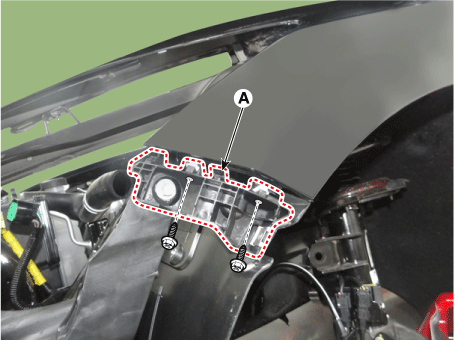
Remove the front bumper side mounting bracket (A) after loosening the screw and bolt.
|
| 7. |
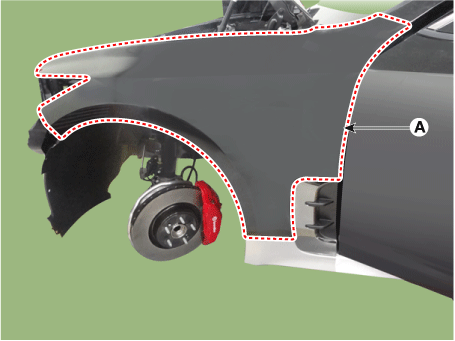
Remove the fender assembly (A) after loosening the nut and bolts.
|
| 8. |
Install in the reverse order of removal.
|
 Cowl Cross Bar Assembly
Components and components location
Component Location
1. Cowl cross bar assembly
Repair procedures
Replacement
...
 Floor Carpet
Components and components location
Component Location
1. Floor carpet assembly
Repair procedures
Replacement
& ...
Other information:
Kia Stinger CK 2018-2025 Owners Manual: Recharging the battery
Your vehicle has a maintenance-free, calcium-based battery. If the battery becomes discharged in a short time (because, for example, the headlamps or interior lamps were left on while the vehicle was not in use), recharge it by slow charging (trickle) for 10 hours. If the battery gradual ...
Kia Stinger CK 2018-2025 Service Manual: Front Differential Carrier
Repair procedures Removal 1. Remove the propeller shaft. (Refer to Driveshaft and axle - "Front propeller shaft") 2. Remove the sub frame. (Refer to Suspension System - "Sub frame") 3. Separate th ...
Copyright © www.kstinger.com 2015-2025
