Kia Stinger CK: Driving your vehicle / Special driving conditions
Contents:
- Hazardous driving conditions
- Rocking the vehicle
- Driving at night
- Driving in the rain
- Driving in flooded areas, Driving off-road
- Highway driving
Hazardous driving conditions
When hazardous driving conditions are encountered such as water, snow, ice, mud, sand, or similar hazards, follow these suggestions:
- Drive cautiously and allow extra distance for braking.
- Avoid sudden braking or steering.
- When braking with non-ABS brakes pump the brake pedal with a light up-and-down motion until the vehicle is stopped.
Do not pump the brake pedal on a vehicle equipped with ABS.
- If stalled in snow, mud, or sand, use the second gear. Accelerate slowly to avoid spinning the drive wheels.
- Use sand, rock salt, or other nonslip material under the drive wheels to provide traction when stalled in ice, snow, or mud.
WARNING - Downshifting
Do not downshift with an automatic transmission while driving on slippery surfaces. The sudden change in tire speed could cause the tires to skid and result in an accident.
Rocking the vehicle
If it is necessary to rock the vehicle to free it from snow, sand, or mud, first turn the steering wheel right and left to clear the area around your front wheels. Then, shift back and forth between R (Reverse) and any forward gear in vehicles equipped with an Automatic Transmission. Do not race the engine, and spin the wheels as little as possible. If you are still stuck after a few tries, have the vehicle pulled out by a tow vehicle to avoid engine overheating and possible damage to the transmission.
WARNING - Sudden Vehicle Movement
Do not attempt to rock the vehicle if people or objects are nearby. The vehicle may suddenly move forward or backwards as it becomes unstuck.
CAUTION - Vehicle rocking
Prolonged rocking may cause engine overheating, transmission damage or failure, and tire damage.
CAUTION - Spinning tires
Do not spin the wheels, especially at speeds more than 56 km/h (35 mph). Spinning the wheels at high speeds when the vehicle is stationary could cause a tire to overheat which could result in tire damage that may injure bystanders.
The ESC system should be turned OFF prior to rocking the vehicle.
Smooth cornering
Avoid braking or gear changing in corners, especially when roads are wet. Ideally, corners should always be taken under gentle acceleration. If you follow these suggestions, tire wear will be held to a minimum.
Driving at night
Because night driving presents more hazards than driving in the daylight, here are some important tips to remember:
- Slow down and keep more distance between you and other vehicles, as it may be more difficult to see at night, especially in areas where there may not be any street lights.
- Adjust your mirrors to reduce the glare from other driver's headlights.
- Keep your headlights clean and properly aimed. (On vehicles not equipped with the automatic headlight aiming feature.) Dirty or improperly aimed headlights will make it much more difficult to see at night.
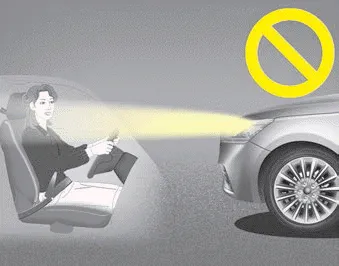
- Avoid staring directly at the headlights of oncoming vehicles. You could be temporarily blinded, and it will take several seconds for your eyes to readjust to the darkness.
Driving in the rain
Rain and wet roads can make driving dangerous, especially if you’re not prepared for the slick pavement. Here are a few things to consider when driving in the rain:
- A heavy rainfall will make it harder to see and will increase the distance needed to stop your vehicle, so slow down.
- Keep your windshield wiping equipment in good shape. Replace your windshield wiper blades when they show signs of streaking or missing areas on the windshield.
- If your tires are not in good condition, making a quick stop on wet pavement can cause a skid and possibly lead to an accident. Be sure your tires are in good shape.
- Turn on your headlights to make it easier for others to see you.
- Driving too fast through large puddles can affect your brakes. If you must go through puddles, try to drive through them slowly.
- If you believe you may have gotten your brakes wet, apply them lightly while driving until normal braking operation returns.
Driving in flooded areas, Driving off-road
Driving in flooded areas
Avoid driving through flooded areas unless you are sure the water is no higher than the bottom of the wheel hub. Drive through any water slowly. Allow adequate stopping distance because brake performance may be affected.
After driving through water, dry the brakes by gently applying them several times while the vehicle is moving slowly.
Driving off-road
Drive carefully off-road because your vehicle may be damaged by rocks or roots of trees. Become familiar with the off-road conditions where you are going to drive before you begin driving.
Highway driving ➤


Other information:
If your vehicle is equipped with a sunroof, you can slide or tilt your sunroof with the sunroof control lever located on the overhead console. The sunroof can be operated for approximately 30 seconds after the Engine Start/Stop button is in the OFF position. However, if the driver’s door is opened, the sunroof cannot be operated even within the 30 second period.Oil pressure characteristics input Oil-pressure characteristics input Solenoid valve oil-pressure characteristics input procedure 1. Perform the oil-pressure characteristics input procedure using the KDS. 2. Click the "OK" button after checking the condition.Categories
- Manuals Home
- Kia Stinger Owners Manual
- Kia Stinger Service Manual
- Hazardous driving conditions
- Rocking the vehicle
- Driving at night
- Driving in the rain
- Driving in flooded areas, Driving off-road
- Highway driving
- New on site
- Most important about car
Contents
