Kia Stinger CK: Seat / Headrest
Contents:
The driver's and front passenger's seats are equipped with a headrest for the occupant's safety and comfort.
The headrest not only provides comfort for the driver and front passenger, but also helps protect the head and neck in the event of a rear collision.
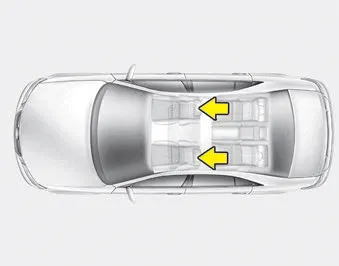
For maximum effectiveness in case of an accident, the headrest should be adjusted so the middle of the headrest is at the same height of the center of gravity of an occupant's head.
Generally, the center of gravity of most people's head is similar with the height of the top of their eyes. Also, adjust the headrest as close to your head as possible. For this reason, the use of a cushion that holds the body away from the seatback is not recommended.
WARNING - Headrest removal/adjustment
- Do not operate the vehicle with the headrests removed. Headrests can provide critical neck and head support in a crash.
- Do not adjust the headrest height while the vehicle is in motion. Driver may lose control of the vehicle.
CAUTION
Excessive pulling or pushing may damage the headrest.
Adjusting the height up and down
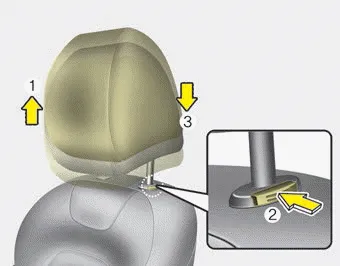
To raise the headrest, pull it up to the desired position (1). To lower the headrest, push and hold the release button (2) on the headrest support and lower the headrest to the desired position (3).
Forward and backward adjustment
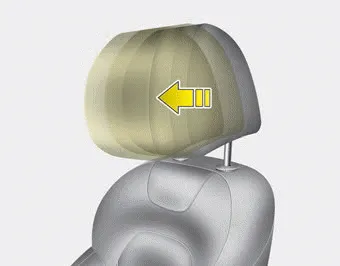
The headrest may be adjusted forward to 4 different positions by pulling the headrest forward to the desired detent.
To adjust the headrest to it’s furthest backwards position, pull the headrest fully forward to the farthest position and release it.
Adjust the headrest so that it properly supports the head and neck.
✽ NOTICE
If you recline the seatback towards the front with the headrest and seat cushion raised, the headrest may come in contact with the sunvisor or other parts of the vehicle.
Removal and reinstallation
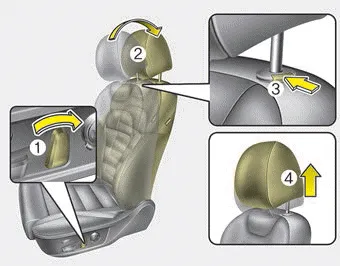
To remove the headrest:
1. Recline the seatback (2) with the recline switch (1).
2. Raise headrest as far as it can go.
3. Press the headrest release button (3) while pulling the headrest up (4).
WARNING - Headrest Removal
NEVER allow anyone to ride in a seat with the headrest removed. Headrests can provide critical neck and head support in a crash.
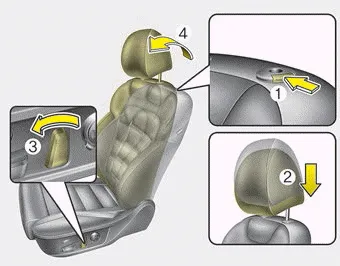
To reinstall the headrest :
1. Put the headrest poles (2) into the holes while pressing the release button (1).
2. Recline the seatback (4) with the recline switch (3).
3. Adjust the headrest to the appropriate height.
WARNING - Headrest Reinstallation
To reduce the risk of injury to the head or neck, always make sure the headrest is locked into position and adjusted properly after reinstalling.


Other information:
Kia Stinger (CK) 2018-2023 Owner's Manual: Front Stabilizer Bar
Repair procedures Removal 1. Remove wheel nuts, front wheel and tire (A) from hub. Tightening torque: 107.9 - 127.5 N·m (11.0 - 13.0 kgf·m, 79.6 - 94.0 lb·ft) Be careful not to damage the wheel bolts when removing the wheel and tire (A).Kia Stinger (CK) 2018-2023 Owner's Manual: Front Seat Frame Assembly
Components and components location Component Location 1. Front seat back frame assembly 2. Front seat cushion frame assembly Repair procedures Replacement • Put on gloves to protect your hands.Categories
- Manuals Home
- Kia Stinger Owners Manual
- Kia Stinger Service Manual
- New on site
- Most important about car
Contents
