Kia Stinger: Timing System / Timing Chain Cover
Repair procedures
| Removal |
In case of removing the high pressure fuel pump, high pressure fuel pipe, delivery pipe, and injector, there may be injury caused by leakage of the high pressure fuel. So don’t do any repair work right after engine stops. |

|

Mark all wiring and hoses to avoid misconnection. |

| 1. |
Disconnect the battery negative terminal. |
| 2. |
Remove the engine cover. (Refer to Engine and Transmission Assembly - "Engine Cover") |
| 3. |
Remove the engine room front under cover. (Refer to Engine and Transmission Assembly - "Engine Room Under Cover") |
| 4. |
Remove the drive belt. (Refer to Drive Belt System - "Drive Belt") |
| 5. |
Remove the water pump pulley. (Refer to Cooling System - "Water Pump") |
| 6. |
Remove the drive belt tensioner. (Refer to Drive Belt System - "Drive belt Tensioner") |
| 7. |
Remove the crankshaft damper pulley. (Refer to Drive Belt System - "Crankshaft Damper Pulley") |
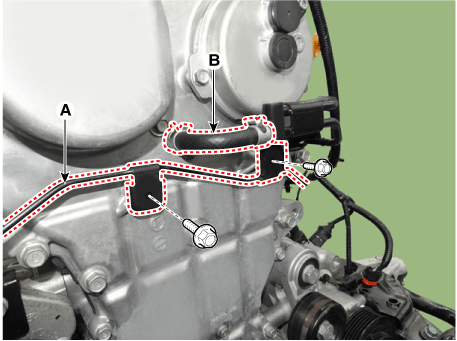
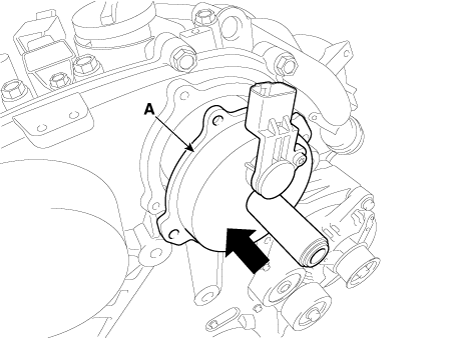
| 8. |
Remove the vacuum pipe (A) and then disconnect the air vent lower hose (B).
|
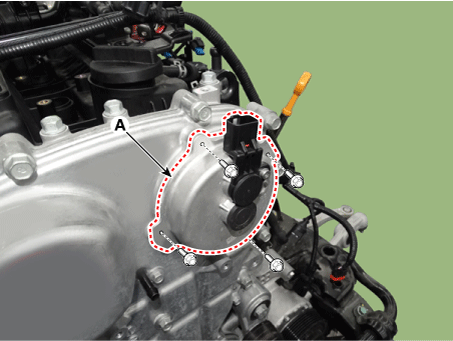
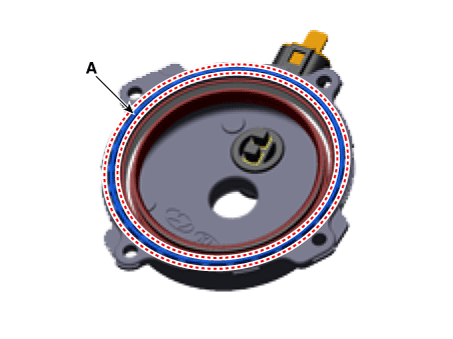
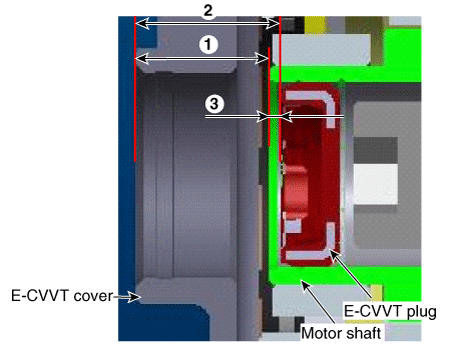
| 9. |
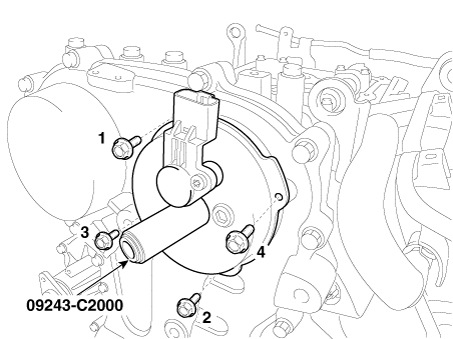
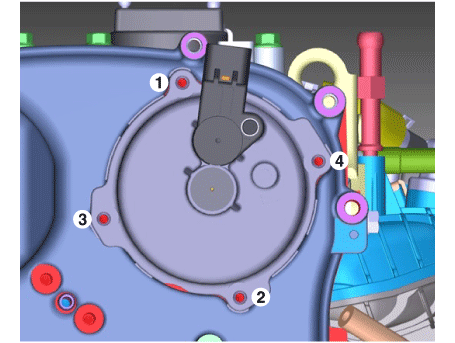
Remove the E-CVVT cover (A).
|
| 10. |
Remove the oil pan. (Refer to Lubrication System - "Oil Pan") |
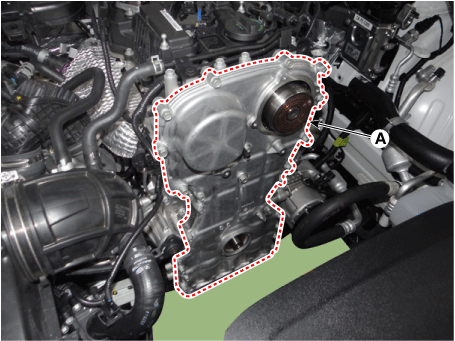
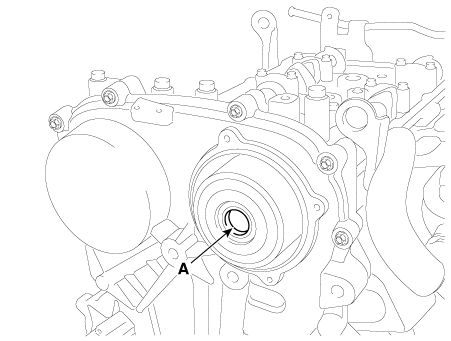
| 11. |
Remove the timing chain cover (A) by gently prying the portions between the cylinder head and cylinder block.
|
| Inspection |
| 1. |
Check if the oil flows inside the E-CVVT cover. If the oil flows inside the E-CVVT cover, replace the E-CVVT cover. |
| 2. |
Check the connector brush wear condition. If the brush is worn down, replace the E-CVVT cover assembly. |
| Installation |
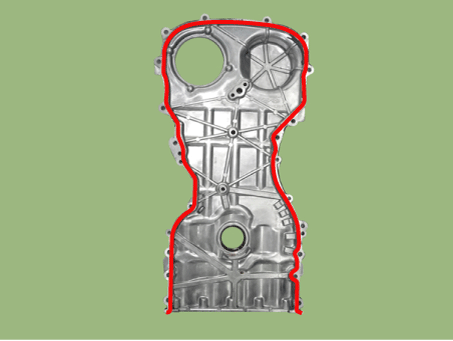
| 1. |
Install the timing chain cover.
|

| 2. |
Install the front oil seal. (Refer to Timing System - "Front Oil Seal") |
| 3. |
Install the drive belt tensioner. (Refer to Drive Belt System - "Drive Belt Tensioner") |
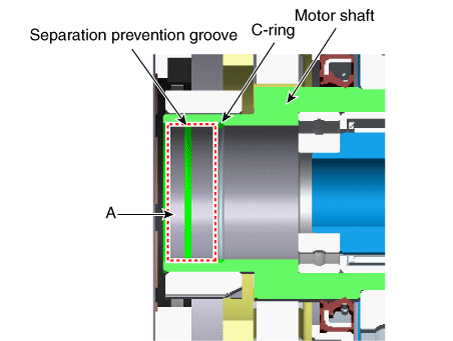
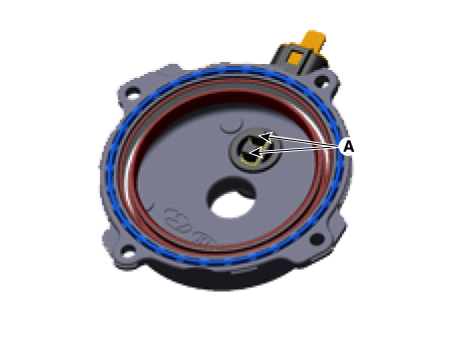
| 4. |
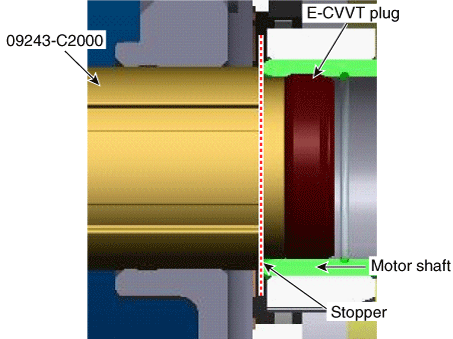
Remove it by breaking the center of E-CVVT motor plug (A).
|
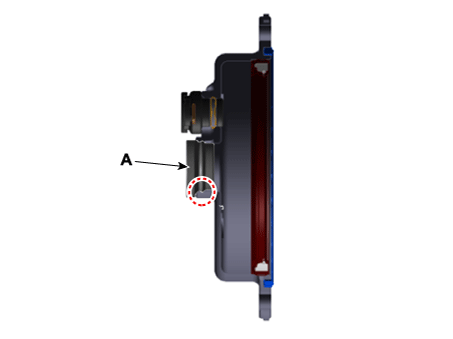
| 5. |
Clean the E-CVVT motor plug mounting surface (A) with oil cleaner.
|
| 6. |
When reusing the E-CVVT cover, inspect the below items.
|
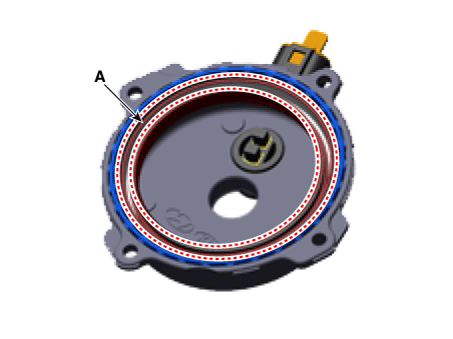
| 7. |
Install the E-CVVT cover.
|

| 8. |
Install the E-CVVT plug.
|
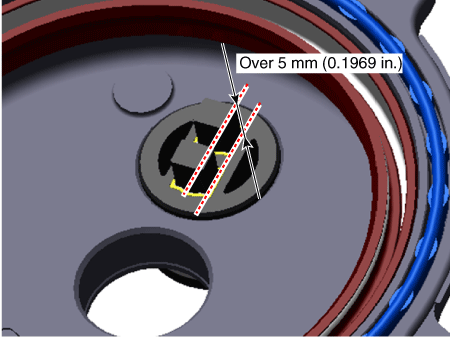
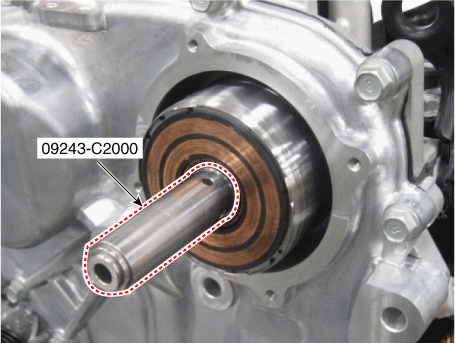
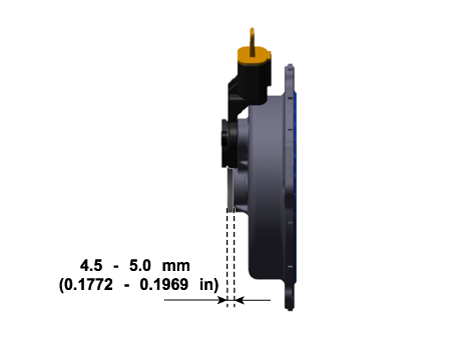
| 9. |
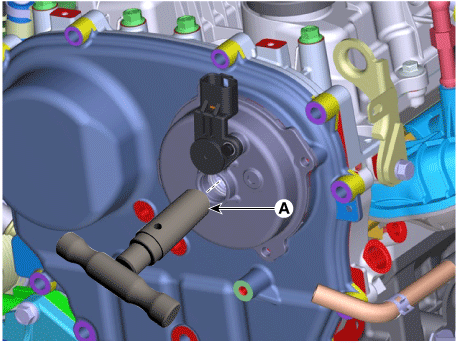
Inspect the pressed depth of E-CVVT plug.
|
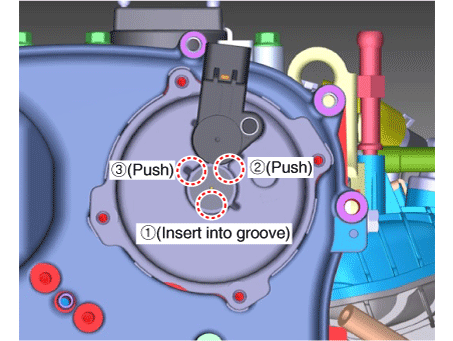
| 10. |
Insert the E-CVVT cover plug so that the protrusion (A) reach to E-CVVT cover groove correctly.
|
| 11. |
Install the other parts in the reverse order of removal. |
|
 Front Oil Seal
Repair procedures
Replacement
1.
Remove the crankshaft damper pulley.
(Refer to Drive Belt System - "Crankshaft Damper Pulley")
2.
Rem ...
 Timing Chain
Repair procedures
Removal
1.
Remove the cylinder head cover.
(Refer to Cylinder Head Assembly - "Cylinder Head Cover")
2.
Turn the cra ...
Other information:
Kia Stinger CK 2018-2025 Service Manual: Mode Control Actuator
Description and operation Description Located in the heater unit, the mode control actuator adjusts the position of the mode door by operating the mode control actuator according to the signal from the A/C control unit. Pressing the mode select switch shifts the mode control actu ...
Kia Stinger CK 2018-2025 Service Manual: Brake Line
Components and components location Components Repair procedures Removal 1. Turn ignition switch OFF and disconnect the negative (-) battery cable. 2. Remove the brake fluid from the master cylinder reservoir with a syringe. ...
