Kia Stinger CK: Light bulb position (Side) / Headlamp (Low/High beam) bulb replacement (Headlamp Type A)
Contents:
■ Head lamp - Type A
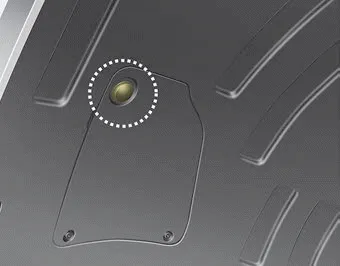
1. Remove the service cover clip on the wheel housing.
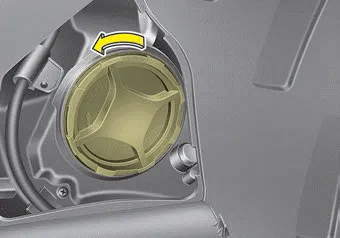
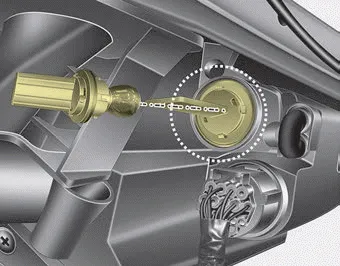
2. Remove the headlamp bulb cover by turning it counterclockwise.
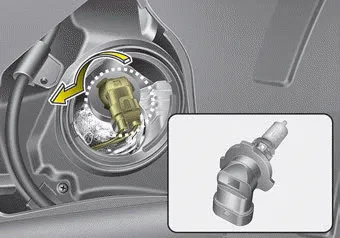
3. Disconnect the headlamp bulb socket-connector.
4. Remove the bulb-socket from the headlamp assembly by turning the bulb-socket counterclockwise until the tabs on the bulb-socket align with the slots on the headlamp assembly.
5. Install a new bulb-socket assembly in the headlamp assembly by aligning the tabs on the bulb-socket with the slots in the headlamp assembly. Push the bulb-socket into the headlamp assembly and turn the bulb-socket clockwise.
6. Connect the headlamp bulb socket- connector.
7. Install the headlamp bulb cover by turning it clockwise.
8. Install the clip on the service cover.
❈ If it is difficult to replace light bulbs, have the vehicle checked by an authorized Kia dealer.
Headlamp bulb
WARNING - Halogen bulbs
- Halogen bulbs contain pressurized gas that will produce flying pieces of glass if broken.
- Always handle them carefully, and avoid scratches and abrasions. If the bulbs are lit, avoid contact with liquids.
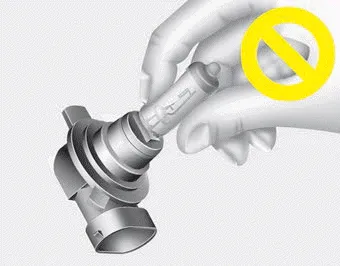
- Never touch the glass with bare hands. Residual oil may cause the bulb to overheat and burst when lit. A bulb should be operated only when installed in a headlight.
- If a bulb becomes damaged or cracked, replace it immediately and carefully dispose of it.
- Wear eye protection when changing a bulb. Allow the bulb to cool down before handling it.
Front turn signal lamp bulb replacement (Headlamp Type A)

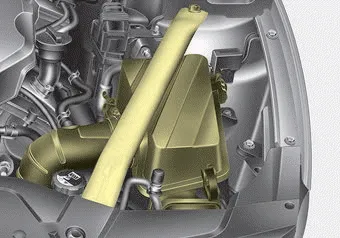
1. Open the hood.
2. Remove the strut bar and the air cleaner assembly.
3. Remove the bulb-socket from the headlamp assembly by turning the bulb-socket counterclockwise until the tabs on the bulb-socket align with the slots on the headlamp assembly.
4. Remove the bulb from the bulbsocket by pressing it in and rotating it counterclockwise until the tabs on the bulb align with the slots in the bulb-socket. Pull the bulb out of the bulb-socket.
5. Insert a new bulb by inserting it into the bulb-socket and rotating it until it locks into place.
6. Install the socket in the headlamp assembly by aligning the tabs on the bulb-socket with the slots in the assembly. Push the bulb-socket into the headlamp assembly and turn the socket clockwise.
7. Install the strut bar and the air cleaner assembly.
❈ If it is difficult to replace light bulbs, have the vehicle checked by an authorized Kia dealer.


Other information:
Kia Stinger (CK) 2018-2023 Owner's Manual: Smart Key Diagnostic
Repair procedures Inspection 1. In the body electrical system, failure can be quickly diagnosed by using the vehicle diagnostic system (KDS). The diagnostic system (KDS) provides the following information. (1) Self diagnosis : Checking failure and code number (DTC). (2) Current data : Checking the system input/output data state.Kia Stinger (CK) 2018-2023 Owner's Manual: Transmission Oil Temperature Sensor
Specifications Specifications Item Specification Oil temperature sensor Type *NTC thermistor Temp.[(°C)°F] / Resistance (kΩ) (-40)-40 / 139.5 (-20)-4 / 47.4 (0)32 / 18.6 (20)68 / 8.1 (40)104 / 3.Categories
- Manuals Home
- Kia Stinger Owners Manual
- Kia Stinger Service Manual
- New on site
- Most important about car
Contents
