Kia Stinger CK: Power Train / Spark Plug
Repair procedures
| Inspection |
| [On vehicle inspection] |
| 1. |
Accelerate the engine to about 3,000 rpm 3 times or more. |
| 2. |
Remove the spark plug. |
| 3. |
Check the spark plug visually. If the electrode is dry, the spark plug is normal. If the electrode is wet, check the damage and electrode gap as below. |
| [Component Inspection] |
| 1. |
Check the spark plug for any damage on its thread and insulator. If there is damage, replace the spark plug. |
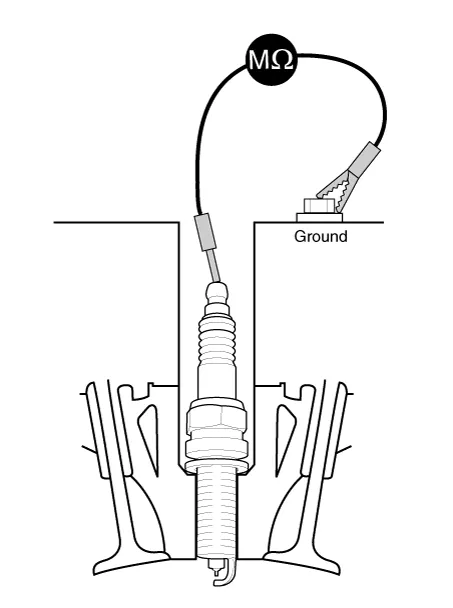
| 2. |
Check the electrode. Measure the insulation resistance with an ohmmeter. If the resistance is less than the specified value, adjust the electrode gap.
|
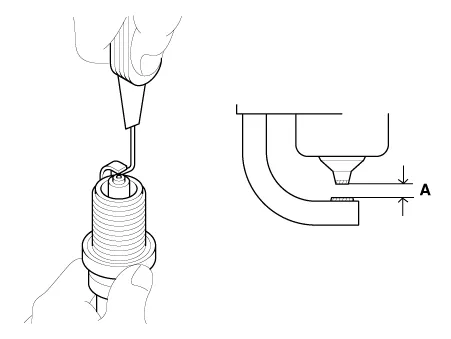
| 3. |
Check the spark plug electrode gap. If the gap is greater than the maximum, replace the spark plug.
|

| Removal |
| Theta-II 2.0 T-GDI |
| 1. |
Remove the ignition coil. (Refer to Ignition System - "Ignition Coil") |
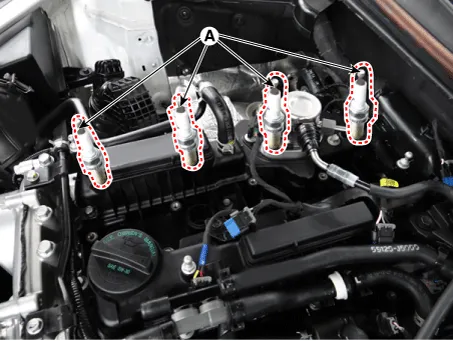
| 2. |
Using a spark plug wrench, remove the spark plug (A).
|
| Lambda-II 3.3 T-GDI |
| 1. |
Remove the ignition coil. (Refer to Engine Electrical System - "Ignition Coil") |
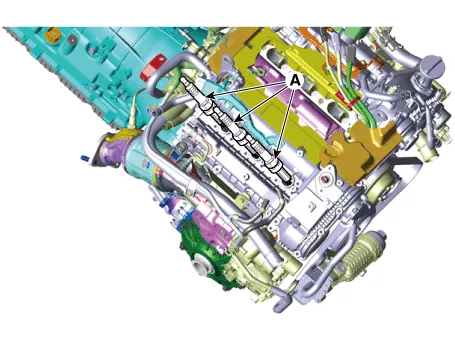
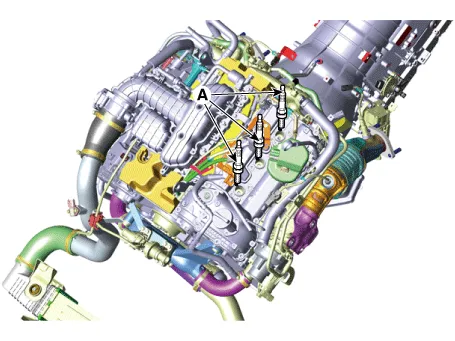
| 2. |
Using a spark plug wrench, remove the spark plug (A). [Bank 1]
[Bank 2]
|


Other information:
Kia Stinger (CK) 2018-2023 Service Manual: Intake Manifold
Components and components location Components 1. Intake manifold 2. VCM actuator 3. Clip 4. VCM shaft 5. Intake manifold gasket 6. Intake manifold bracket (LH) 7. Intake manifold bracket (RH) Repair procedures Removal and Installation 1. Disconnect the negative battery terminal.Kia Stinger (CK) 2018-2023 Service Manual: Blind-Spot Collision Warning (BCW)
Specifications Specifications Items Specification Rated voltage DC 12 V Operating voltage 9 - 16 V Operating speed 30 - 255 km/h Sensing distance 30 m (Sedan) Curvature radius Start : Equal to or greater than 125 m Stop : Less than 125 m Frequency 24 GHz Quantity 2 EA (Master 1EA, Slave 1EA) Components and components location Components 1.Categories
- Manuals Home
- Kia Stinger Owners Manual
- Kia Stinger Service Manual
- New on site
- Most important about car
