Kia Stinger CK: Floor Console / Floor Console Assembly
Components and components location
| Component Location |
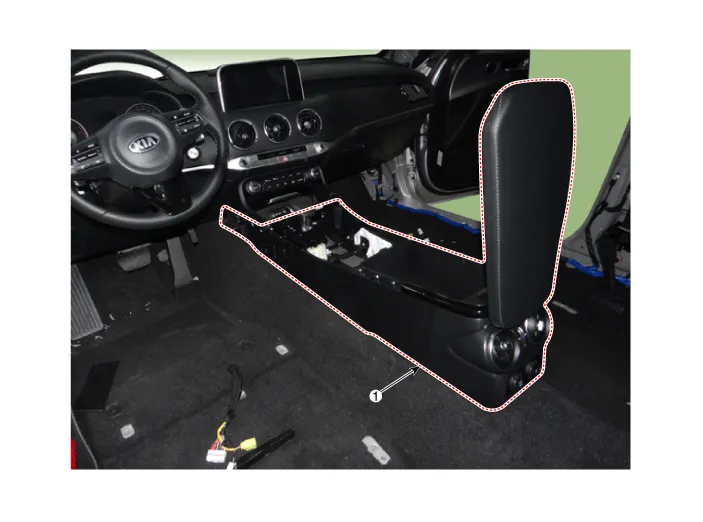
| 1. Floor console assembly |
Repair procedures
| Replacement |
Put on gloves to protect your hands. |

|

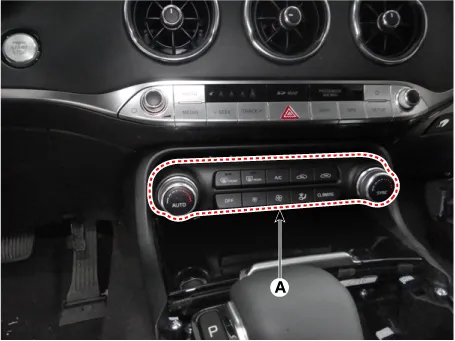
| 1. |
Separate the heater control unit (A).
|
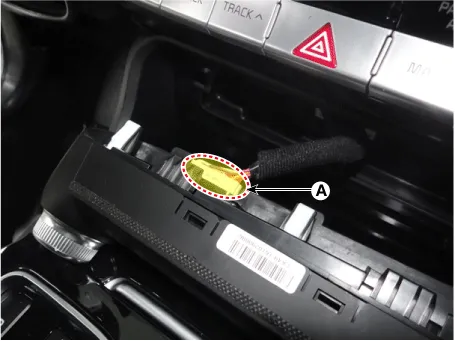
| 2. |
Remove the heater control unit after disconnecting the connector (A).
|
| 3. |
Remove the console upper cover (A) by using a remover.
|
| 4. |
Remove the console upper cover after disconnecting the console upper cover connectors (A).
|
| 5. |
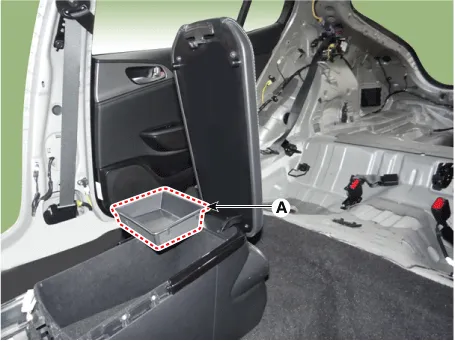
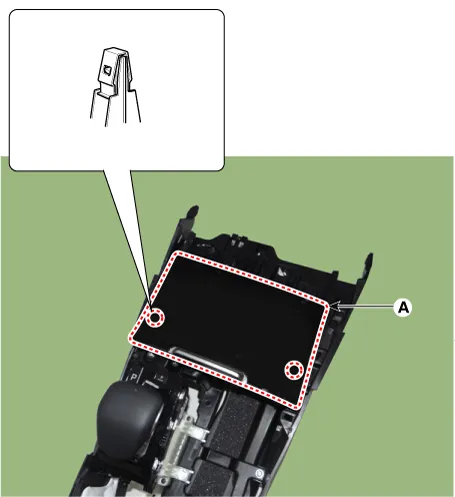
Remove the console storage box small tray (A).
|
| 6. |
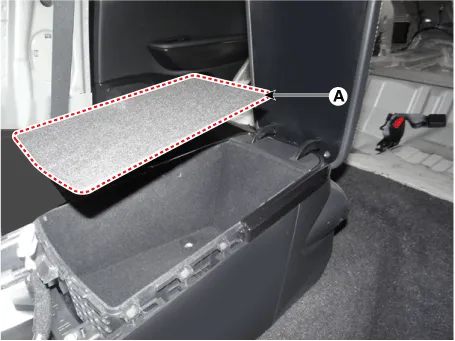
Remove the console storage box mat (A).
|
| 7. |
Remove the console side molding (A).
|
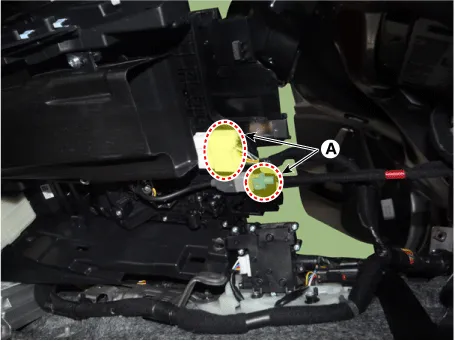
| 8. |
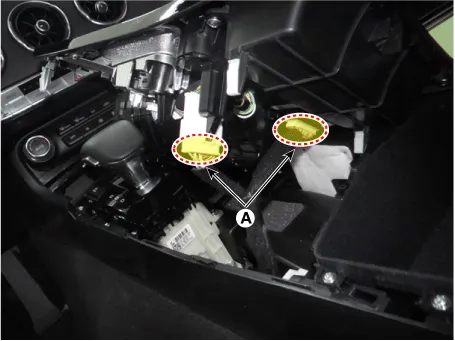
Disconnect the console upper side extension connectors (A).
|
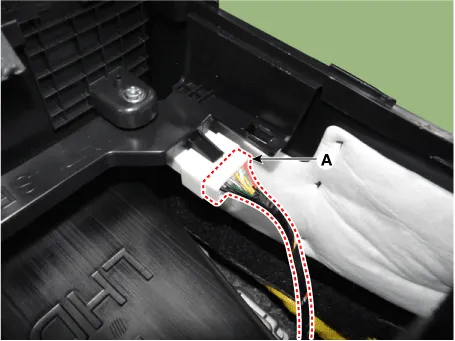
| 9. |
Disconnect the electronic shift lever connector (A).
|
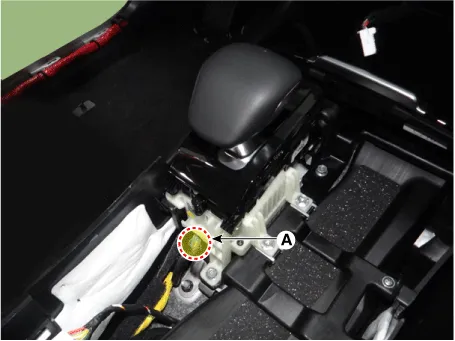
| 10. |
Disconnect the console lower side extension connectors (A).
|
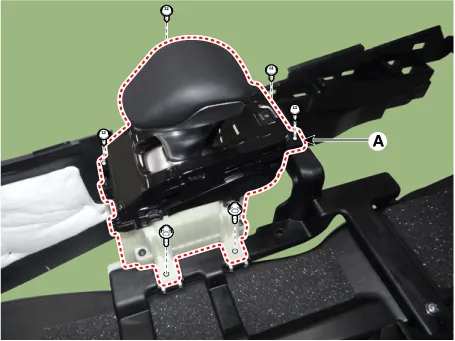
| 11. |
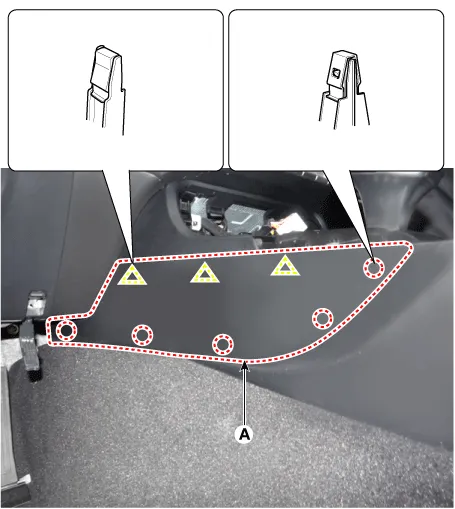
Remove the console front cover (A) after loosening the mounting screws.
|
| 12. |
Remove the console tray(A).
|
| 13. |
Remove the electronic shift lever (A) after loosening the mounting bolts & screws.
|
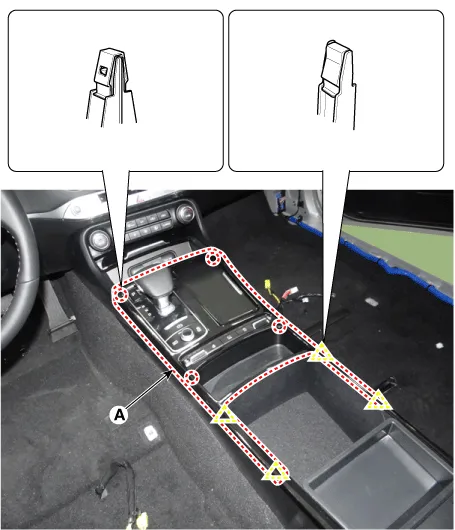
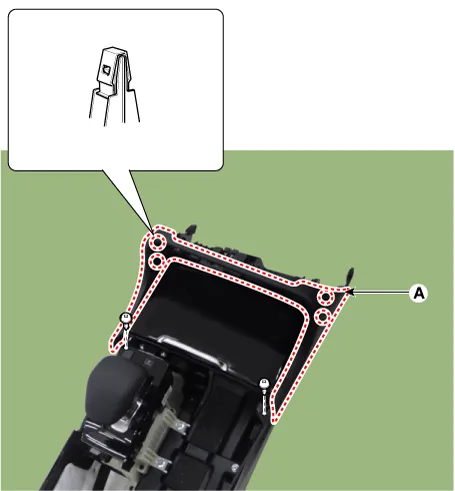
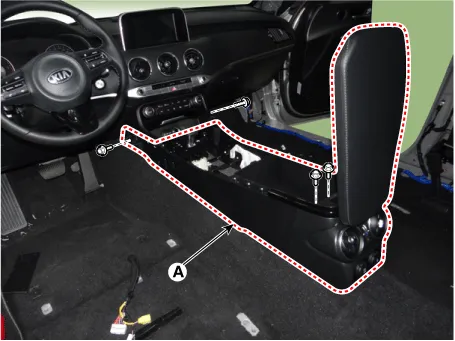
| 14. |
Remove the console assembly (A) after loosening the mounting bolts.
|
| 15. |
Install in the reverse order of removal.
|


Other information:
Kia Stinger (CK) 2018-2023 Service Manual: Inner panel fuse replacement
1. Turn the ignition switch and all other switches off. 2. Open the fuse panel cover. If the switch is located in the “OFF” position, a caution indicator will be displayed in the cluster. 3. Pull the suspected fuse straight out. Use the removal tool provided on the engine compartment fuse panel cover. 4. Check the removed fuse; replace it if it is blown.Kia Stinger (CK) 2018-2023 Service Manual: Engine And Transmission Assembly
Repair procedures Removal and Installation • Use fender covers to avoid damaging painted surfaces. • To avoid damage, unplug the wiring connectors carefully while holding the connector portion.Categories
- Manuals Home
- Kia Stinger Owners Manual
- Kia Stinger Service Manual
- New on site
- Most important about car
