Kia Stinger CK: Floor Console / Console Armrest
Kia Stinger (CK) 2018-2023 Service Manual / Body (Interior and Exterior) / Floor Console / Console Armrest
Components and components location
| Component Location |
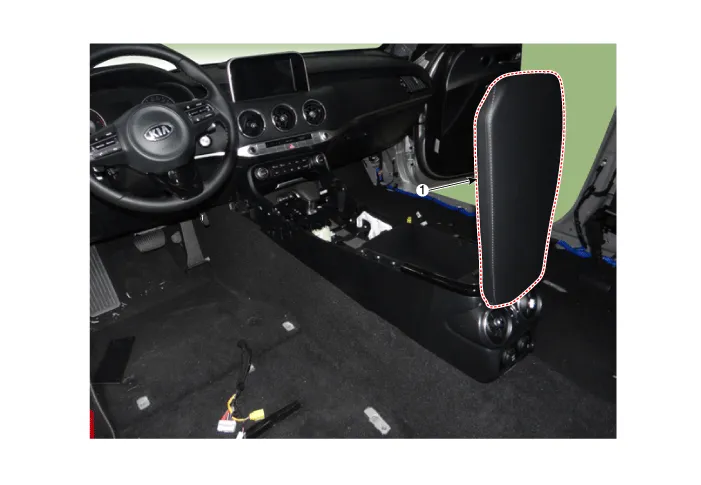
| 1. Front console armrest |
Repair procedures
| Replacement |
Put on gloves to protect your hands. |

|

| 1. |
Remove the console assembly. (Refer to Floor console - "Floor Console Assembly") |
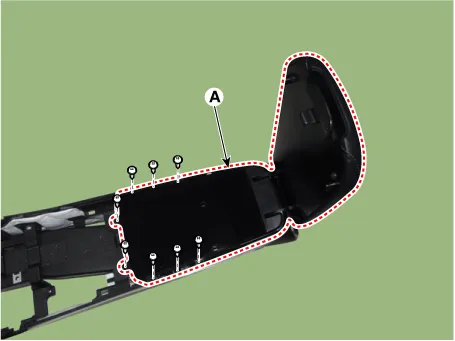
| 2. |
Remove the rear console bracket (A) after loosening the console lower side mounting screws.
|

| 3. |
Remove the console storage box & armrest(A) after loosening the mounting screws.
|
| 4. |
Remove the console armrest(A) after loosening the mounting screws.
|
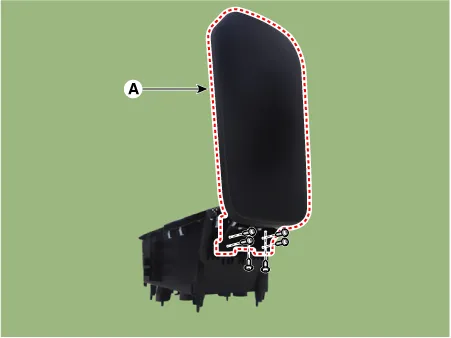
| 5. |
Install in the reverse order of removal.
|


Other information:
Repair procedures Removal 1. Release the residual pressure in fuel line. (Refer to the Fuel Delivery System - "Release Residual Pressure in Fuel Line") 2. Switch "OFF" the ignition and disconnect the negative (-) battery terminal. 3. Remove the rear seat cushion.Repair procedures Oil Specification 1. The HFC-134a system requires synthetic (PAG) compressor oil whereas the R-12 system requires mineral compressor oil. The two oils must never be mixed. 2. Compressor (PAG) oil varies according to compressor model. Be sure to use oil specified for the model of compressor.Categories
- Manuals Home
- Kia Stinger Owners Manual
- Kia Stinger Service Manual
- New on site
- Most important about car

Copyright © 2026 www.kstinger.com 0.0129