Kia Stinger CK: Floor Console / Rear Console Cover
Components and components location
| Component Location |
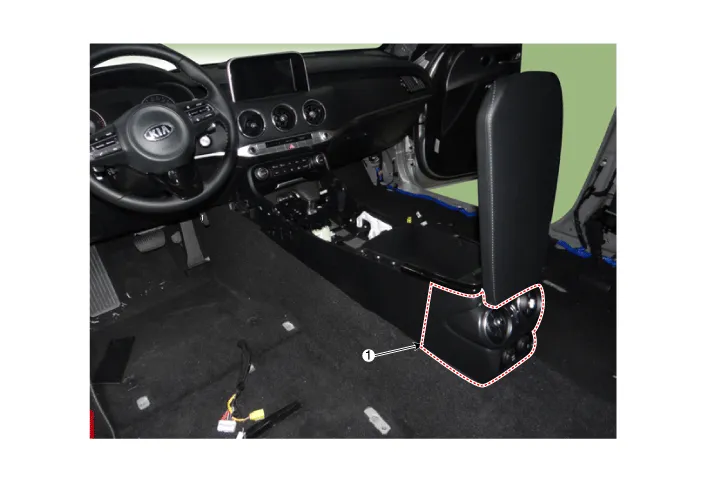
| 1. Rear console cover |
Repair procedures
| Replacement |
Put on gloves to protect your hands. |

|

| 1. |
Remove the console assembly. (Refer to Floor console - "Floor Console Assembly") |
| 2. |
Remove the rear console bracket (A) after loosening the console lower side mounting screws.
|

| 3. |
Remove the console storage box & armrest(A) after loosening the mounting screws.
|
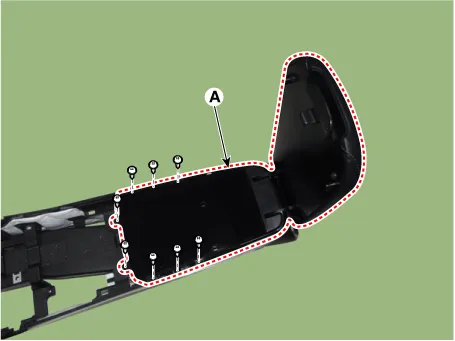
| 4. |
Disconnect the console lower side extension wiring mounting clip (A).
|
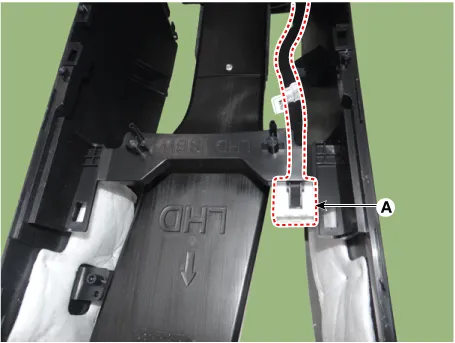
| 5. |
Remove the console rear cover (A) after loosening the mounting screws.
|
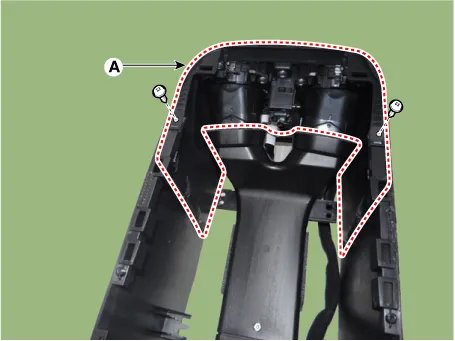
| 6. |
Install in the reverse order of removal.
|


Other information:
Kia Stinger (CK) 2018-2023 Service Manual: Front Wheel Speed Sensor
Repair procedures Removal [2WD] 1. Remove wheel nuts, wheel and tire (A) from front hub. Tightening torque: 107.9 - 127.5 N·m (11.0 - 13.0 kgf·m, 79.6 - 94.0 lb·ft) Be careful not to damage the hub bolts when removing the wheel and tire.Kia Stinger (CK) 2018-2023 Service Manual: Immobilizer system
Your vehicle is equipped with an electronic engine immobilizer system to reduce the risk of unauthorized vehicle use. Whenever the ENGINE START/STOP button is changed to the ON position, the immobilizer system checks and verifies if the key is valid or not. If the key is valid, the engine will start. If the key is invalid, the engine will not start.Categories
- Manuals Home
- Kia Stinger Owners Manual
- Kia Stinger Service Manual
- New on site
- Most important about car
