
Kia Stinger CK: Features of your vehicle / Hood
Opening the hood
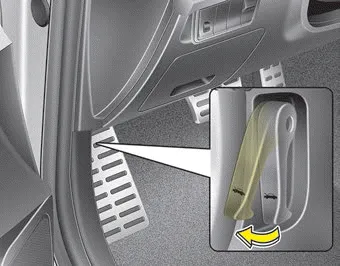
1. Pull the release lever to unlatch the hood. The hood should pop open slightly.
Only open the hood with the vehicle on a flat surface, engine is turned off, shift lever placed in P (Park) position and setting the parking brake.

2. Go to the front of the vehicle, raise the hood slightly, push the secondary latch (1) left side of the hood center and lift the hood (2).
3. Raise the hood. It will completely rise by itself after it has been raised about halfway.
Hood open warning
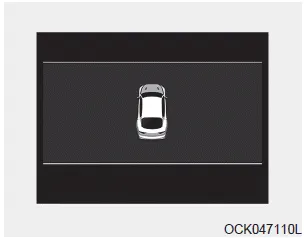
The warning message will appear on the LCD display when hood is open.
The warning chime will operate when the vehicle is being driven at or above 3 km/h (2 mph) with the hood open.
Closing the hood
1. Before closing the hood, check the following:
- All filler caps in engine compartment must be correctly installed.
- Gloves, rags or any other combustible material must be removed from the engine compartment.
2. Lower the hood halfway and push down to securely lock in place.
3. Check that the hood has engaged properly. If the hood can be raised slightly, it is not properly engaged.
Open it again and close it with a little more force.
CAUTION - Hood obstruction
Before closing the hood, ensure that all obstructions are removed from the hood opening. Closing the hood with an obstruction present in the hood opening may result in property damage.
WARNING - Fire risk
Do not leave gloves, rags or any other combustible material in the engine compartment. Doing so may cause a heat-induced fire.
WARNING - Unsecured engine hood
Always double check to be sure that the hood is firmly latched before driving away. If it is not latched, the hood could fly open while the vehicle is being driven, causing a total loss of visibility, which might result in an accident.


Other information:
Kia Stinger (CK) 2018-2023 Owner's Manual: Disc Brakes and Pads
Repair procedures Inspection Check the pads for excessive wear, discs for run out and wear, and calipers for fluid leakage. Front Brake Front brake disc thickness check 1. Check the brake pads for wear and fade. 2. Check the brake disc for damage and cracks. 3.Kia Stinger (CK) 2018-2023 Owner's Manual: Field Effect Transistor (DATC)
Repair procedures Inspection 1. Turn the ignition switch ON. 2. Manually operate the control switch and measure the voltage of the blower motor. 3. Operate the control switch to raise the voltage up to high speed. Specification Fan Speed Manual Control Auto Control 1 4.Categories
- Manuals Home
- Kia Stinger Owners Manual
- Kia Stinger Service Manual
- New on site
- Most important about car
