Kia Stinger CK: Rear Suspension System / Rear Stabilizer Bar
Repair procedures
| Removal |
| 1. |
Remove wheel nuts, wheel and tire (A) from hub.
|


| 2. |
Remove the brake caliper. (Refer to Brake system - "Rear disc brake") |
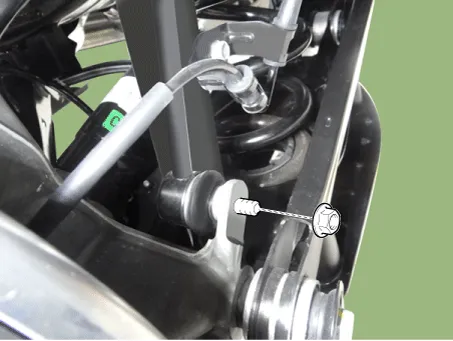
| 3. |
Loosen the stabilizer link nut and then separate the rear axle.
|
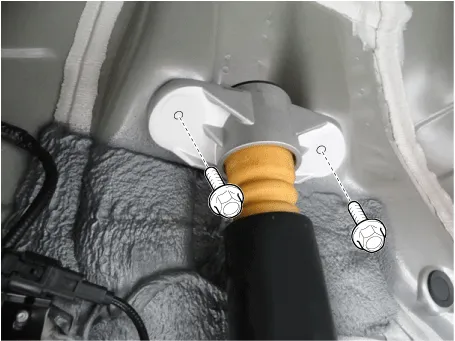
| 4. |
Loosen the rear shock absorber upper bolts and the remove the rear shock absorber.
|
| 5. |
Remove the propeller shaft. (Refer to Driveshaft and axle - "Propeller shaft") |
| 6. |
Remove the rear muffler. D 2.2 R VGT (Refer to Engine Mechanical System - "Muffler") G 2.0 T-GDI THETA II (Refer to Engine Mechanical System - "Muffler") G 3.3 T-GDI LAMBDA II (Refer to Engine Mechanical System - "Muffler") |
| 7. |
Loosen the rear cross member nuts & bolts and then remove the rear cross member.
|
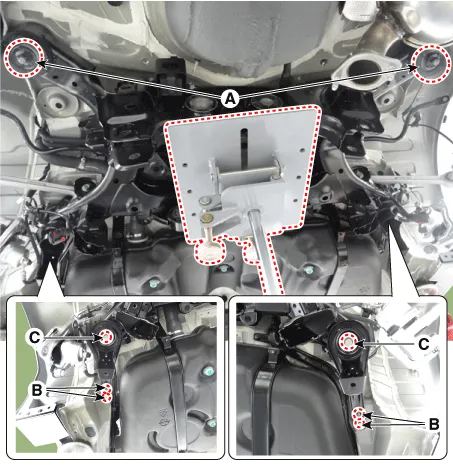
| 8. |
Loosen the stabilizer bar nuts & bolts and then remove the stabilizer bar.
|

| 9. |
Install in the reverse order of removal. |
| 10. |
Check the alignment. (Refer to Suspension System - "Alignment") |
| Inspection |
| 1. |
Check the rear stabilizer bar for deformation. |
| 2. |
Check the rear stabilizer link ball joint for damage. |


Other information:
Kia Stinger (CK) 2018-2023 Service Manual: Floor Console
Components and components location Components 1. Console complete 2. Floor console tray 3. Console upper complete 4. Lever boots 5. Console storage box matKia Stinger (CK) 2018-2023 Service Manual: Hood Latch Release Handle
Components and components location Component Location 1. Hood latch release handle Repair procedures Replacement 1. After loosening the mounting screw, remove the hood latch release handle (A). 2. Install in the reverse order of removal.Categories
- Manuals Home
- Kia Stinger Owners Manual
- Kia Stinger Service Manual
- New on site
- Most important about car
