Kia Stinger CK: Driving your vehicle / Forward Collision-avoidance Assist (FCA)
Contents:
- System setting and activation
- FCA warning message and system control
- Brake operation
- FCA front radar / camera sensor
- System malfunction
- Limitation of the system
The FCA system (if equipped) is designed to detect and monitor a vehicle ahead or detect a pedestrian in the roadway through radar signals and camera recognition to warn the driver that a collision is imminent, and if necessary, apply emergency braking.
WARNING - Forward Collision-Avoidance assist (FCA) Limitations
The FCA system is a supplemental system and is not a substitute for safe driving practices. It is the responsibility of the driver to always check the speed and distance to the vehicle ahead and to be prepared to apply the brakes.
WARNING
Take the following precautions when using the forward collision- avoidance assist (FCA) system:
- This system is only a supplemental system and it is not intended to, nor does it replace the need for extreme care and attention of the driver. The sensing range and objects detectable by the sensors are limited. Pay attention to the road conditions at all times.
- NEVER drive too fast in accordance with the road conditions or while cornering.
- Always drive cautiously to prevent unexpected and sudden situations from occurring. FCA does not stop the vehicle completely and does not avoid collisions.
System setting and activation ➤
FCA warning message and system control ➤
Brake operation
- In an urgent situation, the braking system enters into the ready status for prompt reaction against the driver’s depressing the brake pedal.
- The FCA provides additional braking power for optimum braking performance when the driver depresses the brake pedal.
- The braking control is automatically deactivated, when the driver sharply depresses the accelerator pedal, or when the driver abruptly operates the steering wheel.
- The braking control is automatically canceled when risk factors disappear.
The driver should always exercise caution when operating the vehicle, even though there is no warning message or warning alarm.
WARNING
The FCA is a supplemental system and cannot completely stop the vehicle in all situations or avoid all collisions. It is the responsibility of the driver to safely drive and control the vehicle.
WARNING
Never deliberately drive dangerously to activate the system as such conduct increases the risk of an accident.
✽ NOTICE
The FCA system assesses the risk of a collision by monitoring several variables such as the distance to the vehicle/pedestrian ahead, the speed of the vehicle/pedestrian ahead, and the driver's operation of the vehicle. Certain conditions such as inclement weather and road conditions may affect the operation of the FCA system.
FCA front radar / camera sensor ➤
System malfunction
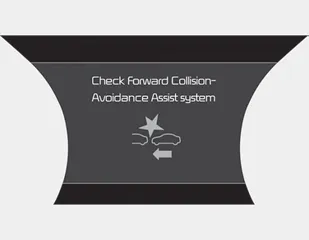
- When the FCA is not working properly, the FCA warning light (
 )
will illuminate and the warning message will appear for a few seconds. After
the message disappears, the master warning light (
)
will illuminate and the warning message will appear for a few seconds. After
the message disappears, the master warning light (
 )
will illuminate. In this case, have the vehicle inspected by an authorized Kia
dealer.
)
will illuminate. In this case, have the vehicle inspected by an authorized Kia
dealer. - The FCA warning message may appear along with the illumination of the ESC warning light.
WARNING
The FCA is only a supplemental system for the driver’s convenience. It is the driver's responsibility to control the vehicle. Do not solely depend on the FCA system. Rather, maintain a safe braking distance, and, if necessary, depress the brake pedal to lower the driving speed.
- Due to sensing limitation, the FCA may not produce warning messages or warning alarms in certain situations. Read the section "Limitation of the system" for more information.
- When there is a malfunction with the FCA, the automatic braking control does not operate even with other braking systems normally operating.
- The FCA only recognizes vehicles and pedestrians in front of it while driving forward. It does not identify any animals or vehicles in the opposite direction.
- The FCA can not recognize crosstraffic or parked vehicles presenting a sideprofile.
- The FCA system may not activate if the driver applies the brake pedal to avoid the risk of a collision.
- The FCA system does not operate when the vehicle is in reverse. In these cases, you must maintain a safe braking distance, and if necessary, depress the brake pedal to reduce the driving speed.
Limitation of the system ➤


Other information:
Kia Stinger (CK) 2018-2023 Owner's Manual: ECS(Electronic Control Suspension) System
Components and components location Components 1. ECS ECU 2. Front ECS Damper 3. Wheel speed sensor 4. Rear ECS Damper 5. Body G Sensor Description and operation Operation System Check the MCU and the state of each part when electric power is applied to ECU and prepare to operate.Battery saver function The purpose of this feature is to prevent the battery from being discharged if the lights are left in the ON position. The system automatically shuts off the parking lights 30 seconds after the ignition key is removed and the driver’s door is opened and closed. With this feature, the parking lights will turn off automatically if the driver parks on the side of the road at night and opens the driver’s side door.Categories
- Manuals Home
- Kia Stinger Owners Manual
- Kia Stinger Service Manual
- System setting and activation
- FCA warning message and system control
- Brake operation
- FCA front radar / camera sensor
- System malfunction
- Limitation of the system
- New on site
- Most important about car
Contents
