Kia Stinger: Brake System / Brake Line
Components and components location
| Components |
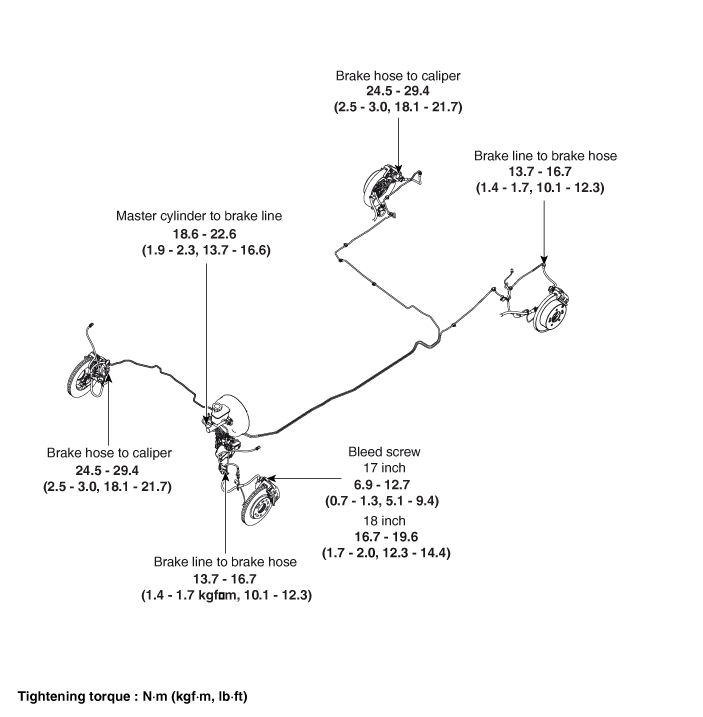
Repair procedures
| Removal |
| 1. |
Turn ignition switch OFF and disconnect the negative (-) battery cable. |
| 2. |
Remove the brake fluid from the master cylinder reservoir with a syringe.
|

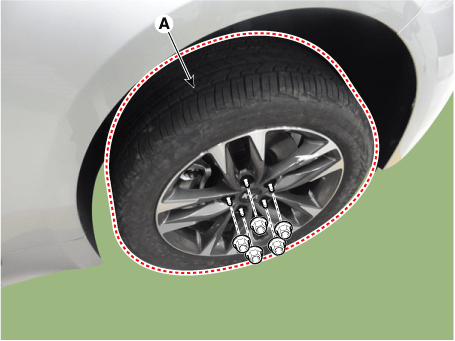
| 3. |
Remove wheel nuts, front/rear wheel and tire (A) from front/rear hub.
[Front] |
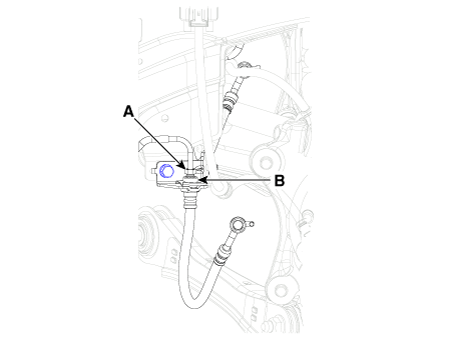
| 4. |
Loosen the flare nut (A) and then disconnect the tube. |
| 5. |
Disconnect the brake hose clip (B).
[Rear] |
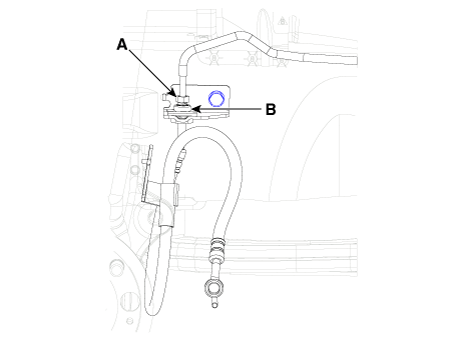
| 6. |
Loosen the flare nut (A) and then disconnect the tube. |
| 7. |
Disconnect the brake hose clip (B).
|
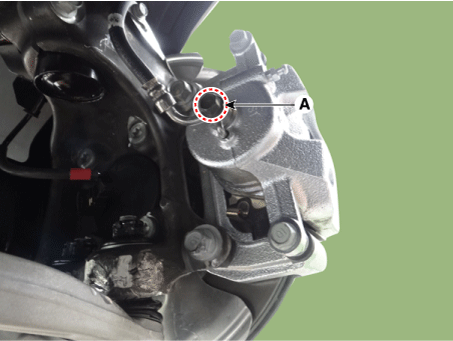
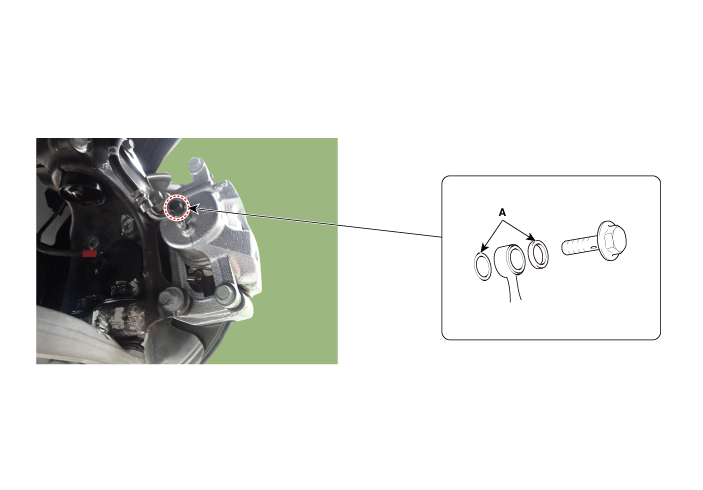
| 8. |
Loosen the front/rear brake cailiper hose bolt (A).
|
| Inspection |
| 1. |
Check the brake tubes for cracks, crimps and corrosion. |
| 2. |
Check the brake hoses for cracks, damage and fluid leakage. |
| 3. |
Check the brake tube flare nuts for damage and fluid leakage. |
| 4. |
Check brake hose mounting bracket for crack or deformation. |
| Installation |
| 1. |
Install in the reverse order of removal.
|
| 2. |
After installation, bleed the brake system. (Refer to Brake system - "Brake Bleeding Procedures") |
| 3. |
Check the spilled brake oil. |
 Master Cylinder
Components and components location
Components
1. Master cylinder
2. Brake booster
3. Brake reservoir
Repair procedures
Removal
[LHD]
...
 Brake Pedal
Components and components location
Components
1. Brake lamp switch
2. Brake pedal
Repair procedures
Removal
[LHD]
1.
Turn i ...
Other information:
Kia Stinger CK 2018-2025 Owners Manual: Launch Control
Launch Control Operation When using Launch Control, a driver should always make sure that the engine’s cooling water is warmed up and reaches a recommended temperature. To operate ESC Off state 2, Press and hold ESC button for more than 3 seconds in Sports mode. (Status Display on Clus ...
Kia Stinger CK 2018-2025 Service Manual: Engine Control System
Components and components location Components Location 1. ECM (Engine Control Module) 2. Manifold Absolute Pressure Sensor (MAPS) 3. Intake Air Temperature Sensor (IATS) 4. Boost Pressure Sensor (BPS) 5. Engine Coolant Temperature Sensor (ECTS) ...
