Kia Stinger CK: Front Suspension System / Front Strut Assembly
Components and components location
| Components |
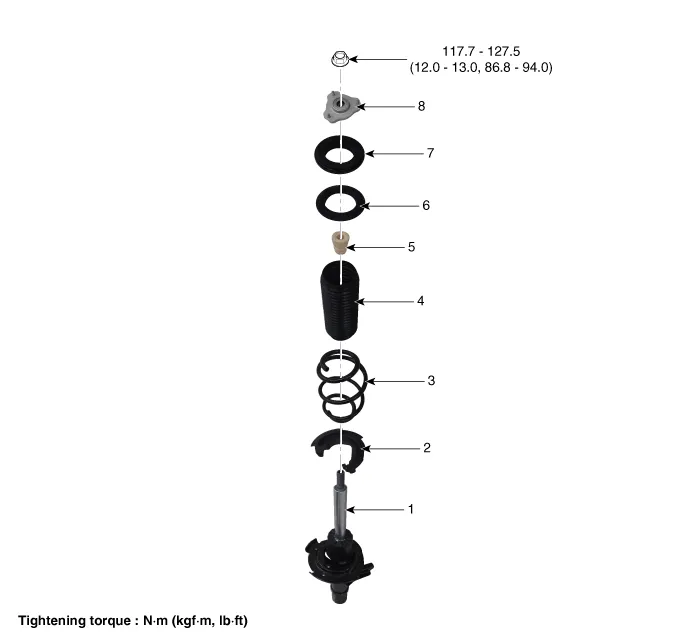
| 1. Shock absorber 2. Spring lower pad 3. Coil spring 4. Dust cover 5. Bumper stopper |
6. Spring upper cover 7. Strut bearing 8. Insulator assembly 9. Lock nut |
Repair procedures
| Removal |
[2WD]
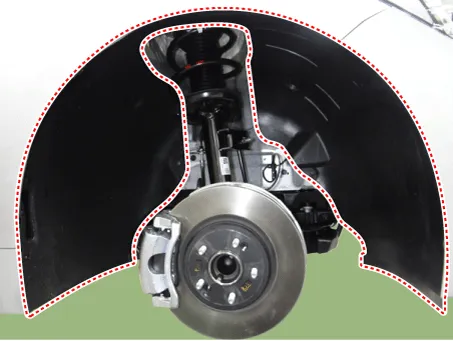
| 1. |
Remove wheel nuts, front wheel and tire (A) from hub.
|


| 2. |
Remove the front wheel guard.
|
| 3. |
Remove the front stabilizer bar. (Refer to Suspension System - "Front Stabilizer Bar") |
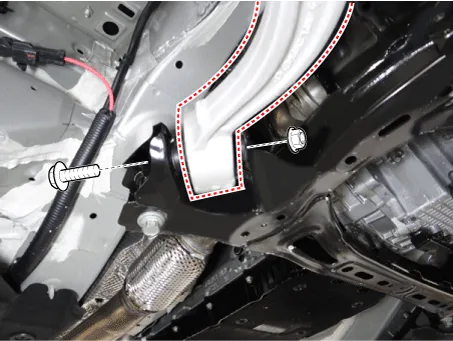
| 4. |
Remove the engine room side cover. D 2.2 R VGT (Refer to Engine Mechanical System - "Engine Room Under cover") G 2.0 T-GDI THETA II (Refer to Engine Mechanical System - "Engine Room Under cover") G 3.3 T-GDI LAMBDA II (Refer to Engine Mechanical System - "Engine Room Under cover") |
| 5. |
Loosen the lateral arm pin (A) and nut (B).
|
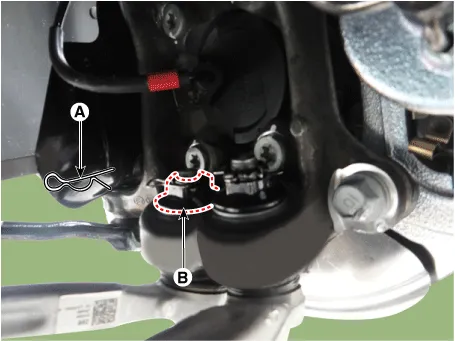
| 6. |
Loosen the compression arm pin (A) and nut (B).
|

| 7. |
Loosen the compression arm bolt & nut from the subframe.
|
| 8. |
Disonnec the wheel speed sensor connector.
|
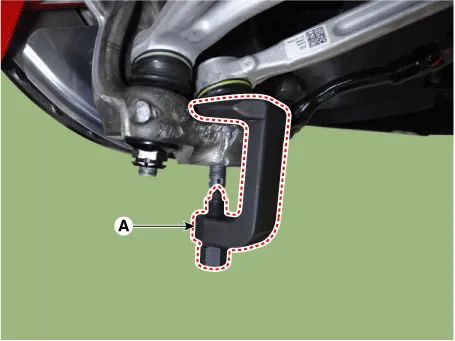
| 9. |
Remove the lateral arm by using the ball joint remover (A).
|
| 10. |
Remove the compression arm by using the ball joint remover (A).
|
| 11. |
Remove the brake caliper. (Refer to Brake System - "Front Disc Brake") |
| 12. |
Remove the tie rod end nut.
|
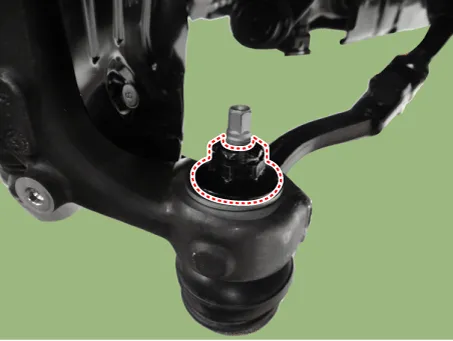
| 13. |
Remove the knuckle by using the ball joint remover (A).
|
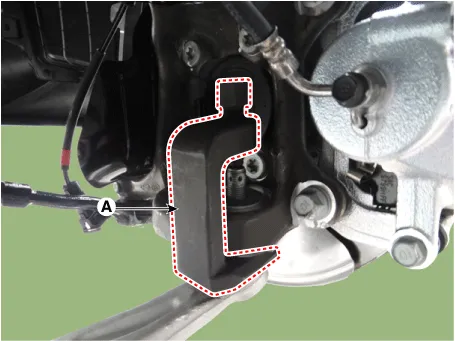
| 14. |
Loosen the wheel speed sensor bracket bolt and then remove the wheel speed sensor bracket.
|
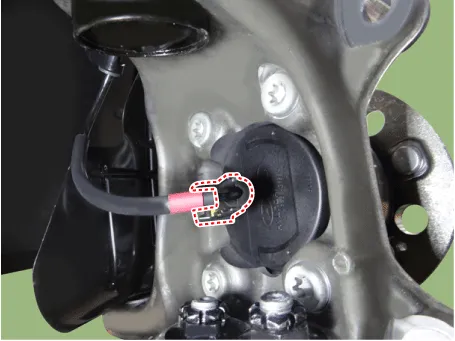
| 15. |
Loosen the brake caliper hose bracket bolt.
|
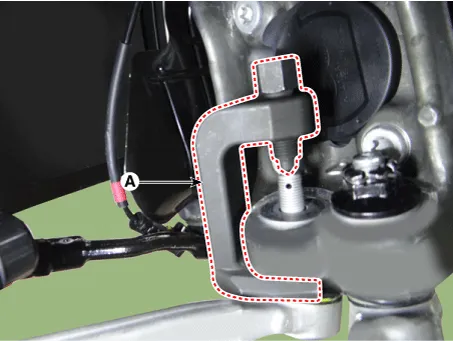
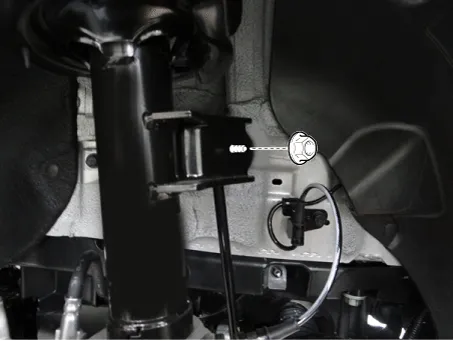
| 16. |
Loosen the knuckle upper bolt & nut.
|
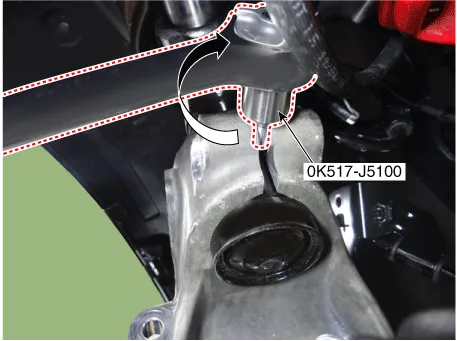
| 17. |
Remove the knuckle by using the SST (0K517-J5100).
|
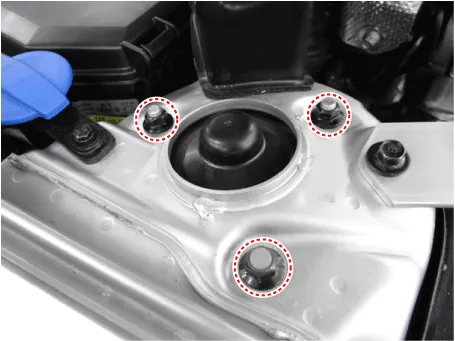
| 18. |
Loosen the shock absorber upper nuts and then remove the shock absorber.
|
| 19. |
Install in the reverse order of removal.
|
| 20. |
Check the front alignment. (Refer to Suspension System - "Alignment") |
| [AWD] |
| 1. |
Remove wheel nuts, front wheel and tire (A) from front hub.
|
| 2. |
Remove the brake caliper. (Refer to Brake System - "Front Disc Brake") |
| 3. |
Loosen the nut and then separate the stabilizer link from the front shock absorber.
|
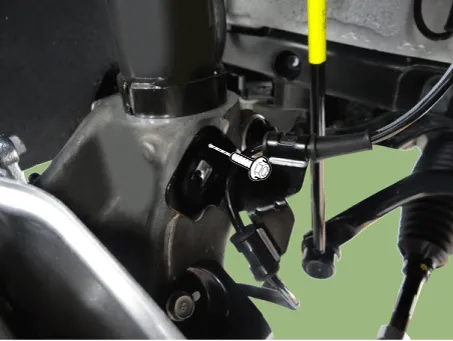
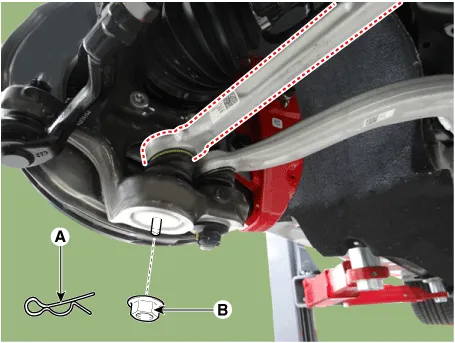
| 4. |
Loosen the lateral arm pin (A) and nut (B).
|
| 5. |
Remove the lateral arm by using the ball joint remover (A).
|
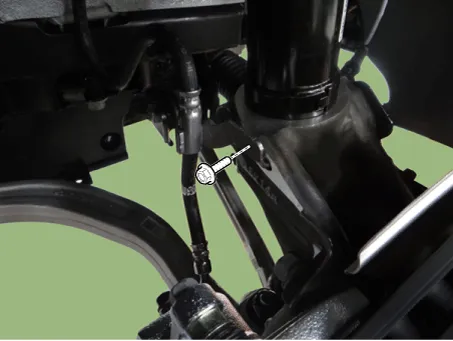
| 6. |
Loosen the compression arm pin (A) and nut (B).
|
| 7. |
Remove the compression arm by using the ball joint remover (A).
|

| 8. |
Remove the tie rod end nut.
|
| 9. |
Remove the knuckle by using the ball joint remover (A).
|
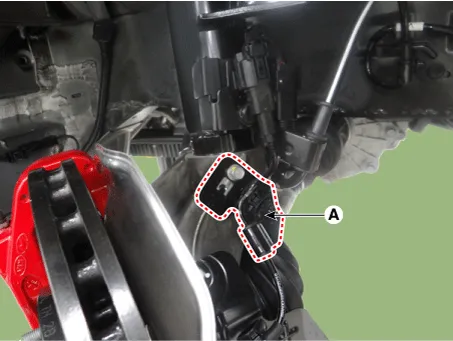
| 10. |
Remove the brake hose bracket (A).
|
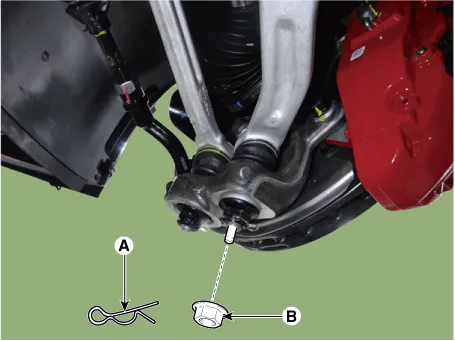
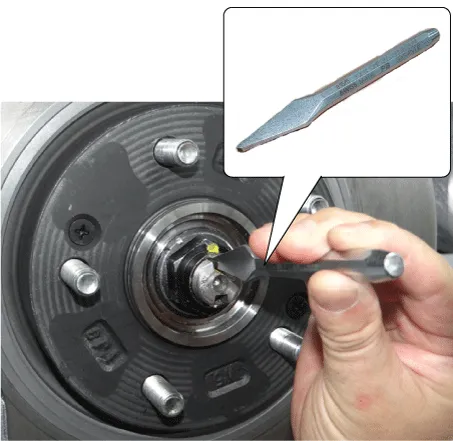
| 11. |
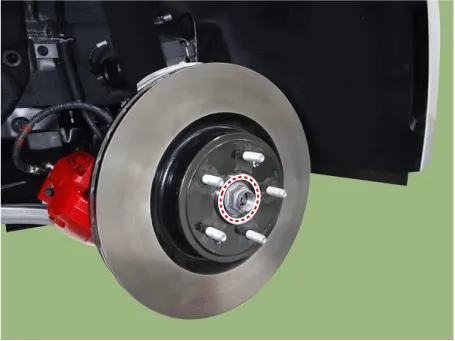
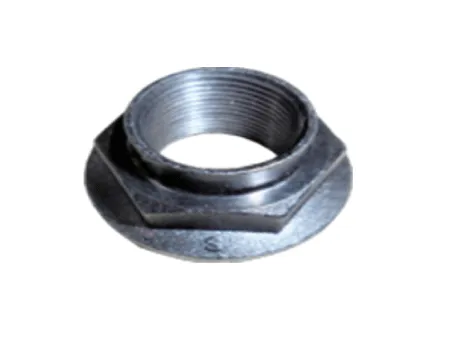
By hammering on a chisel, unlock the driveshaft lock hub nut caulking.
|
| 12. |
Loosen the caulking nut (A) and then separate the hub assembly from the drive shaft.
|
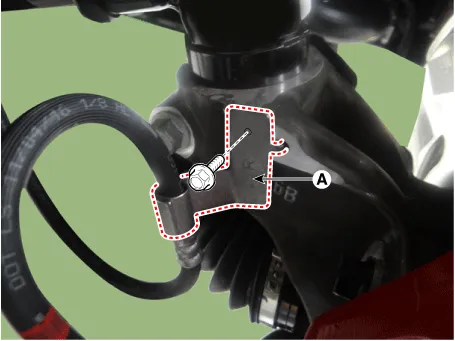
| 13. |
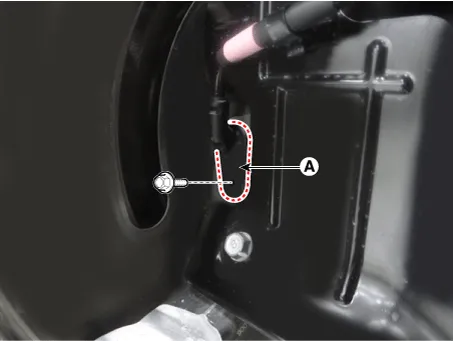
Loosen the wheel speed sensor bolt (A) and then disconnect the wheel speed sensor.
|
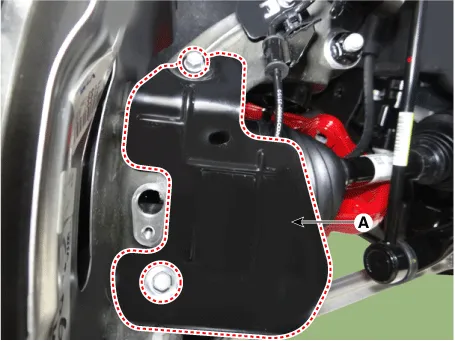
| 14. |
Remove the brake cooling cover (A).
|
| 15. |
Remove the wheel speed sensor bracket (A).
|
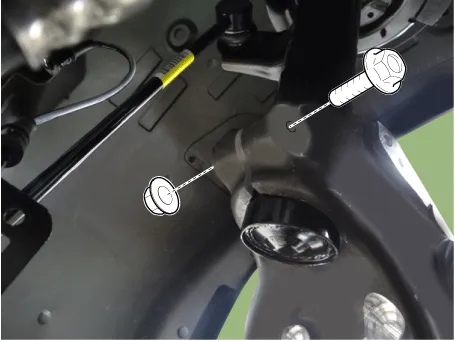
| 16. |
Loosen the knuckle upper bolt & nut.
|
| 17. |
Remove the knuckle by using the SST (0K517-J5100).
|
| 18. |
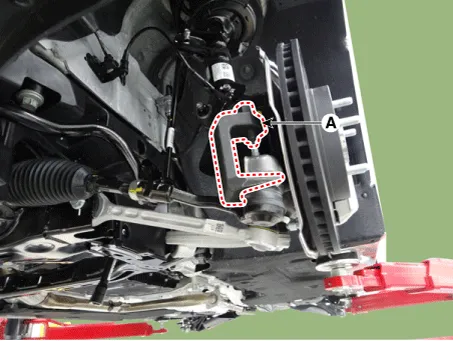
Loosen the shock absorber upper nuts and then remove the shock absorber.
|
| 19. |
Install in the reverse order of removal.
|
| 20. |
Check the front alignment. (Refer to Suspension System - "Alignment") |
| Disassembly |
| 1. |
Remove the front shock absorber cover. |
| 2. |
Compress the coil spring (A) with a strut spring compressor. Do not compress the spring excessively.
|

| 3. |
Using the SST(0K546-F6100), loosen the lock nut.
|

| 4. |
Gradually turn the bolt on the spring compressor to slowly release the tension from the spring. Then, disconnect the components. |
| 5. |
Install in the reverse order of removal. |
| Inspection |
| 1. |
Check the strut insulator for wear or damage. |
| 2. |
Check rubber parts for damage or deterioration. |
| 3. |
Compress and extend the piston rod and check that there is no abnormal resistance or unusual sound during operation. |


Other information:
Kia Stinger (CK) 2018-2023 Service Manual: P Position Solenoid Valve (ON/OFF)
Specifications Specifications Item Specification Control type ON/OFF Control pressure kpa (kgf/cm², psi) 539.36 (5.5, 78.23) Current (mA) 0 - 600 Coil resistance (Ω) 10.5 ± 0.5 Components and components location Components Location 1.Repair procedures Removal [2WD] 1. Remove wheel nuts, front wheel and tire (A) from hub. Tightening torque: 107.9 - 127.5 N·m (11.0 - 13.0 kgf·m, 79.6 - 94.0 lb·ft) Be careful not to damage the wheel bolts when removing the wheel and tire (A).Categories
- Manuals Home
- Kia Stinger Owners Manual
- Kia Stinger Service Manual
- New on site
- Most important about car
