
Kia Stinger CK: Power Train / Air Cleaner Filter
Repair procedures
| Inspection |
| 1. |
Remove the air cleaner element. |
| 2. |
Check that the air filter is excessively dirty. If the air filter is excessively dirty, replace the air cleaner element. |
| 3. |
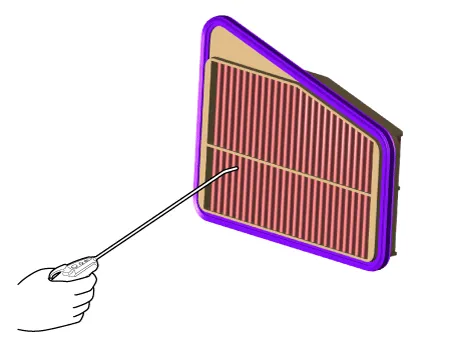
If the air cleaner element needs to be cleaned, blow compressed air as shown in the illustration to clean it.
|

| 4. |
Reinstall the air cleaner element. |
| Replacement |
[R 2.2]
| 1. |
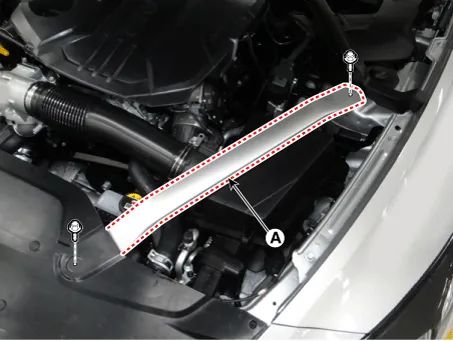
Remove the LH front strut bar (A).
|
| 2. |
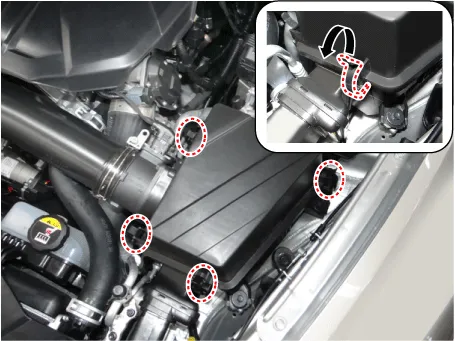
Open the air cleaner element cover (A) by unlocking the clamp.
|
| 3. |
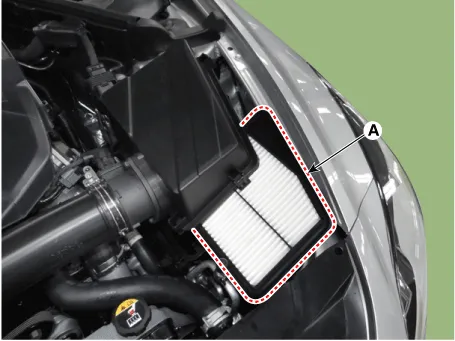
Replace the air cleaner element (A) with a new one.
|
[Theta-II 2.0 T-GDI]
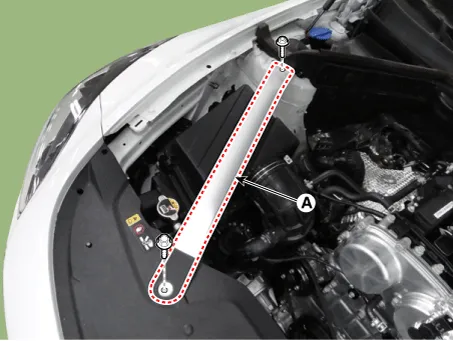
| 1. |
Remove the RH front strut bar (A).
|
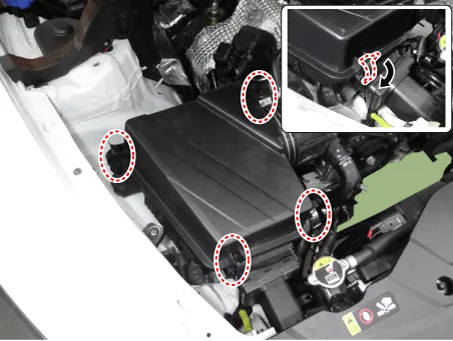
| 2. |
Open the air cleaner element cover by unlocking the clamp.
|
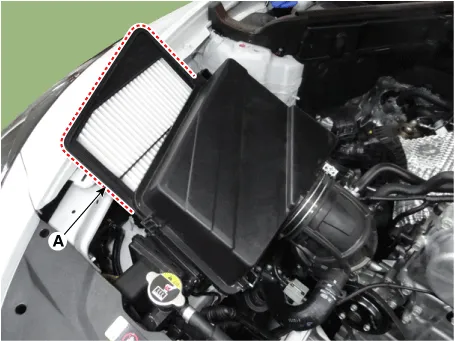
| 3. |
Replace the air cleaner element (A) with a new one.
|
| 4. |
Close the air cleaner cover by hooking the clamps. |
[Lambda-II 3.3 T-GDI]
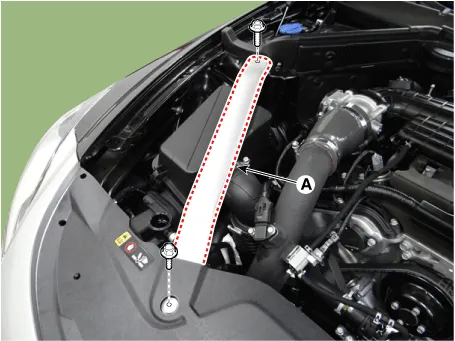
| 1. |
Remove the LH and RH front strut bar (A).
[LH]
[RH]
|

| 2. |
Open the air cleaner element cover (A) by unlocking the clamp. [LH]
[RH]
|


| 3. |
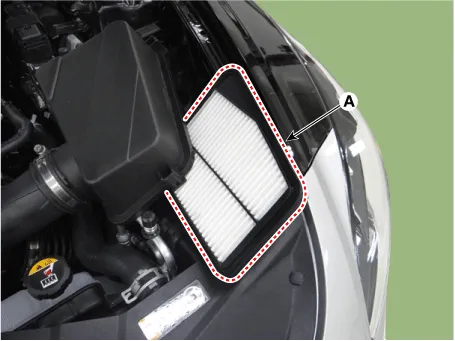
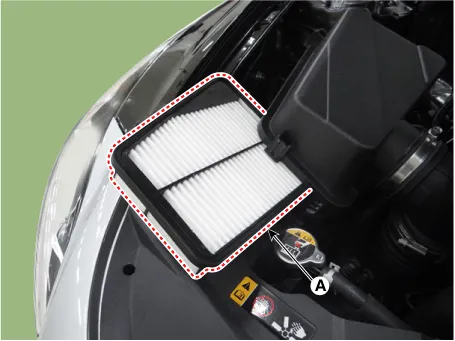
Replace the air cleaner element (A) with a new one. [LH]
[RH]
|
| 4. |
Close the air cleaner cover by hooking the clamps. |


Other information:
Kia Stinger (CK) 2018-2023 Service Manual: Active hood actuator assembly
Repair procedures Replacement 1. Disconnect the negative battery terminal. After disconnecting the cables, wait at least 30 seconds. 2. Remove the cowl top cover. (Refer to Body - "Cowl Top Cover") 3.Kia Stinger (CK) 2018-2023 Service Manual: Front Seat Back Cover
Components and components location Component Location 1. Front seat back cover Repair procedures Replacement Put on gloves to protect your hands. • Use a plastic panel removal tool to remove interior trim pieces without marring the surface.Categories
- Manuals Home
- Kia Stinger Owners Manual
- Kia Stinger Service Manual
- New on site
- Most important about car
