Kia Stinger CK: Body / Climate Control Air Filter
Repair procedures
| Filter inspection |
The climate control air filter should be replaced according to the maintenance schedule.
If the vehicle is operated in severely polluted city or on dusty rough roads for a long period, it should be inspected more frequently and replaced earlier than schedule.
When replacing the climate control air filter, replace in the following procedure and be careful not to damage other components.
| Cleaning |
| 1. |
Remove the climate control air filter. |
| 2. |
Check that the climate control air filter is not excessively dirty.
|

| 3. |
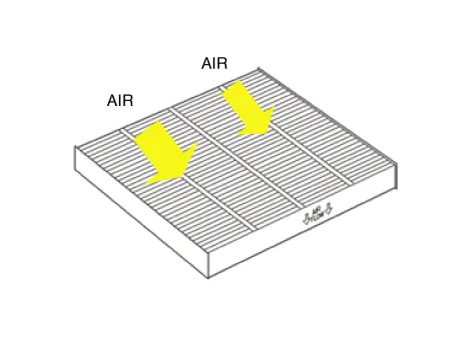
When cleaning the climate control air filter, blow compressed air as shown in the illustration to clean it.
|

| Replacement |
| 1. |
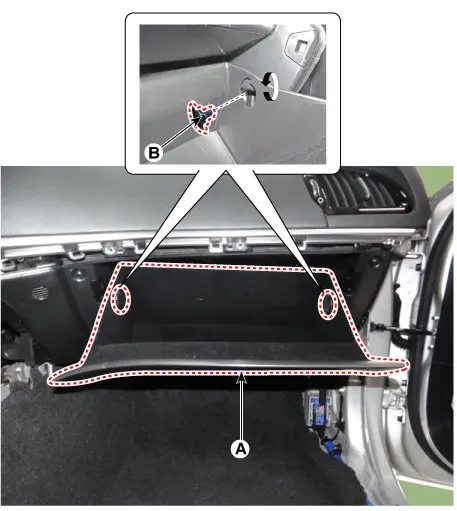
Disconnect the stopper (B) from the glove box (A).
|
| 2. |
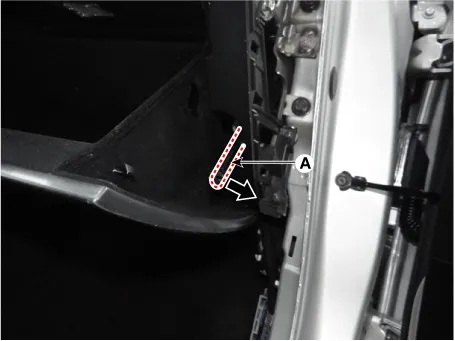
Disconnect the air damper (A) from the glove box (B).
|
| 3. |
Remove the filter cover (A) by pressing the knob.
|

| 4. |
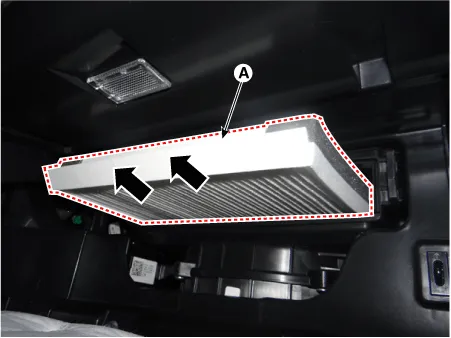
Replace the air filter (A) with a new one according to the direction of air filter.
|
| 5. |
Install in the reverse order of removal. |


Other information:
Kia Stinger (CK) 2018-2023 Service Manual: Front seat adjustment - power
The front seat can be adjusted by using the control switches located on the outside of the seat cushion. Before driving, adjust the seat to the proper position so you can easily control the steering wheel, pedals and switches on the instrument panel. WARNING - Unattended children Do not leave children unattended in the vehicle. Children might operate features of the vehicle that could injure them.Components and components location Components 1. Cowl cross member bar 2. Main wiring 3. Main crash pad 4. Side air vent duct [RH] 5. Crash pad under cover [RH] 6. Crash pad lower panel [RH] 7. Crash pad center lower cover 8. Glove box housing 9. Fuse A/S cover 10. Crash pad garnish [RH] 11.Categories
- Manuals Home
- Kia Stinger Owners Manual
- Kia Stinger Service Manual
- New on site
- Most important about car
