Kia Stinger CK: Air Conditioning System / Condenser
Components and components location
| Components |
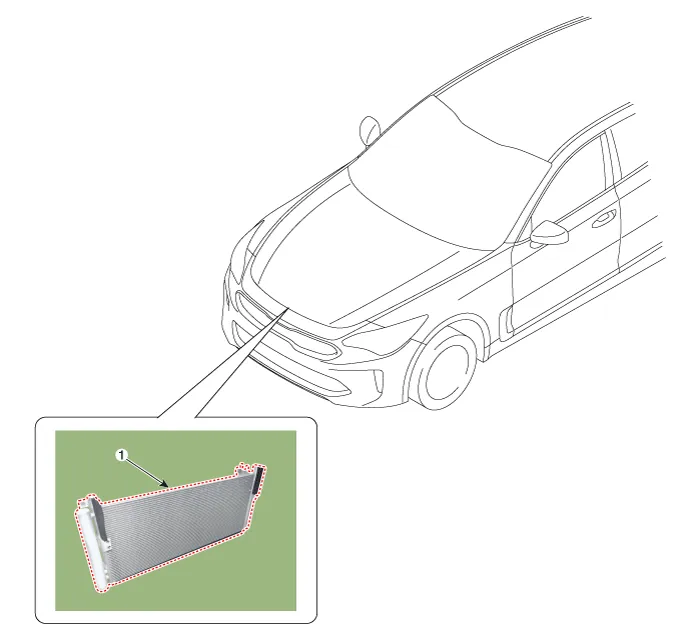
| 1. Condenser |
Repair procedures
| Inspection |
| 1. |
Check the condenser fins for clogging and damage. If clogged, clean with water, and blow dry with compressed air. If bent, gently smooth out using a screwdriver or pliers. |
| 2. |
Check the condenser connections for leakage, and repair or replace it, if required. |
| Replacement |
| 1. |
Recover the refrigerant with a recovery/recycling/charging station. |
| 2. |
Disconnect the negative (-) battery terminal. |
| 3. |
Remove the front bumper assembly. (Refer to Body - "Front Bumper Assembly") |
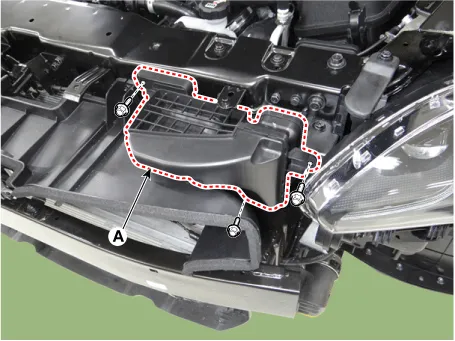
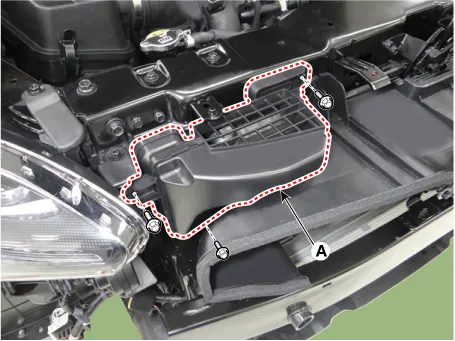
| 4. |
Detach the air duct (A).
[LH]
[RH]
|
| 5. |
Remove the air guard (A) after loosening the mounting bolt and nut.
|

| 6. |
Remove the [LH],[RH] headlamp. (Refer to Body Electrical System - "Headlamp") |
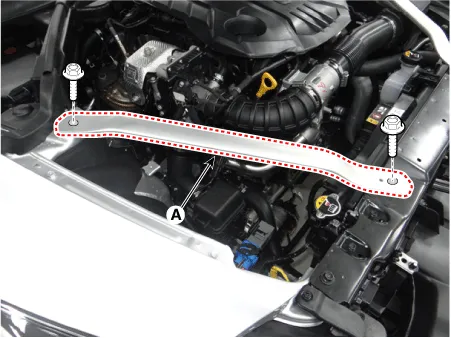
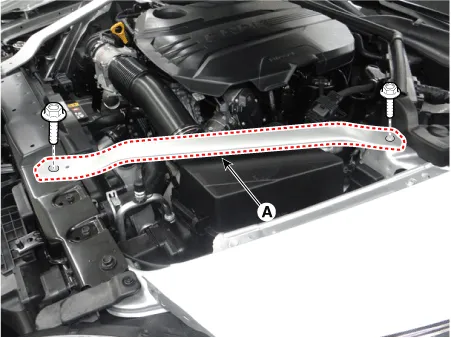
| 7. |
Remove the strut bar (A). [LH]
[RH]
|
| 8. |
Disconnect the hood latch connector (A).
|

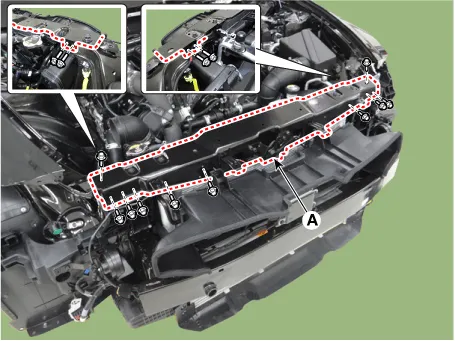
| 9. |
Remove the radiator support upper member (A).
|
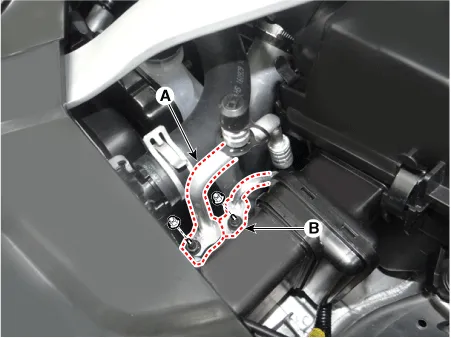
| 10. |
Remove the discharge line (A) and liquid line (B) from the condenser after loosening the nuts.
|
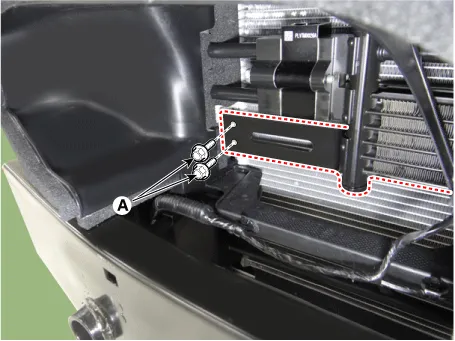
| 11. |
Remove the transmission oil cooler mounting bolts (A).
[LH]
[RH]
|

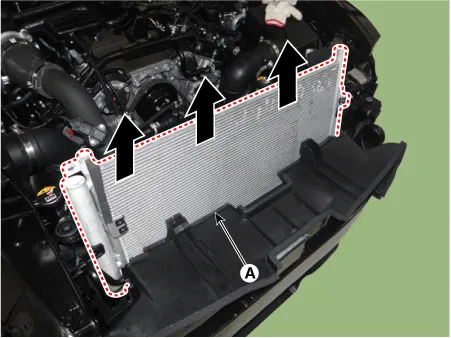
| 12. |
Remove the condensor (A) after loosening the mounting bolts.
|
| 13. |
Install in the reverse order of removal.
|


Other information:
Kia Stinger (CK) 2018-2023 Service Manual: AWD Control System
Components and components location Components Location 1. AWD ECU Description and operation Description The AWD ECU distributes the driving force to the front/rear wheel through controlling the multi plate clutch on the AWD transfer case by analyzing the input information, i.e. the wheel speed, accelerator and steering angle depending on the road condition and driving state.Kia Stinger (CK) 2018-2023 Service Manual: AVN Remote Controller
Components and components location Components 1. Left Remote Control Switch (Audio + Bluetooth + Voice) 2. Right Remote Control Switch (Trip Computer + ACC + SCC) Schematic diagrams Circuit Diagram [Audio + Bluetooth + Voice] [Trip + ACC] [Trip + ACC + SCC] Repair procedures Removal 1.Categories
- Manuals Home
- Kia Stinger Owners Manual
- Kia Stinger Service Manual
- New on site
- Most important about car
