Kia Stinger CK: Front Door / Front Door Trim
Components and components location
| Component Location |
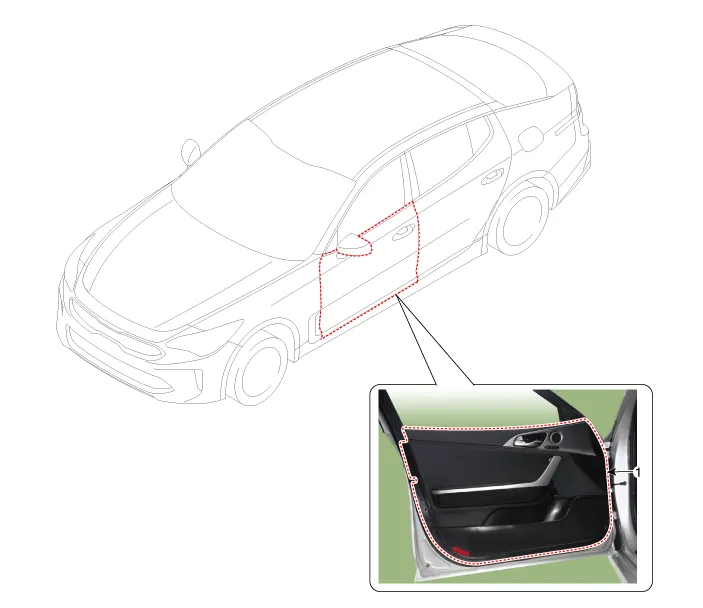
| 1. Front door trim |
Repair procedures
| Replacement |
Put on gloves to protect your hands. |

|

| 1. |
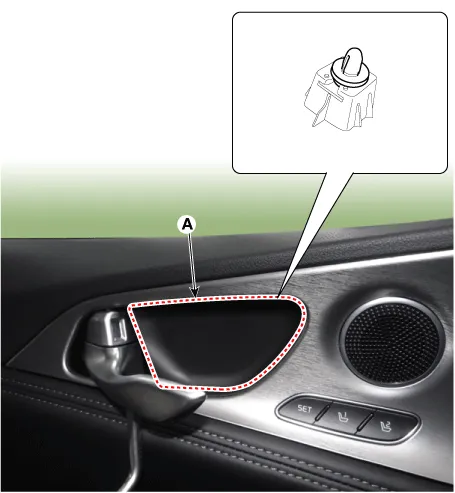
Remove the front door inside handle cap (A) by using a remover.
|
| 2. |
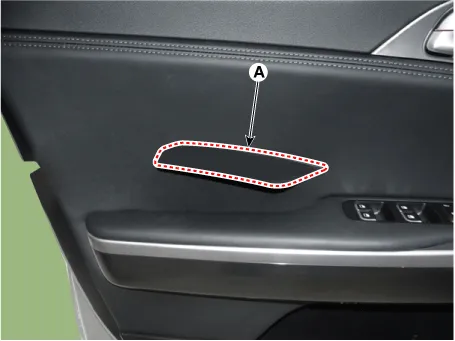
Remove the front door inside pull handle cap (A) by using a remover.
|
| 3. |
Seperate the front door inside pull handle mounting cap (A).
|

| 4. |
Remover the front door trim (A) after loosening the mounting screws.
|

| 5. |
Remove the front door inside handle cage (A).
|
| 6. |
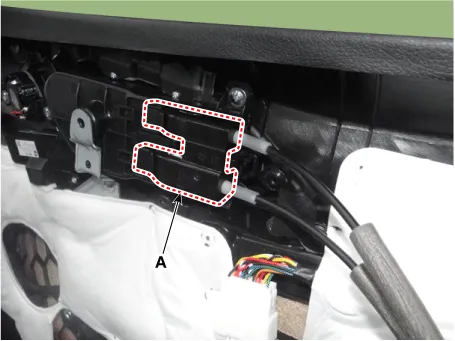
Disconnect the front door intergration connector (A).
|

| 7. |
Install in the reverse order of removal.
|


Other information:
Kia Stinger (CK) 2018-2023 Service Manual: Specifications
Service data Service Data Front Suspension Item Specification Suspension type Macpherson multi link Shock absorber Type HPD (High Performance Damper) ECS(Electronic Control Suspension) Rear Suspension Item Specification Suspension type Multi link Shock absorber Type HPD (High Performance Damper) ECS(Electronic Control Suspension) Wheel & Tire Item Specification Front Rear Aluminum 7.Kia Stinger (CK) 2018-2023 Service Manual: Engine Room Under Cover
Repair procedures Removal and Installation Engine Room Front Under Cover. 1. Remove the engine room front under cover (A). Tightening torque : 7.8 - 11.8 N·m (0.8 - 1.2 kgf·m, 5.8 - 8.7 lb·ft) 2. Install in the reverse order of removal. Engine Room Rear Under Cover.Categories
- Manuals Home
- Kia Stinger Owners Manual
- Kia Stinger Service Manual
- New on site
- Most important about car
