Kia Stinger CK: Around View Monitor (AVM) / Pantoscopic Camera
Components and components location
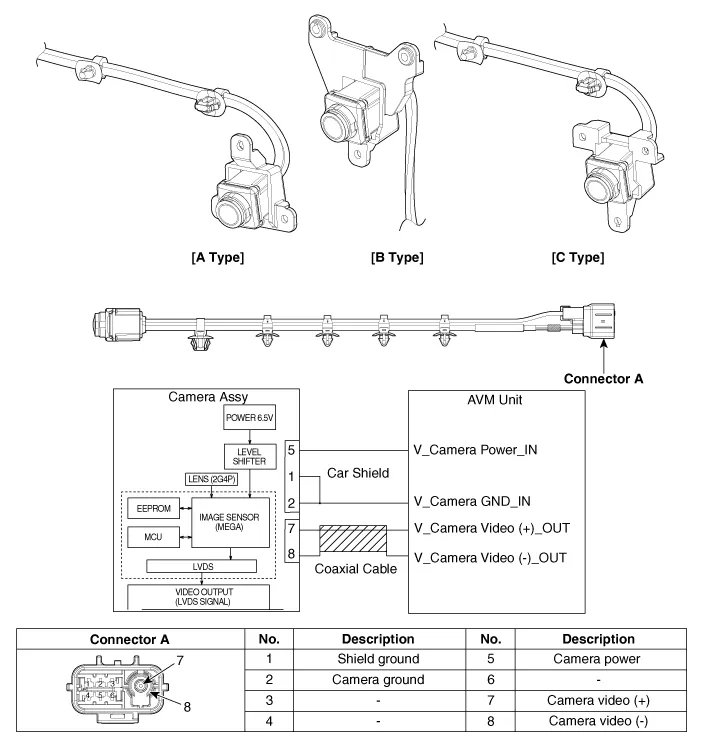
| Components |
| Front View Camera |
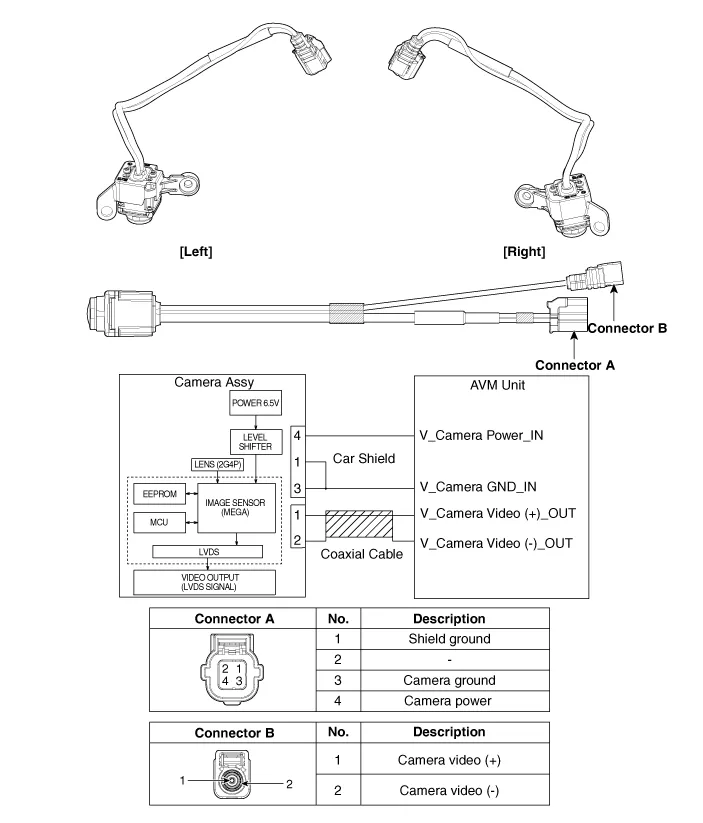
| Side View Camera |
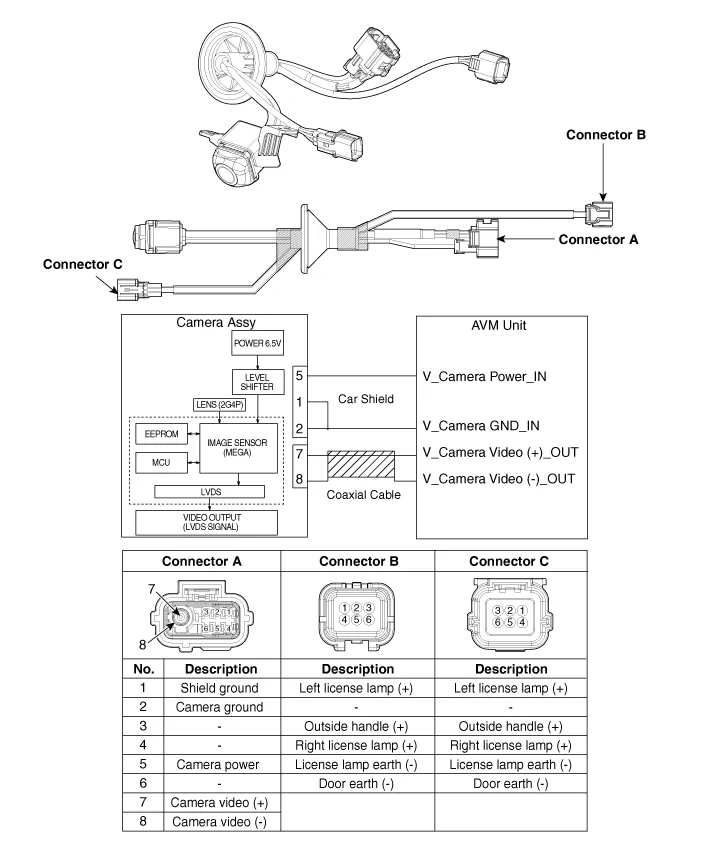
| Rear View Camera |
Repair procedures
| Removal |
In case of bad quality or poor focus, be sure to check the camera lense surface condition and foreign materials. |

Front View Camera
| 1. |
Disconnect the negative (-) battery terminal. |
| 2. |
Remove the front bumper assembly. (Refer to Body - "Front Bumper Assembly") |
| 3. |
Disconnect the front view camera connector (A).
|

| 4. |
Remove the front view camera (A) after loosening the mounting screws.
|
Side View Camera
| 1. |
Disconnect the negative (-) battery terminal. |
| 2. |
Remove the outside rear view mirror. (Refer to Body - "Outside Rear View Mirror") |
| 3. |
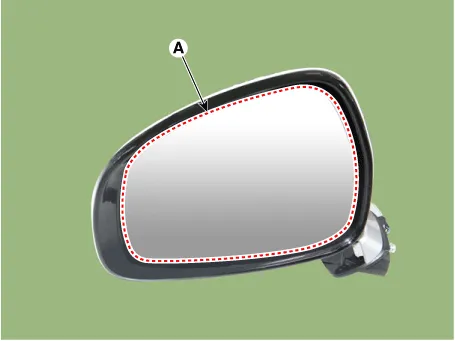
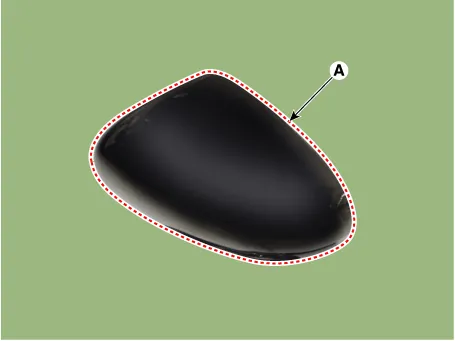
Remove mirror (A) to the direction as shown in the picture using (-) screw driver.
|


| 4. |
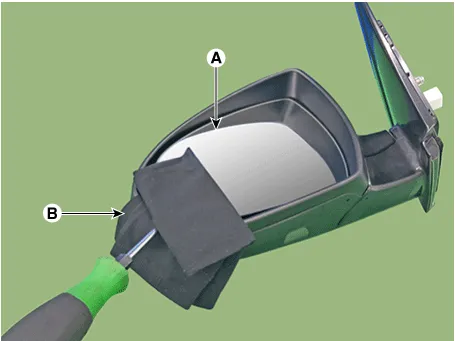
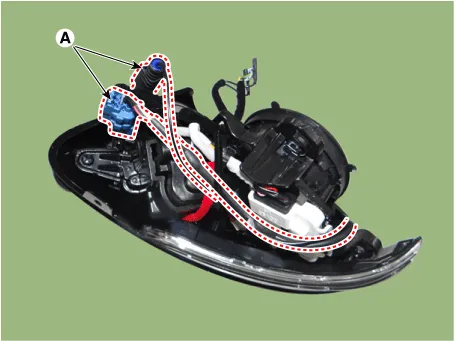
Disconnect the heater connectors (B) and BCW indicator connector (A) from the mirror.
|
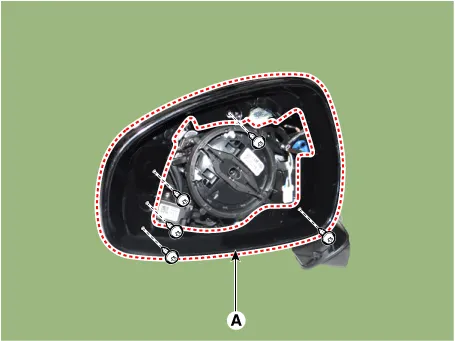
| 5. |
Remove the door mirror housing (A) after loosening the mounting screws.
|
| 6. |
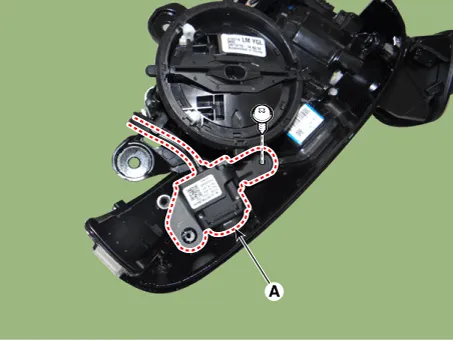
Remove the door mirror back cover (A).
|
| 7. |
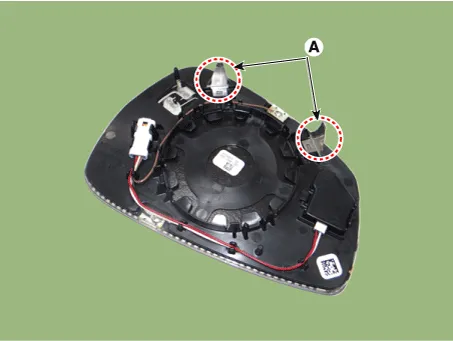
Disconnect the side view camera connectors (A).
|
| 8. |
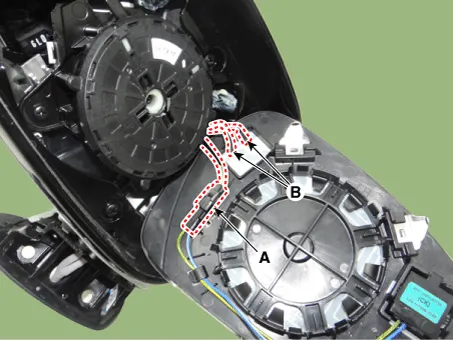
Remove the side view camera (A) after loosening the mounting screw.
|
Rear View Camera
| 1. |
Disconnect the negative (-) battery terminal. |
| 2. |
Remove the tailgate back panel. (Refer to Body - "Tailgate Back Panel") |
| 3. |
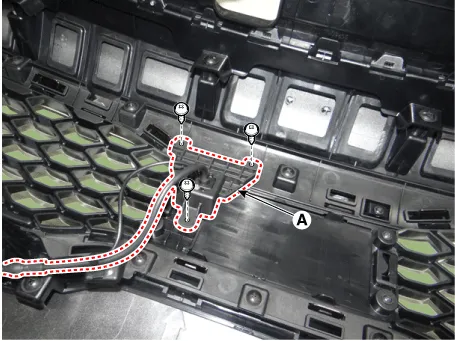
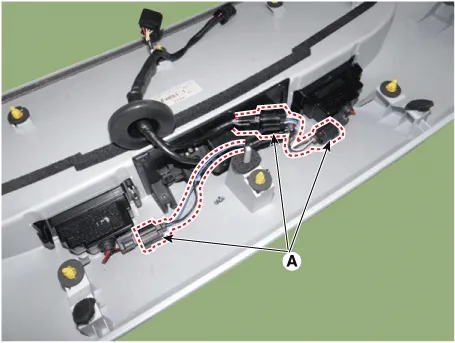
Disconnect the license lamp connectors (A).
|
| 4. |
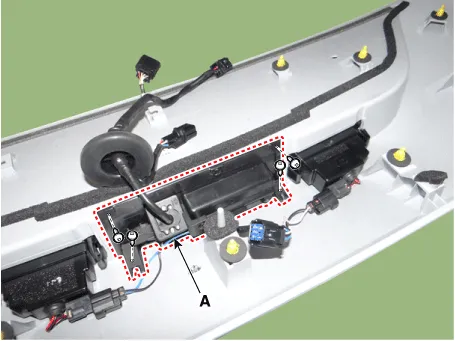
Remove the tailgate outside handle assembly (A) after loosening the mounting screws.
|
| 5. |
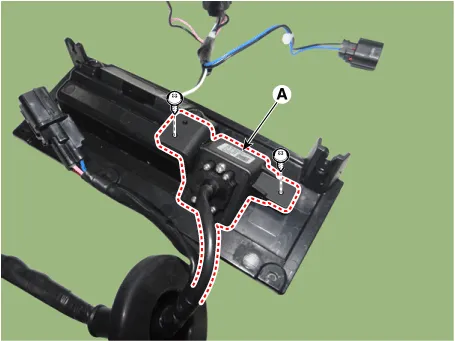
Remove the rear view camera (A) after loosening the mounting screws.
|
| Installation |
Front View Camera
| 1. |
Install the front view camera after connecting the connector. |
| 2. |
Install the front bumper assembly. |
| 3. |
Connect the negative (-) battery terminal. |
Side View Camera
| 1. |
Install the side view camera after connecting the connector. |
| 2. |
Install the door mirror back cover. |
| 3. |
Install the door mirror housing. |
| 4. |
Connect the heater connectors and BCW indicator connector. |
| 5. |
Install the mirror. |
| 6. |
Install the outside rear view mirror. |
| 7. |
Connect the negative (-) battery terminal. |
Rear View Camera
| 1. |
Install the rear view camera. |
| 2. |
Install the tailgate outside handle assembly. |
| 3. |
Connect the license lamp connectors. |
| 4. |
Install the tailgate back panel. |
| 5. |
Connect the negative (-) battery terminal. |
Be sure to perform the compensation calibration after replacing the camera. (Refer to Around View Monitor (AVM) - "Repair procedures") |


Other information:
Kia Stinger (CK) 2018-2023 Service Manual: Ignition Coil
Description and operation Description An ignition coil is an induction coil in an engine's ignition system which transforms the battery's low voltage to the high voltage needed to create an electric spark in the spark plugs to ignite the fuel. Coils have an internal resistor while others rely on a resistor wire or an external resistor to limit the current flowing into the coil from the battery 12 V supply.Kia Stinger (CK) 2018-2023 Service Manual: Knee Airbag (KAB) Module
Description and operation Description Installed inside the crash pad, the knee airbag (KAB) protects the driver in the event of a frontal crash. The SRSCM determines if and when to deploy the KAB. Never attempt to measure the circuit resistance of the airbag module (squib) even if you are using a specified tester.Categories
- Manuals Home
- Kia Stinger Owners Manual
- Kia Stinger Service Manual
- New on site
- Most important about car
