Kia Stinger CK: Around View Monitor (AVM) / Around View Monitor (AVM) Switch
Repair procedures
| Removal |
Put on gloves to protect your hands. |

|

| 1. |
Disconnect the negative (-) battery terminal. |
| 2. |
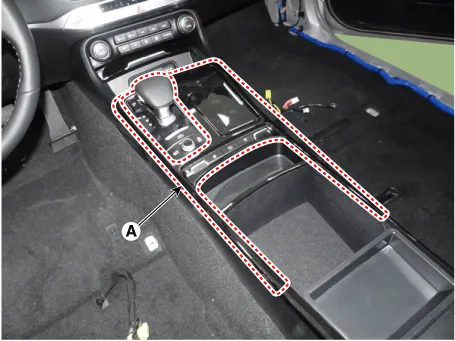
Remvoe the console upper complete (A) by using a remover.
|
| 3. |
Disconnect the connectors (A) from the console upper complete.
|

| 4. |
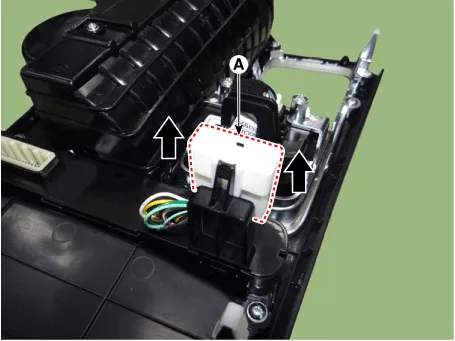
Remove the connector (A) from the console floor switch complete.
|
| 5. |
Remove the console floor switch complete (A) after loosening the mounting screws.
|

| Installation |
| 1. |
Install the console floor switch complete. |
| 2. |
Install the connector from the console floor switch complete. |
| 3. |
Connect the connectors from the console upper complete. |
| 4. |
Install the console upper complete. |
| 5. |
Connect the negative (-) battery terminal. |
|


Other information:
Kia Stinger (CK) 2018-2023 Service Manual: Rear Door
Components and components location Components 1. Rear door trim panel 2. Rear door module 3. Rear door panel 4. Rear door fixed glass & weatherstrip 5. Rear door drive channel 6. Rear door side weatherstrip 7. Rear door body side weatherstrip 8. Rear door inside handle cover 9. Rear door frame inner cover 10.Kia Stinger (CK) 2018-2023 Service Manual: Lane Keeping Assist (LKA) system
The Lane Keeping Assist (LKA) system is designed to detect the lane markers on the road with a front view camera at the front windshield, and assists the driver's steering to help keep the vehicle in the lanes. When the system detects the vehicle straying from its lane, it alerts the driver with a visual and audible warning, while applying a slight countersteering torque, trying to prevent the vehicle from moving out of its lane.Categories
- Manuals Home
- Kia Stinger Owners Manual
- Kia Stinger Service Manual
- New on site
- Most important about car
