
Kia Stinger CK: Parking Distance Warning (PDW) / Parking Distance Warning (PDW) Switch
Components and components location
| Components |
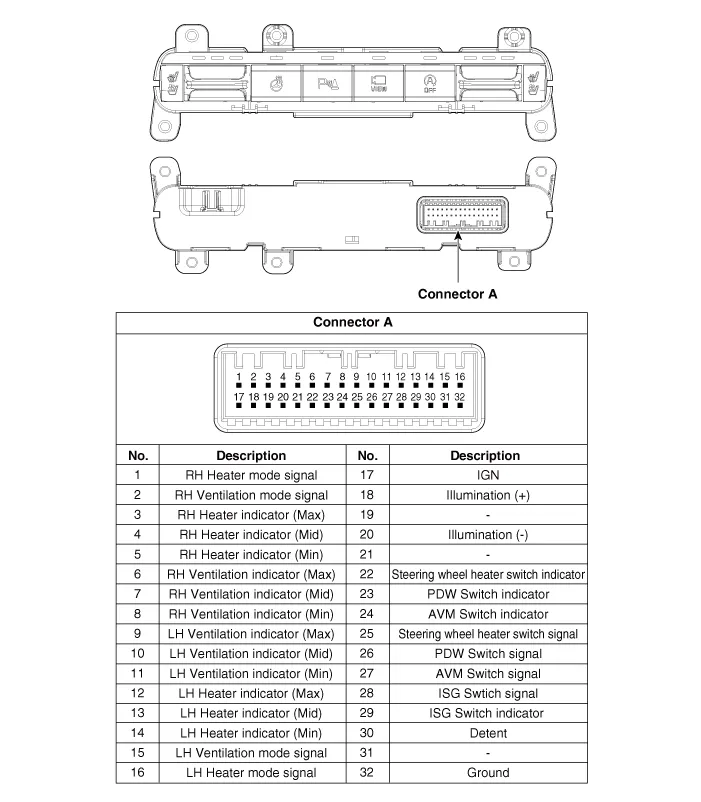
Schematic diagrams
| Circuit Diagram |

Repair procedures
| Removal |
Put on gloves to protect your hands. |

|

| 1. |
Disconnect the negative (-) battery terminal. |
| 2. |
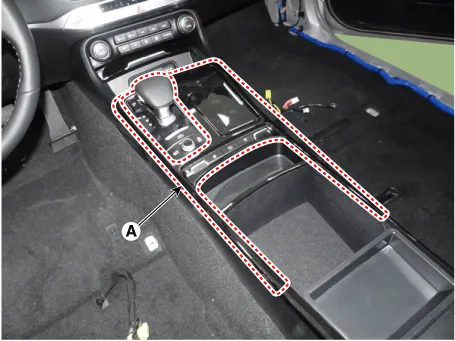
Remvoe the console upper complete (A) by using a remover.
|
| 3. |
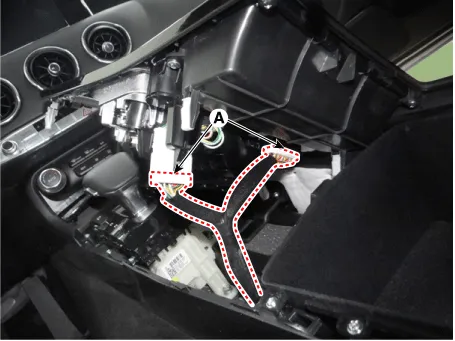
Disconnect the connectors (A) from the console upper complete.
|
| 4. |
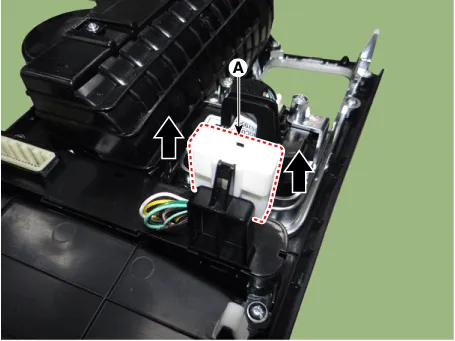
Remove the connector (A) from the console floor switch complete.
|
| 5. |
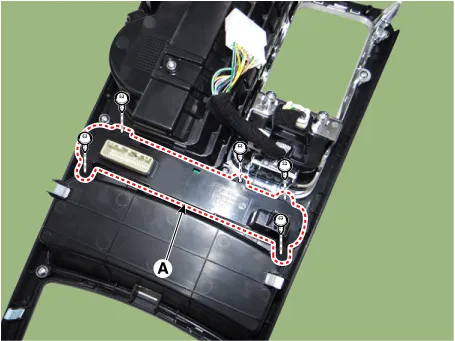
Remove the console floor switch complete (A) after loosening the mounting screws.
|
| Installation |
| 1. |
Install the console floor switch complete. |
| 2. |
Install the connector from the console floor switch complete. |
| 3. |
Connect the connectors from the console upper complete. |
| 4. |
Install the console upper complete. |
| 5. |
Connect the negative (-) battery terminal.
|


Other information:
Kia Stinger (CK) 2018-2023 Service Manual: Camshaft Position Sensor (CMPS)
Specifications Specifications Item Specification Air Cap (mm) 0.2 - 2.0 Description and operation Description Camshaft Position Sensor (CMPS) is a hall sensor, which detects the camshaft position by using a hall element. It is related with Crankshaft Position Sensor (CKPS) and detects the piston position of each cylinder which cannot be detected by the CKPS.Kia Stinger (CK) 2018-2023 Service Manual: Emergency liftgate safety release
Your vehicle is equipped with the emergency liftgate safety release lever located on the bottom of the liftgate. When someone is inadvertently locked in the luggage compartment, the liftgate can be opened by doing as follows: 1. Remove the cover. 2. Push the release lever to the right. 3. Push up the liftgate. WARNING For emergencies, be fully aware of the location of the emergency liftgate safety release lever in the vehicle and how to open the liftgate if you are accidentally locked in the luggage compartment.Categories
- Manuals Home
- Kia Stinger Owners Manual
- Kia Stinger Service Manual
- New on site
- Most important about car
