Kia Stinger CK: Lighting System / Rear Combination Lamp
Repair procedures
| Removal |
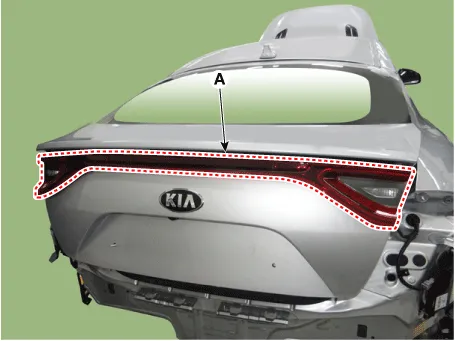
Rear Combination Lamp (Outside)
| 1. |
Disconnect the negative (-) battery terminal. |
| 2. |
Using a screwdriver or remover, remove the rear combination lamp cover (A).
|

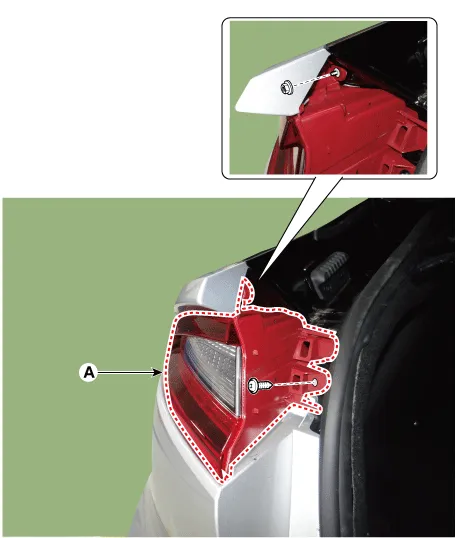
| 3. |
Remove the rear combination lamp (A) after loosening the mounting screw and nut.
|
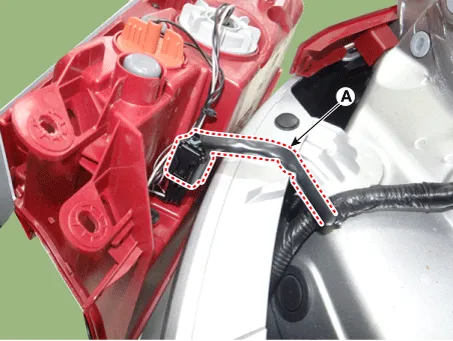
| 4. |
Disconnect the rear combination lamp connector (A).
|
| Bulb Replacement |
Turn signal lamp
| 1. |
Turn the headlamp switch off. |
| 2. |
Remove the rear combination lamp (outside). |
| 3. |
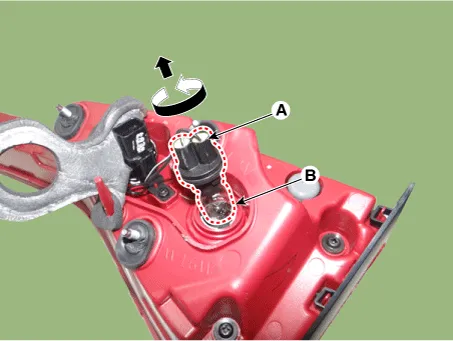
Remove the turn signal lamp bulb (B) by turning the socket (A) counterclockwise.
|

Rear Combination Lamp (Inside)
| 1. |
Disconnect the negative (-) battery terminal. |
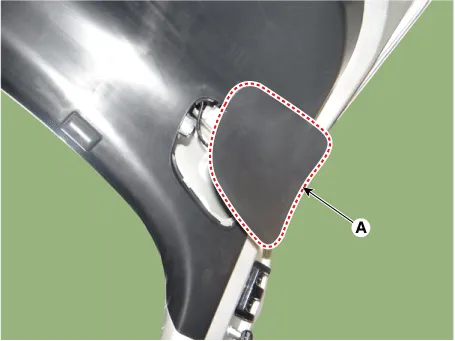
| 2. |
Using a screwdriver or remover, remove the rear combination lamp cover (A).
|
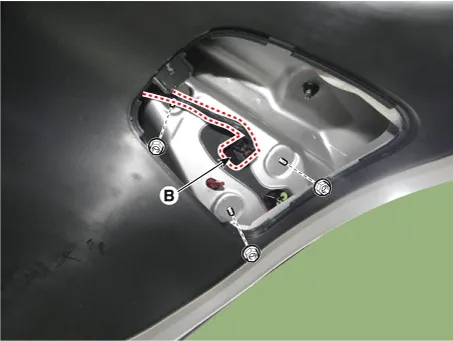
| 3. |
Disconnect the connector (B) and then remove the rear combination lamp (A) after loosening the nuts.
|
| Bulb Replacement |
Back up lamp
| 1. |
Remove the rear combination lamp. (Inside) |
| 2. |
Remove the back up lamp bulb (B) by turning the socket (A) counterclockwise.
|
| Installation |
Rear Combination Lamp (Outside)
| 1. |
Connect the rear combination lamp connector. |
| 2. |
Install the rear combination lamp. |
| 3. |
Install the rear combination lamp cover. |
| 4. |
Connect the negative (-) battery terminal. |
Rear Combination Lamp (Inside)
| 1. |
Install the rear combination lamp. |
| 2. |
Connect the rear combination lamp connector. |
| 3. |
Install the rear combination lamp cover. |
| 4. |
Connect the negative (-) battery terminal. |


Other information:
Kia Stinger (CK) 2018-2023 Service Manual: Children Always in the Rear
WARNING - Restraint Location Never install a child or infant seat on the front passenger's seat. A child riding in the front passenger seat can be forcefully struck by an inflating airbag and seriously injured. WARNING - Hot Child Restraint A child restraint system can become very hot if it is left in a closed vehicle on a sunny day. Be sure to check the seat cover, buckles and latches before placing a child in the restraint system.Kia Stinger (CK) 2018-2023 Service Manual: Smart cruise control with stop & go system
➀ Cruise indicator ➁ Set speed ➂ Vehicle-to-vehicle distance The smart cruise control system allows you to program the vehicle to maintain a constant speed and a predetermined distance to the vehicle ahead without depressing the accelerator or brake pedal. WARNING - Smart cruise control system Inadvertent Activation If the smart cruise control system is left on (CRUISE indicator in the instrument cluster illuminated), it can be activated inadvertently.Categories
- Manuals Home
- Kia Stinger Owners Manual
- Kia Stinger Service Manual
- New on site
- Most important about car
