Kia Stinger CK: Rear Door / Rear Door Trim
Components and components location
| Component Location |

| 1. Rear door trim |
Repair procedures
| Replacement |
Put on gloves to protect your hands. |

|

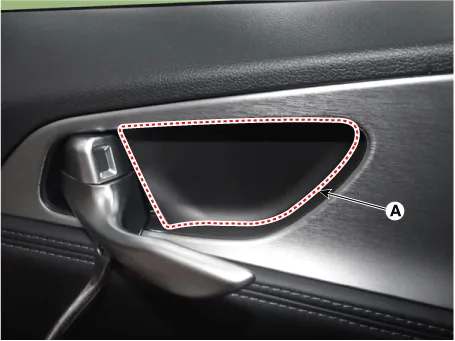
| 1. |
Remove the rear door inside handle cover (A) by using a remover.
|
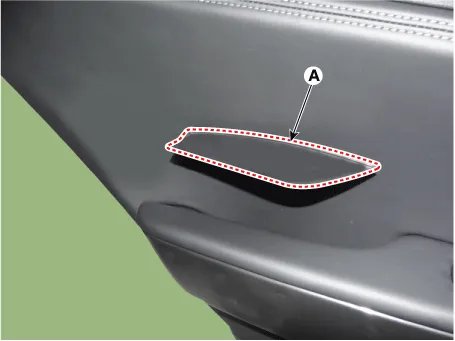
| 2. |
Remove the rear door pull handle cap (A) by using a remover.
|
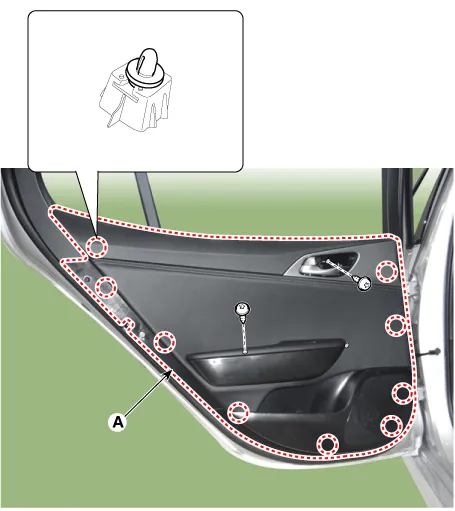
| 3. |
Remove the rear door trim (A) after loosening the mounting screw.
|
| 4. |
Remove the rear door inside handle cage (A).
|
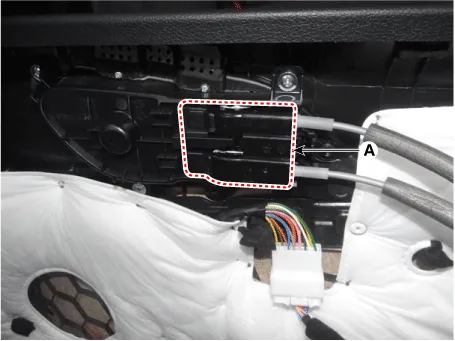
| 5. |
Disconnect the power window switch connector (A) and rear door tweeter speaker (B).
|
| 6. |
Install in the reverse order of removal.
|


Other information:
Kia Stinger (CK) 2018-2023 Service Manual: Engine Coolant Temperature Sensor (ECTS)
Specifications Specification Temperature Resistance (kΩ) °C °F -40 -40 48.14 -20 -4 14.13 - 16.83 0 32 5.79 20 68 2.Kia Stinger (CK) 2018-2023 Service Manual: Emergency Fastening Device (EFD)
Description and operation Description The Emergency Fastening Device (EFD) operates at the same time with the Seat Belt Pretensioner when the deployment condition is satisfied in the event of a collision. It is an auxiliary equipment that instantly pulls the seat belts toward the anchor in the event of frontal collision to protect the driver and front passenger from breaking away.Categories
- Manuals Home
- Kia Stinger Owners Manual
- Kia Stinger Service Manual
- New on site
- Most important about car
