
Kia Stinger CK: Body Electrical System / Rear View Monitor (RVM)
Components and components location
| Component Location |
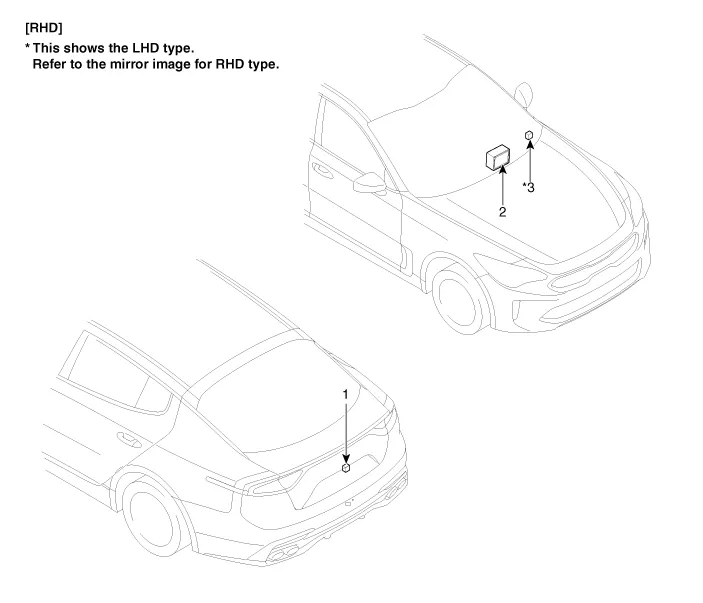
| 1. Rear view monitor (RVM)
2. AVN Monitor |
3. Steering angle sensor |
Description and operation
| Description |
| 1. |
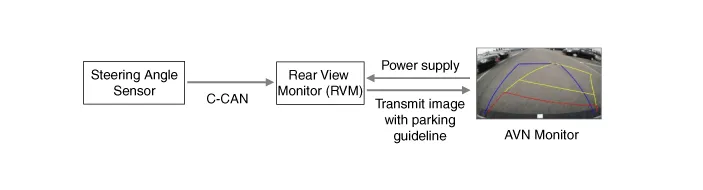
To display back of the vehicle to assist the driver, it receives vehicle rearside image signal from the rear view monitor and displays it on AVN monitor or LHS of inside rearview mirror. |
| 2. |
Rear view monitor is a supplementary device that displays dead zone on monitor screen that automatically operates when the gear stays in "R" for over 3 seconds. |
| 3. |
It displays the estimated trajectory with parking guideline in accordance with the operating angle of steering wheel. (There is no separate unit.) |
System Structure (Rear view monitor operated by steering)
Schematic diagrams
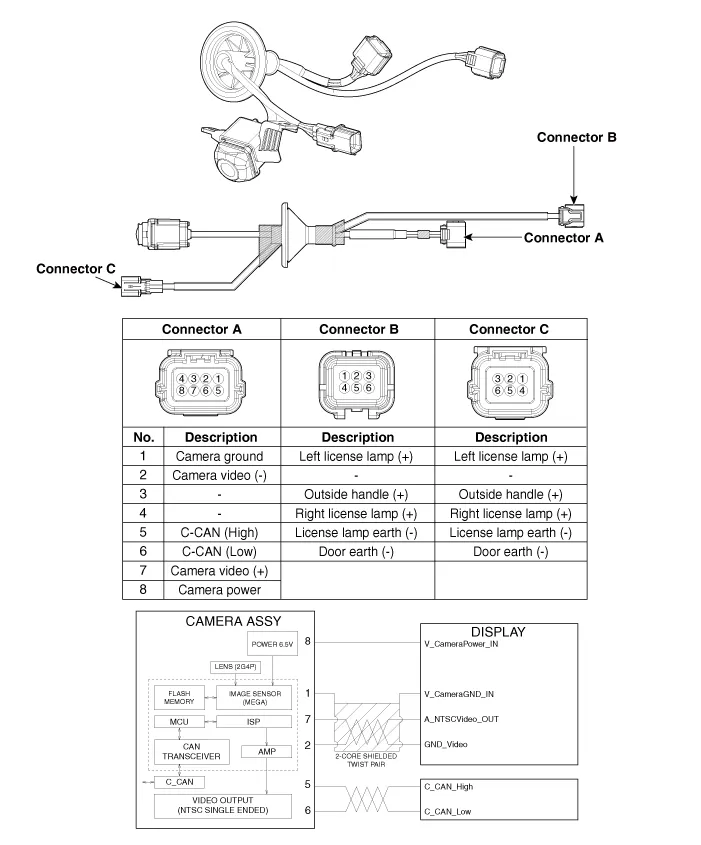
| Circuit Diagram |
Repair procedures
| Removal |
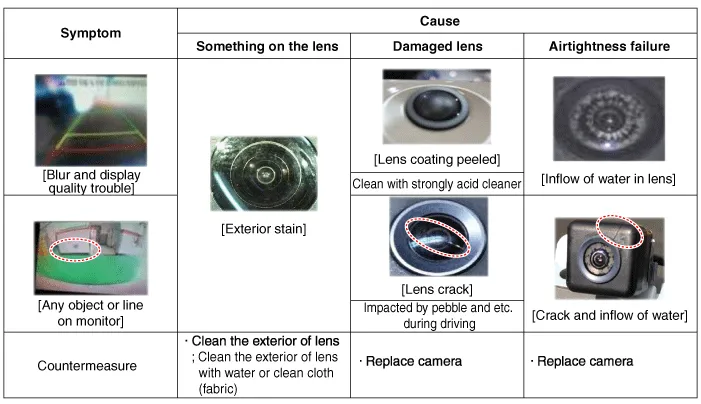
In case of bad quality or poor focus, be sure to check the camera lense surface condition and foreign materials. |

| 1. |
Disconnect the negative (-) battery terminal. |
| 2. |
Remove the tailgate back panel. (Refer to Body - "Tailgate Back Panel") |
| 3. |
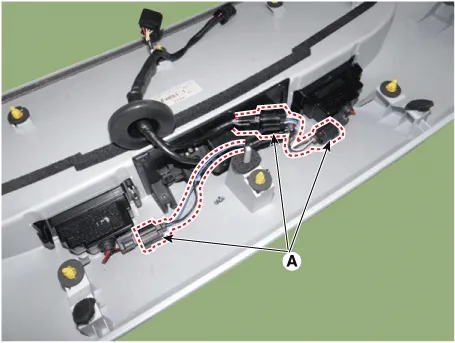
Disconnect the license lamp connectors (A).
|
| 4. |
Remove the tailgate outside handle assembly (A) after loosening the mounting screws.
|
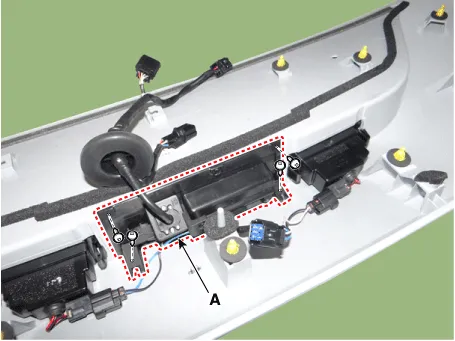
| 5. |
Remove the rear view camera (A) after loosening the mounting screws.
|
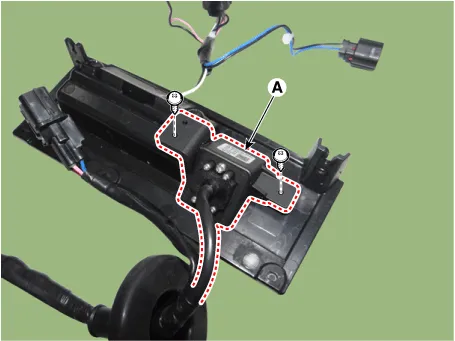
| Installation |
| 1. |
Install the rear view camera. |
| 2. |
Install the tailgate outside handle assembly. |
| 3. |
Connect the license lamp connectors. |
| 4. |
Install the tailgate back panel. |
| 5. |
Connect the negative (-) battery terminal. |
Troubleshooting
| Troubleshooting |
| Diagnosis procedure of each symptom |
|
No. |
Symptom |
Repairment |
|
1 |
AVN monitor turns to black/blue |
R-1, R-2, R-3 |
|
Parking guide line and notification word have not shown |
||
|
2 |
Vehicle has been slanted/leaned during parking |
R-4, R-5 |
|
Trouble on the shown angle |
||
|
Difference of right/left bumper visible sight |
||
|
Parking guidence line has been leaned (left/right deviation happened)
|
||
|
Vehicle has been slanted during parking |
||
|
3 |
Inflow of water in lens |
R-6 |
|
Blurred video |
||
|
Damaged of lens coating |
||
|
Showed red colored video |
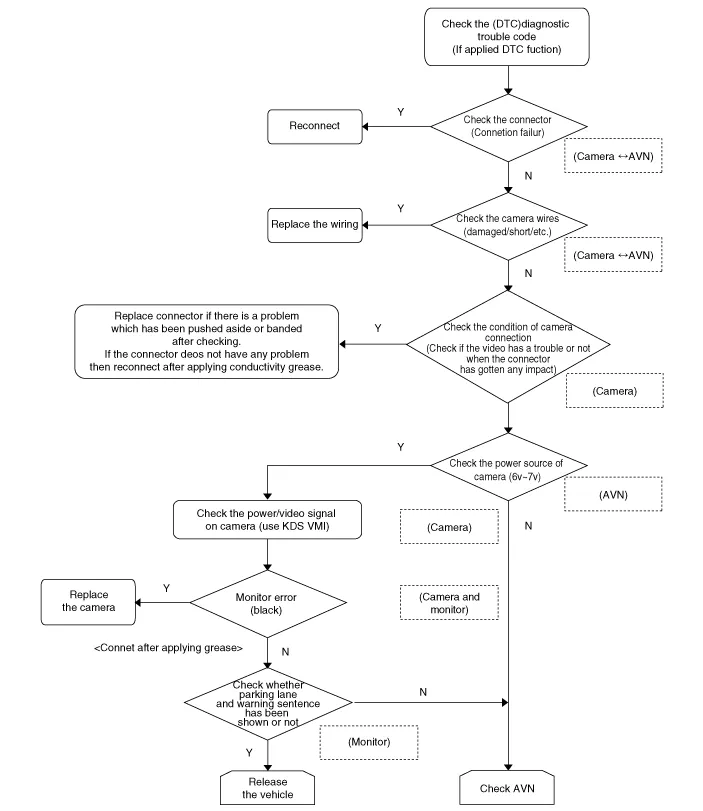
R-1. Inspect in following order when black screen has been occurred(camera - AVN direct connection specification)
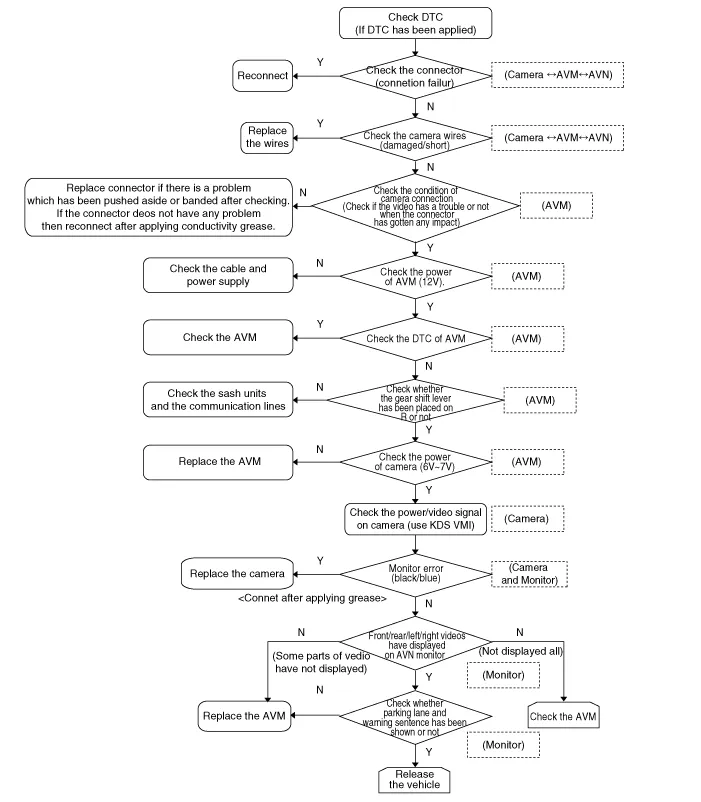
R-2. Inspect in following order when the screen turns to black/blue (camera - PGS/AVM - AVN specification)
R-3. Check the camera
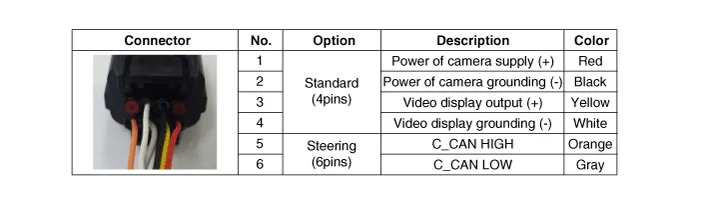
| 1. |
Measure the vedio display waveform and output voltage of rear camera (using KDS VMI). Connect connector 3 - connector 4.
|
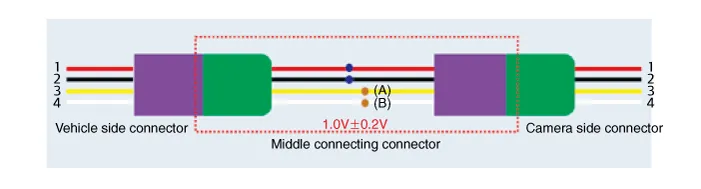

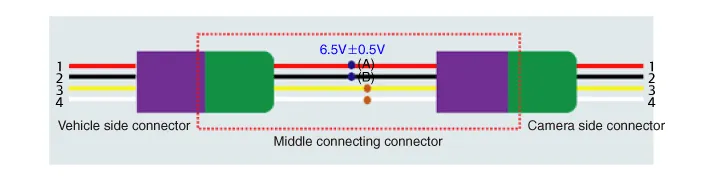
| 2. |
Measure the output voltage of rear camera power source. Connect connector1-connector2.
|
R-4. Check the symptom related to place of camera installation
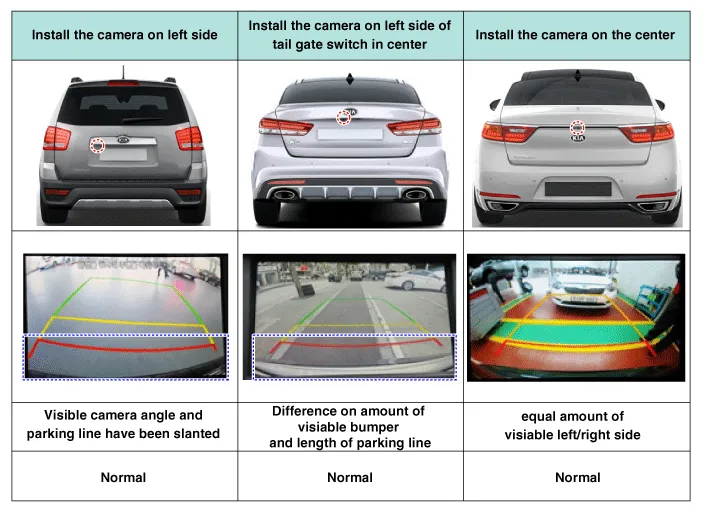
R-5. Slanted/leaned during parking
| 1. |
Check the condition of installing camera.
|
| 2. |
Measure the deviation of slanted/leaned druing parking.
|

R-6. Check monitor quality
|

|
|


Other information:
Kia Stinger (CK) 2018-2023 Service Manual: Rear Assist Arm
Repair procedures Removal 1. Remove wheel nuts, wheel and tire (A) from hub. Tightening torque: 107.9 - 127.5 N·m (11.0 - 13.0 kgf·m, 79.6 - 94.0 lb·ft) Be careful not to damage the wheel bolts when removing the wheel and tire (A).Kia Stinger (CK) 2018-2023 Service Manual: Rear Seat Back Cover
Components and components location Component Location 1. Rear back side seat assembly [LH] 2. Rear seat back assembly [LH] 3. Rear seat back assembly [RH] 4. Rear back side seat assembly [RH] Repair procedures Replacement Put on gloves to protect your hands.Categories
- Manuals Home
- Kia Stinger Owners Manual
- Kia Stinger Service Manual
- New on site
- Most important about car
