Kia Stinger CK: Chassis / Tire (pressure & tread wear)
Repair procedures
| Inspection |
| 1. |
Check the tire pressure. 17(inch) : 245 + 7.0 kPa (36 + 1 psi) 18(inch) : 245 + 7.0 kPa (36 + 1 psi) 19(inch) : 245 + 7.0 kPa (36 + 1 psi) |
Tire Rotation
Checking For Pull And Wander
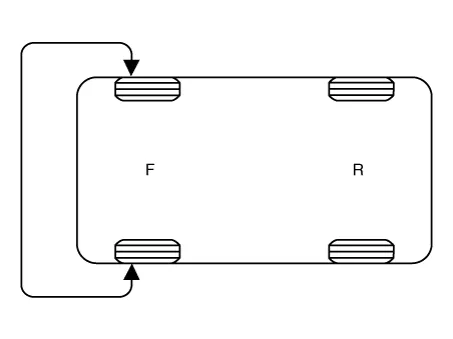
If the steering pulls to one side, rotate the tires according to the following wheel rotation procedure.
| 1. |
Rotate the front right and front left tires, and perform a road test in order to confirm vehicle stability.
|
| 2. |
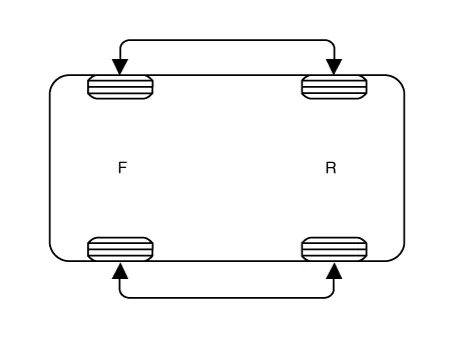
If the steering pulls to the opposite side, rotate the front and rear tires, and perform a road test again.
|
| 3. |
If the steering continues to pull to one side, rotate the front right and left tires again, and perform a road test.
|
| 4. |
If the steering continues to pull to the opposite side, replace the front wheels with new ones.
|

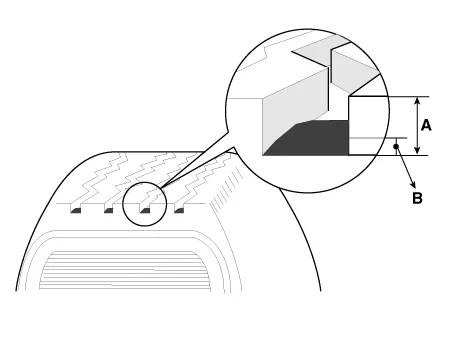
Tire Wear
|

| 1. |
Measure the tread depth of the tires.
|
| 2. |
If the remaining tread depth (A) is less than the limit, replace the tire.
|


Other information:
Kia Stinger (CK) 2018-2023 Service Manual: ECS Control Unit
Repair procedures Removal 1. Turn ignition switch OFF and disconnect the negative (-) battery cable. 2. Remove the luggage side trim. (Refer to Body - "Luggage side trim") 3. Disconnect the ECS control unit connector (A). 4. Loosen the ECS control unit bracket nut and then remove the ECS control unit (A).Kia Stinger (CK) 2018-2023 Service Manual: Tail Gate Assembly
Components and components location Components Location 1. Tailgate assembly Repair procedures Replacement Wear gloves to protect hands from injury. When removing and installing the tail gate, an assistant is needed.Categories
- Manuals Home
- Kia Stinger Owners Manual
- Kia Stinger Service Manual
- New on site
- Most important about car
