Kia Stinger CK: Power Train / Fluid (ATF)
Repair procedures
| Automatic Transmission Fluid (ATF) Level Check |
| 1. |
Start the engine to warm up the ATF.
|

| 2. |
Check by using KDS that the temperature of the ATF is between 50°C and 60°C (122-140°F). |
| 3. |
Move the shift lever slowly from "P" to "D", then back to "P". Repeat this sequence two times and then move the shift lever to "P" range.
|
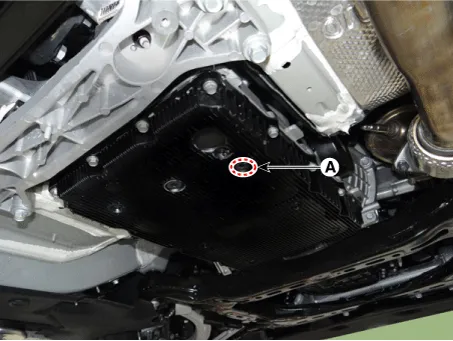
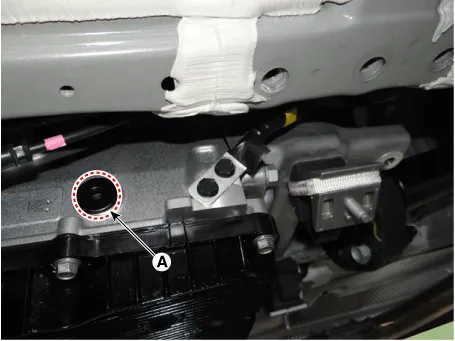
| 4. |
Lift the vehicle and remove the ATF level plug (A) from the valve body cover.
|
| 5. |
Check the ATF level.
|
| 6. |
Install the ATF level plug (A).
|
| 7. |
After ATF level check or exchange, be sure to remove ATF from outside automatic transmission. (Must make sure to remove the residual ATF between automatic transmission case and valve body cover. ) |


Other information:
Kia Stinger (CK) 2018-2023 Service Manual: Cowl Side Trim
Components and components location Component Location 1. Cowl side trim Repair procedures Replacement Put on gloves to protect your hands. • When prying with a flat-tip screwdriver or using a prying trim tool, wrap protective tap around the tool and related parts to prevent damage.Kia Stinger (CK) 2018-2023 Service Manual: ESP Control Module
Components and components location Components 1. FR 2. RL 3. RR 4. FL 5. MC2 (SEC) 6. MC1 (PRI) 7. Damper 8. ESP control module connector 9. ESP control module bracket Repair procedures Removal [LHD] 1. Turn ignition switch OFF and disconnect the negative (-) battery cable.Categories
- Manuals Home
- Kia Stinger Owners Manual
- Kia Stinger Service Manual
- New on site
- Most important about car
