Kia Stinger CK: Hydraulic System / SS-A Solenoid Valve (ON/OFF)
Specifications
| Specifications |
|
Item |
Specification |
|
Control type |
ON/OFF |
|
Control pressure kpa (kgf/cm², psi) |
539.36 (5.5, 78.23) |
|
Current (mA) |
0 - 600 |
|
Coil resistance (Ω) |
10.5 ± 0.5 |
Components and components location
| Components Location |
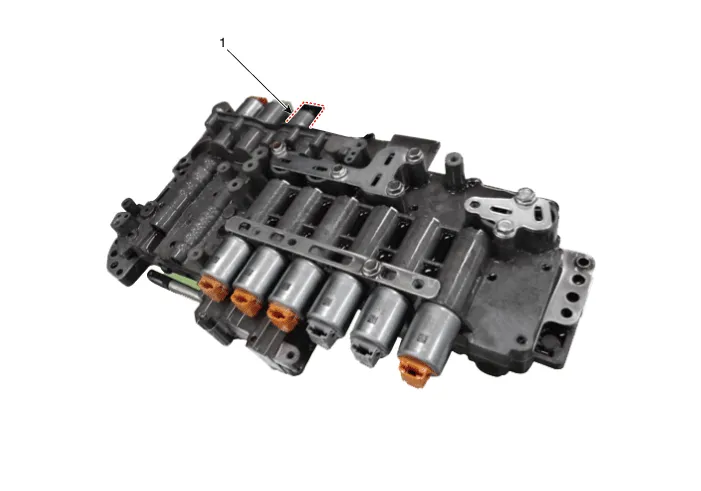
| 1. SS-A solenoid valve (ON/OFF)
|
Description and operation
| Description |
| • |
SS-A solenoid valve is ON/OFF type. |
| • |
When TCM supplies variable current to solenoid valve, the solenoid valve operates and controls the speed range.
|

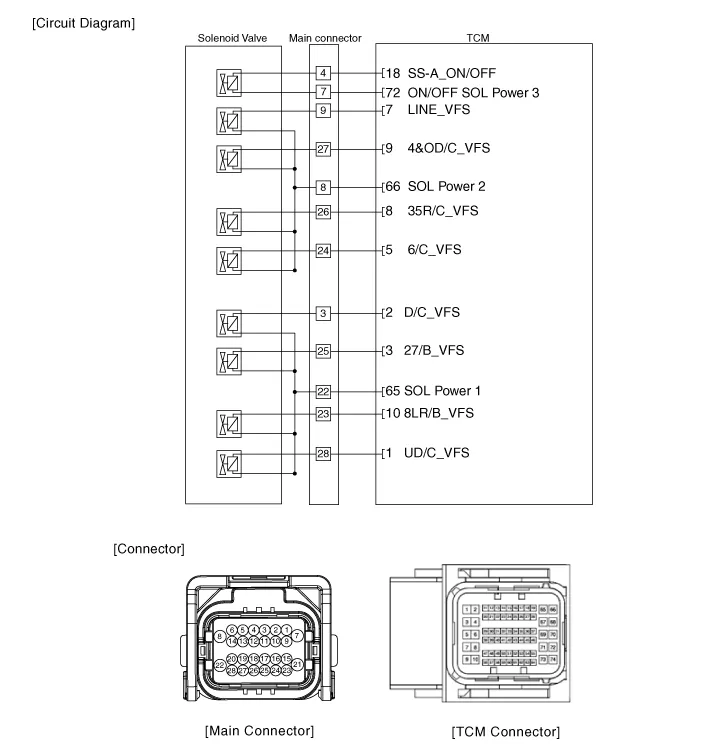
Schematic diagrams
| Circuit Diagram |
Repair procedures
| Inspection |
| 1. |
Switch "OFF" ignition |
| 2. |
Disconnect the main connector (A).
|

| 3. |
Measure the resistance between power terminal (7) and signal terminal (4).
|
| Removal |
|

| 1. |
Remove the under cover. (Refer to Engine Mechanical System - "Engine Room Under Cover"). |
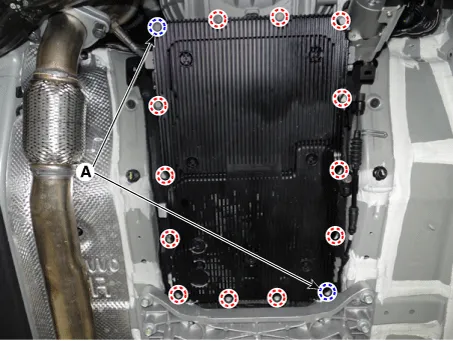
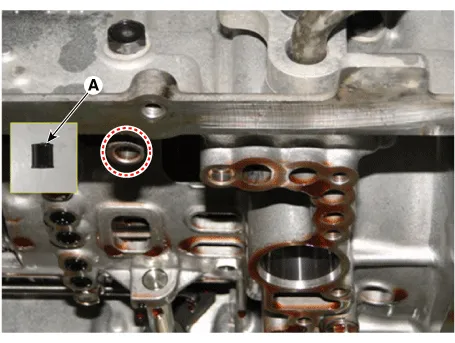
| 2. |
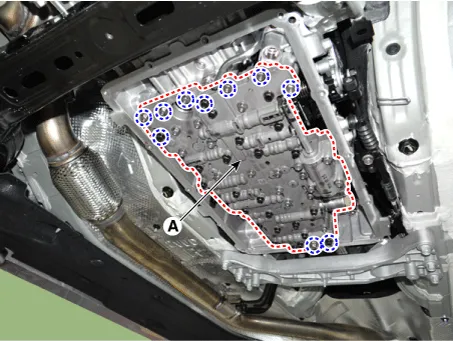
Remove the ATF drain plug (A), allow the fluid to drain out and then reinstall the drain plug.
|


| 3. |
Disconnect the main connector (A).
|
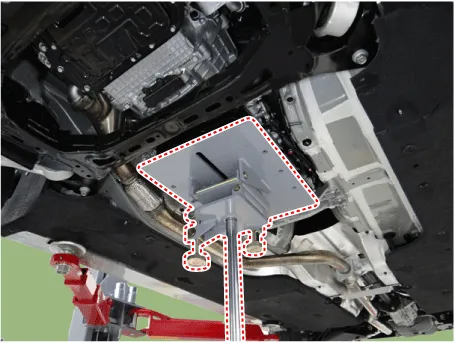
| 4. |
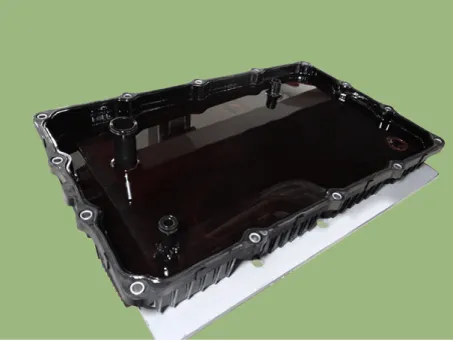
Remove the valve body cover.
|
| 5. |
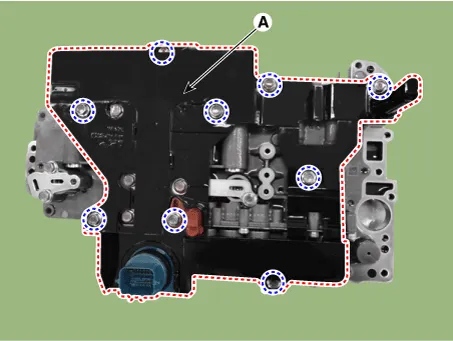
Remove the valve body assembly (A) after loosening the bolts.
|
| 6. |
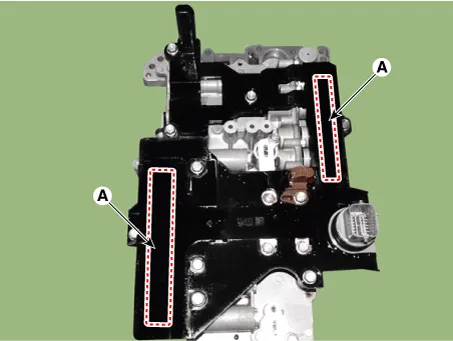
Remove the E-module (A) after loosening the bolts.
|
| 7. |
Remove the solenoid valve support bracket (A).
|
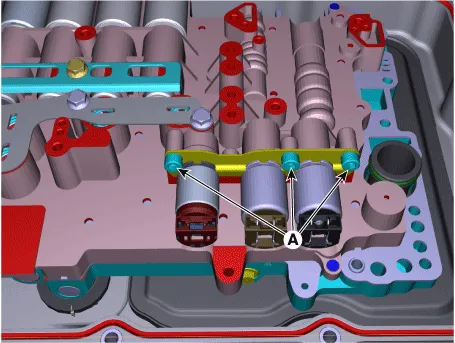
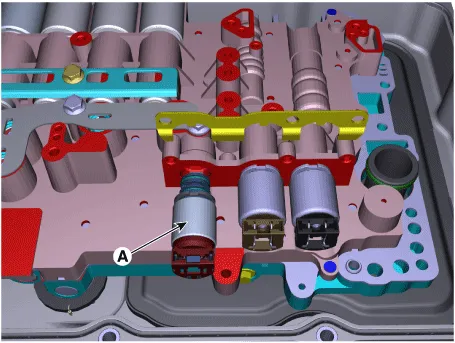
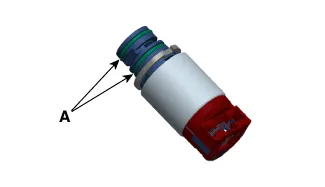
| 8. |
Remove the SS-A solenoid valve (A).
|
| Installation |
| 1. |
Install in the reverse order of removal.
|
| 2. |
Perform the procedures below after installing.
|


Other information:
Kia Stinger (CK) 2018-2023 Service Manual: Hood
Opening the hood 1. Pull the release lever to unlatch the hood. The hood should pop open slightly. Only open the hood with the vehicle on a flat surface, engine is turned off, shift lever placed in P (Park) position and setting the parking brake. 2. Go to the front of the vehicle, raise the hood slightly, push the secondary latch (1) left side of the hood center and lift the hood (2).Kia Stinger (CK) 2018-2023 Service Manual: Fuel Filter (For Diesel engine only)
Repair procedures Removal 1. Switch "OFF" the ignition and disconnect the negative (-) battery terminal. 2. Remove the engine cover (A). 3. Disconnect the water sensor connector & fuel heater connector (A), fuel pressure sensor connector (B). 4.Categories
- Manuals Home
- Kia Stinger Owners Manual
- Kia Stinger Service Manual
- New on site
- Most important about car
