Kia Stinger CK: Emission Control System / Crankcase Emission Control System
Contents:
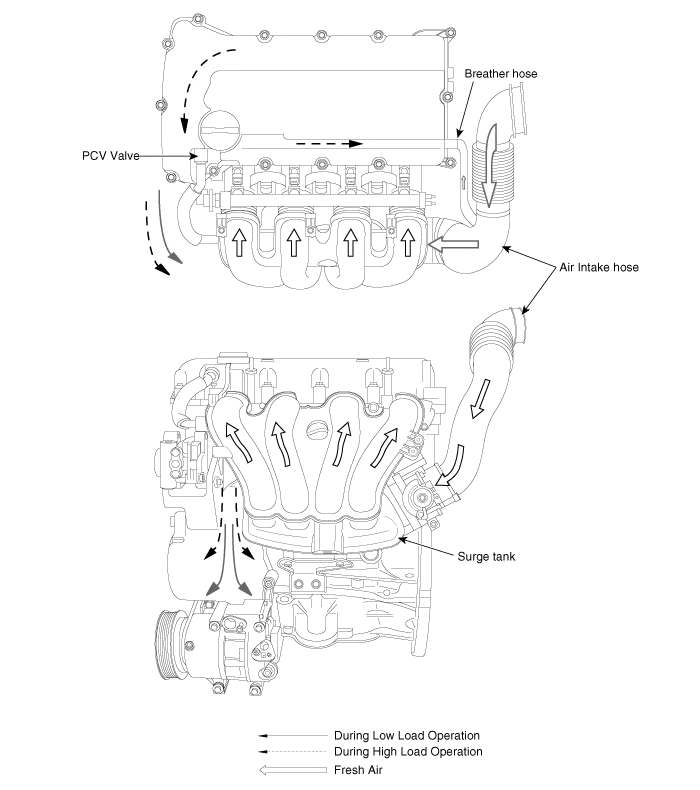
Schematic diagrams
| Schematic Diagram |
Repair procedures
| Inspection |
| 1. |
After disconnecting the vapor hose from the PCV valve, remove the PCV valve. |
| 2. |
Reconnect the PCV valve to the vapor hose. |
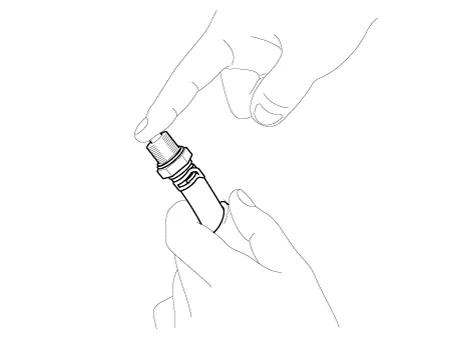
| 3. |
Run the engine at idle, then put a finger over the open end of the PCV valve and make sure that intake manifold vacuum can be felt.
|

| 4. |
If vacuum could not be felt, inspect the PCV operation. If operating correctly, clean or replace the vapor hose. |
Positive Crankcase Ventilation (PCV) Valve
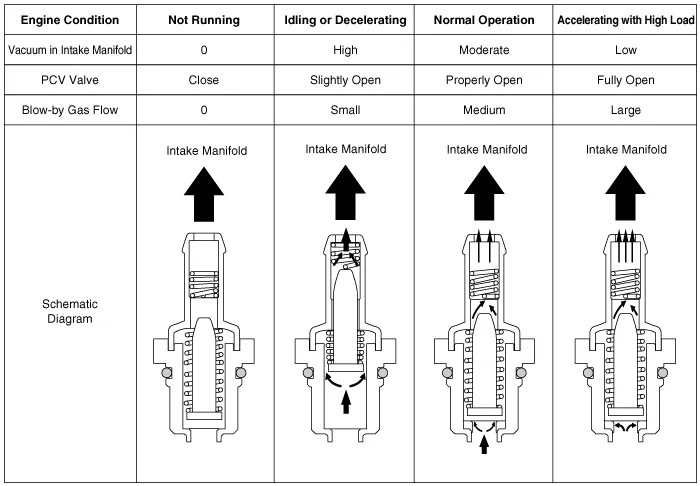
Description and operation
| Operation Principle |
Repair procedures
| Removal |
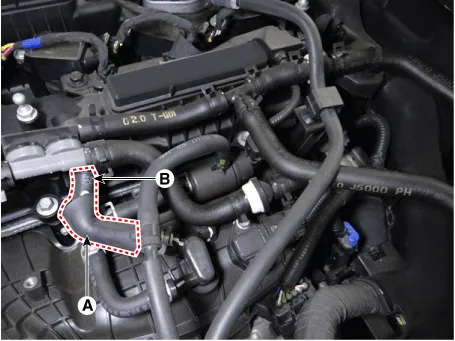
| 1. |
Disconnect the PCV hose (A). |
| 2. |
Remove the PCV valve (B).
|
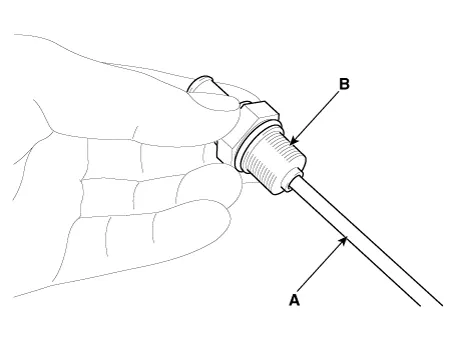
| Inspection |
| 1. |
Insert a thin stick (A) into the PCV valve (B) from the threaded side to check for the plunger movement.
|
| Installation |
| 1. |
Install in the reverse order of removal.
|


Other information:
Kia Stinger (CK) 2018-2023 Service Manual: ETC (Electronic Throttle Control) System
Specifications Specification [Throttle Position Sensor (TPS)] Throttle Angle(°) Output Voltage(V) [Ref=5V] TPS1 TPS2 0 0.0 5.0 10 0.48 4.52 20 0.95 4.05 30 1.Kia Stinger (CK) 2018-2023 Service Manual: Power Tailgate System
Components and components location Components 1. Anti pinch strip (2EA) 2. Power tailgate spindle (2EA) 3. Power tailgate buzzer 4. Side crash pad switch 5. Outside handle switch 6. Cluster (USM) 7. Power tailgate module (PTGM) 8. Power tailgate latch & power closing unit assembly 9.Categories
- Manuals Home
- Kia Stinger Owners Manual
- Kia Stinger Service Manual
- New on site
- Most important about car
Contents
