Kia Stinger: Automatic Transmission System / Automatic Transmission System

Kia Stinger CK 2018-2024 Service Manual / Automatic Transmission System / Automatic Transmission System

Components and components location
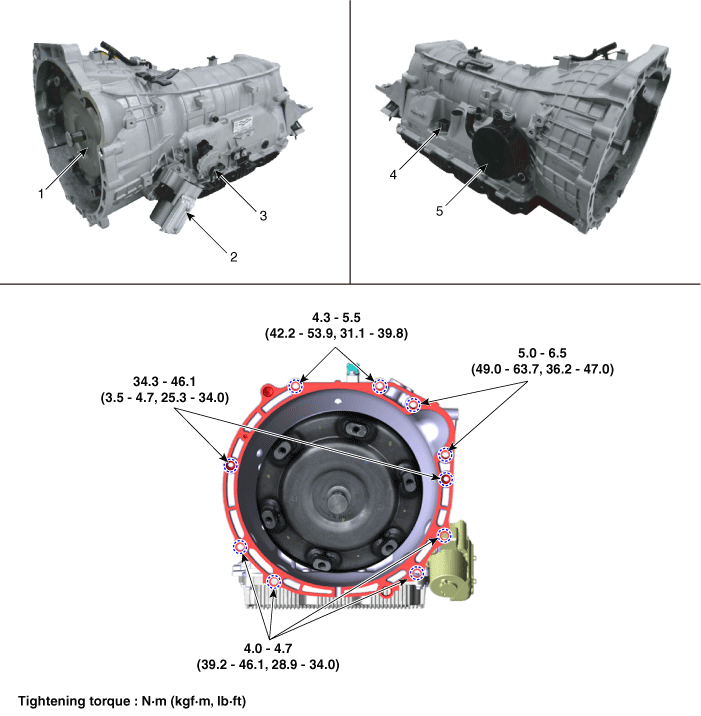
Components

1. Torque converter
2. Electric Oil Pump (EOP)
3. Parking switch (Inhibitor switch)
4. Main connector
5. ATF Warmer

Repair procedures
Removal
1.

Disconnect the negative (-) battery terminal.

2.

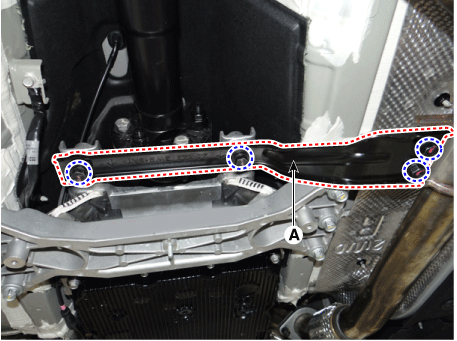
Remove the stay (A) by loosening the bolts.

Tightening torque :

29.4 - 39.2 N·m (3.0 - 4.0 kgf·m, 21.7 - 28.9 lb·ft)

3.

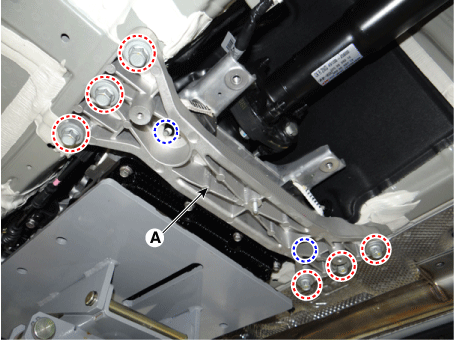
Remove the cross member (A) after supporting the transmission on a jack.

[2WD]

Tightening torque

Bolts : 58.8 - 73.5 N·m (6.0 - 7.5 kgf·m, 43.4 - 54.2 lb·ft)

Nuts : 29.4 - 34.3 N·m (3.0 - 3.5 kgf·m 21.7 - 25.3 lb·ft)

[4WD]

Tightening torque

Bolts : 58.8 - 73.5 N·m (6.0 - 7.5 kgf·m, 43.4 - 54.2 lb·ft)

Nuts : 63.7 - 83.4 N·m (6.5 - 8.5 kgf·m, 47.0 - 61.5 lb·ft)

4.

Remove the front muffler.

(Refer to Engine Mechanical System - "Muffler")

5.

Remove the propeller shaft assembly.

(Refer to Driveshaft and axle - "Propeller Shaft Assembly")

6.

Remove the transfer assembly.

(Refer to 4 Wheel Drive (4WD) System- "Transfer Case Assembly")

7.

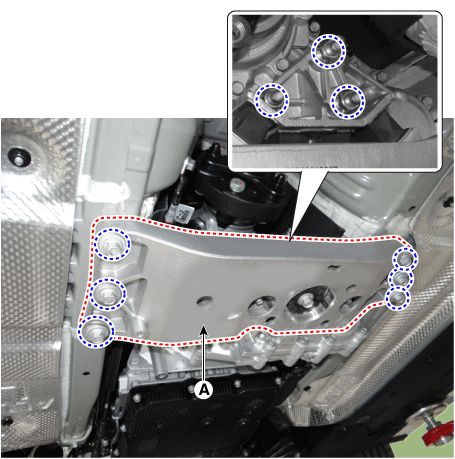
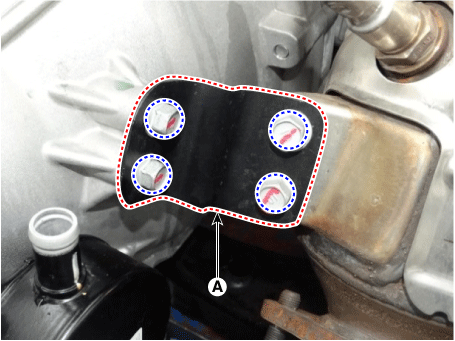
Remove the exhaust manifold stay (A).

Tightening torque :

49.0 - 58.8 N·m (5.0 - 6.0 kgf·m, 36.2 - 43.4 lb·ft

8.

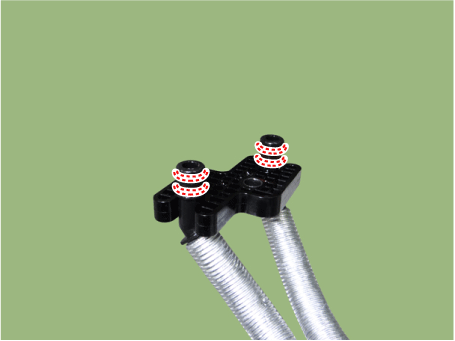
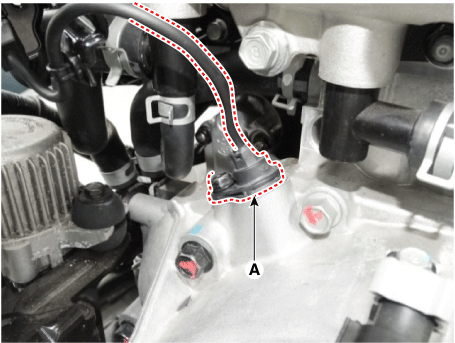
Separate the ATF warmer hose (A). [ATF warmer]

9.

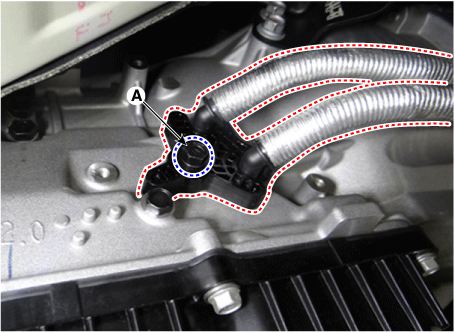
Remove the ATF cooler tube from the transmission after loosening a bolt (A). [Non-ATF warmer]

Tightening torque :

19.6 - 29.4 N·m (2.0 - 3.0 kgf·m, 14.5 - 21.7 lb·ft)


When installing, The existing O-ring must be replaced with a new one. (Do not reuse it.)

After installing, check for leakage of ATF from tube connection during engine start.

10.

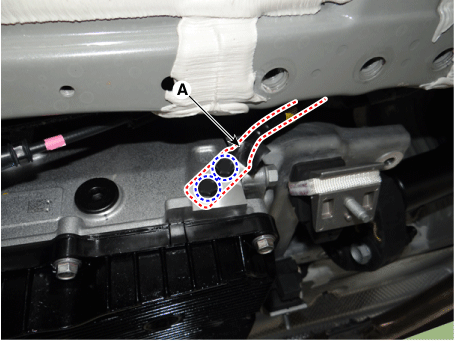
Remove the ground (A).

Tightening torque :

10.8 - 13.7 N·m (1.1 - 1.4 kgf·m, 8.0 - 14.5 lb·ft)

11.

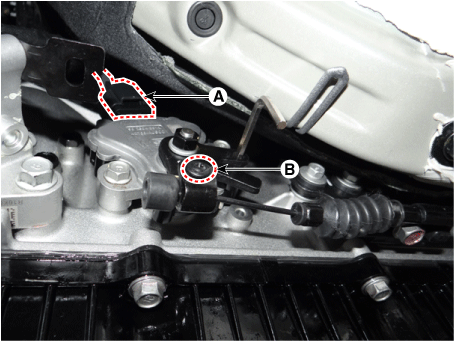
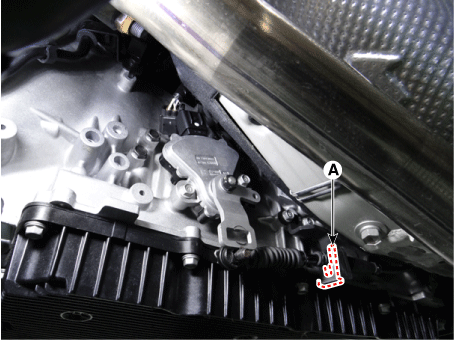
Disconnect the parking switch (inhibitor switch) connector and remove the parking release cable (shift cable).

[SBW]

(1)

Disconnect the parking switch connector (A) and then remove the parking release cable after loosening the fastener (B).


The existing fastener (B) must be replaced with a new one. (Do not reuse it.)

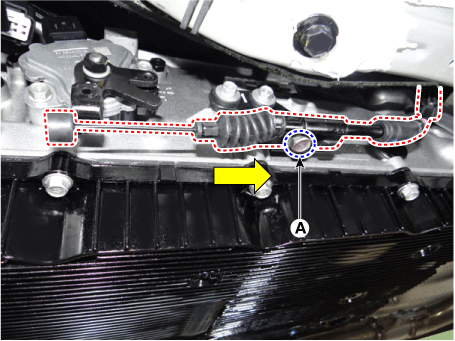
(2)

Remove the parking release cable from the bracket after loosening a bolt (A).


When installing , tighten the bolt (A) to the specified torque after removing gap by pushing the parking release cable in the direction of the arrow.

Tightening torque :

12.7 - 15.7 N·m (1.3 - 1.6 kgf·m, 9.4 - 11.6 lb·ft)

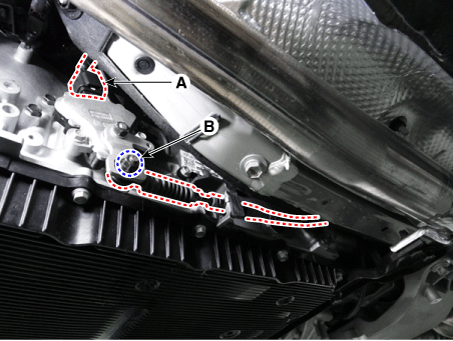
[SBC]

(1)

Disconnect the inhibitor switch connector (A) and then remove the shift cable after loosening the nut (B).

Tightening torque :

9.8 - 14.7 N·m (1.0 - 1.5 kgf·m, 7.2 - 10.8 lb·ft)

(2)

Remove the clip (A).


When installing, The existing shift cable clip must be replaced with new one. (Do not reuse it.)

12.

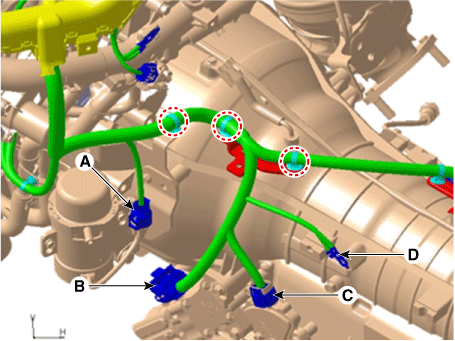
Remove the wiring from the transmission.

(1)

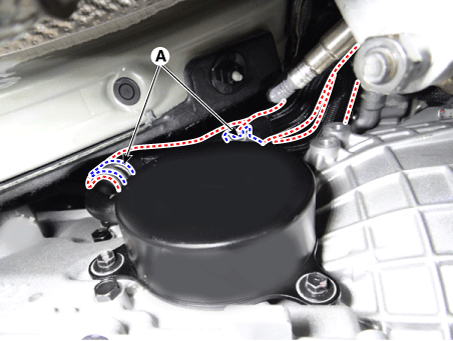
Disconnect the vacuum pump connector (A), EOP connector and parking switch / inhibitor switch connector (C).

(2)

Remove the ground (D) by loosening a bolt and remove the wiring fixing clip from the wiring bracket.

Tightening torque :

10.8 - 13.7 N·m (1.1 - 1.4 kgf·m, 8.0 - 14.5 lb·ft)

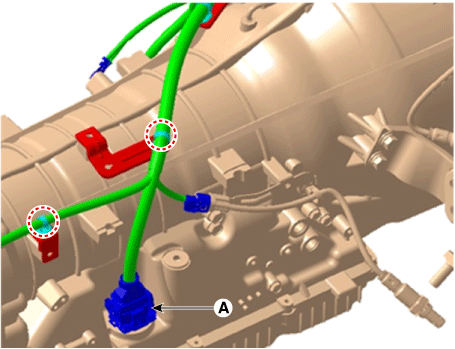
(3)

Disconnect the E-module connector (A).

(4)

Remove the wiring fixing clip from the wiring bracket.

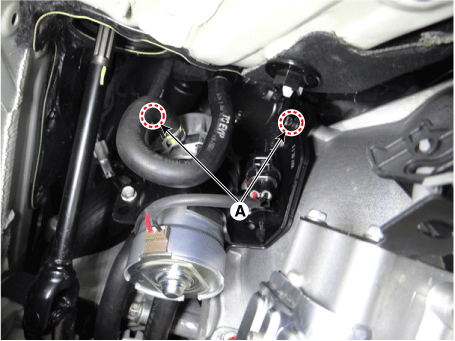
13.

Remove the vacuum pump from the transmission after loosening th bolts (A).

Tightening torque :

19.6 - 29.4 N·m (2.0 - 3.0 kgf·m, 14.5 - 21.7 lb·ft)

14.

Remove the CKP sensor (A) after loosening a bolt.

Tightening torque :

19.6 - 29.4 N·m (2.0 - 3.0 kgf·m, 14.5 - 21.7 lb·ft)

15.

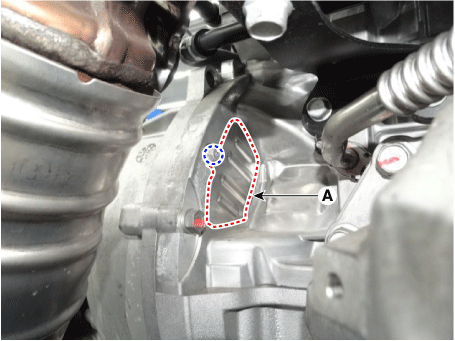
Remove the cover (A).

Tightening torque :

9.8 - 11.8 N·m (1.0 - 1.2 kgf·m, 7.2 - 8.7 lb·ft)

16.

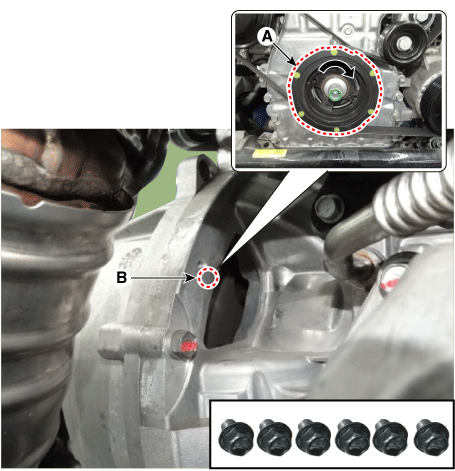
Remove the cover and then loosen the torque converter mounting bolts (B-6pcs) by rotating the crankshaft (A).

Tightening torque :

45.1 - 52.0 N·m (4.6 - 5.3 kgf·m, 33.3 - 38.3 lb·ft)

17.

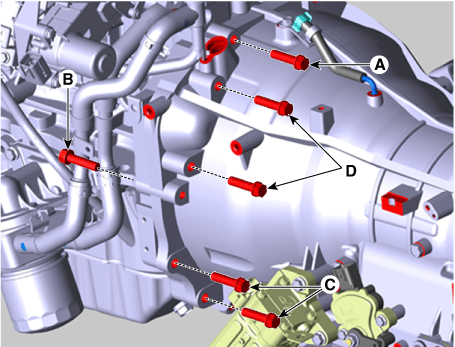
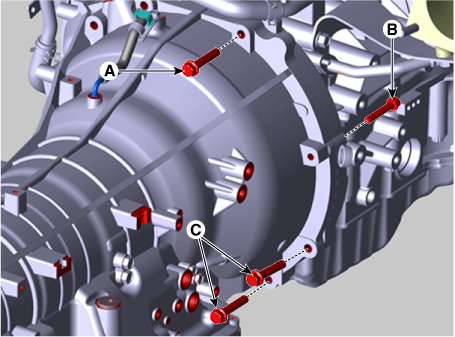
Loosen the transmission mounting bolts (A, B, C) and starter mouting bolts (D).

Tightening torque

(A) : 42.2 - 53.9 N·m (4.3 - 5.5 kgf·m, 31.1 - 39.8 lb·ft)

(B) : 34.3 - 46.1 N·m (3.5 - 4.7 kgf·m, 25.3 - 34.0 lb·ft)

(C) : 39.2 - 46.1 N·m (4.0 - 4.7 kgf·m, 28.9 - 34.0 lb·ft)

(D) : 49.0 - 63.7 N·m (5.0 - 6.5 kgf·m, 36.2 - 47.0 lb·ft)


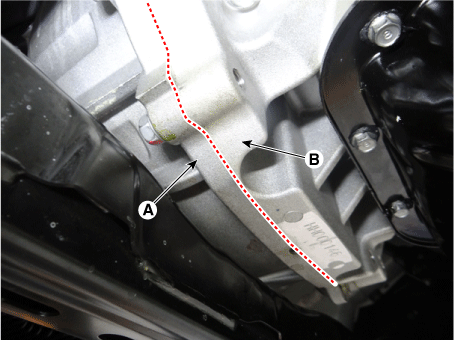
After mounting the automatic transmission to the engine by pushing the automatic transmission, tighten the mounting bolts after check that there is no gap between the torque converter housing (A) and the engine block (B).

18.

After separating the transmission from the engine, remove the transmission by lowering the jack slowly.


Be careful not to damage other nearby systems or parts when removing the transmission assembly.

Installation
1.

Install in the reverse order of removal


Matters that require attention when installing the transmission to engine

1)

Check that there is no gap between the torque converter housing (A) and the engine block (B).

2)

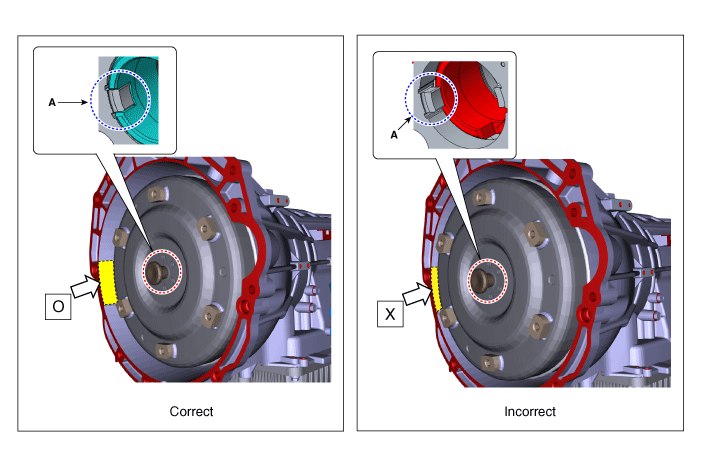
This gap means the torque converter is not assembled correctly and it can cause damage on the key (A) of oil pump gear. In this case, reinstall the torque converter correctly after removing the transamission assembly.

3)

If the bolt is tightened while there is a gap, it can cause damage on the key of oil pump gear. In this case, replace the transmission assembly after loosening the mounting bolts.

When reinstalling the automatic transmission assembly, perform the procedures below.

1)

Refill the engine coolant system radiator with coolant. [ATF warmer only]

(Refer to Engine Mechanical System - "Coolant")

2)

Check the ATF level after refilling the automatic transmission with fluid.

(Refer to Hydraulic System - "Fluid")

3)

Clear the diagnostic trouble codes (DTC) using the KDS. Disconnecting the battery negative terminal will not clear the DTCs. Clear DTCs using the KDS at all times.

When replacing with a new automatic transmission assembly, perform the procedures below.

1)

Refill the engine coolant system radiator with coolant. [ATF warmer only]

(Refer to Engine Mechanical System - "Coolant")

2)

Automatic transmission is already filled with the specified amount of ATF.

For this reason, it is not necessary to refill and check the ATF. However, the remaining ATF in the ATF cooler has to be drained.

3)

Clear the diagnostic trouble codes (DTC) using the KDS. Disconnecting the battery negative terminal will not clear the DTCs. Clear DTCs using the KDS at all times.

4)

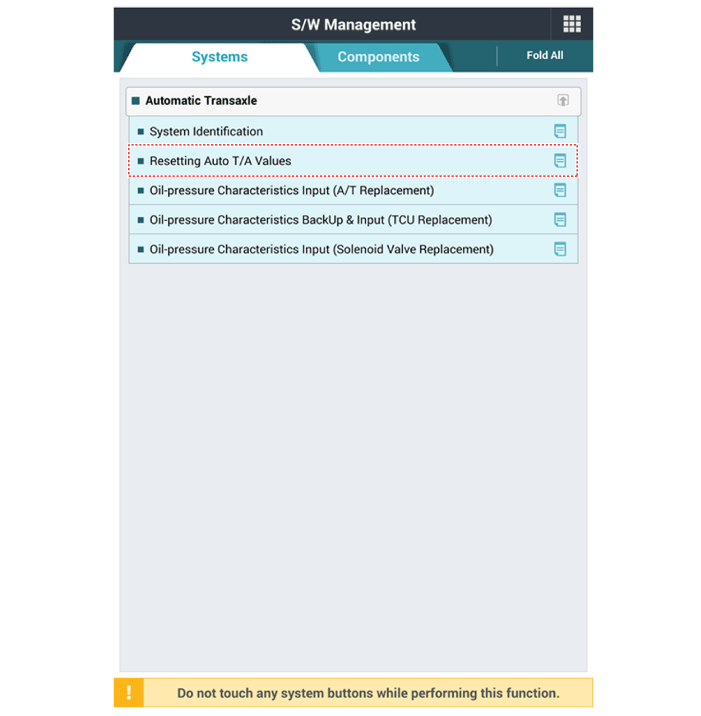
Reset the automatic transmission adaptive values using the KDS.

5)

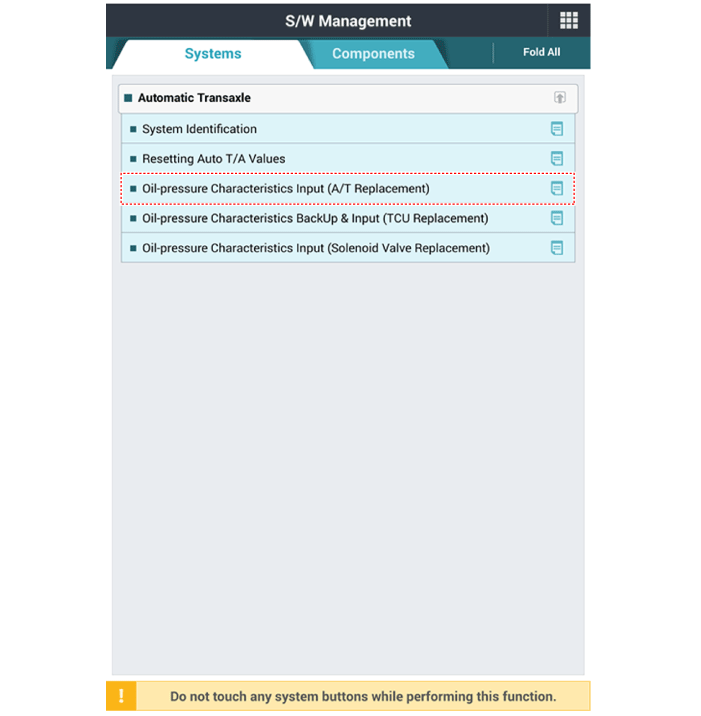
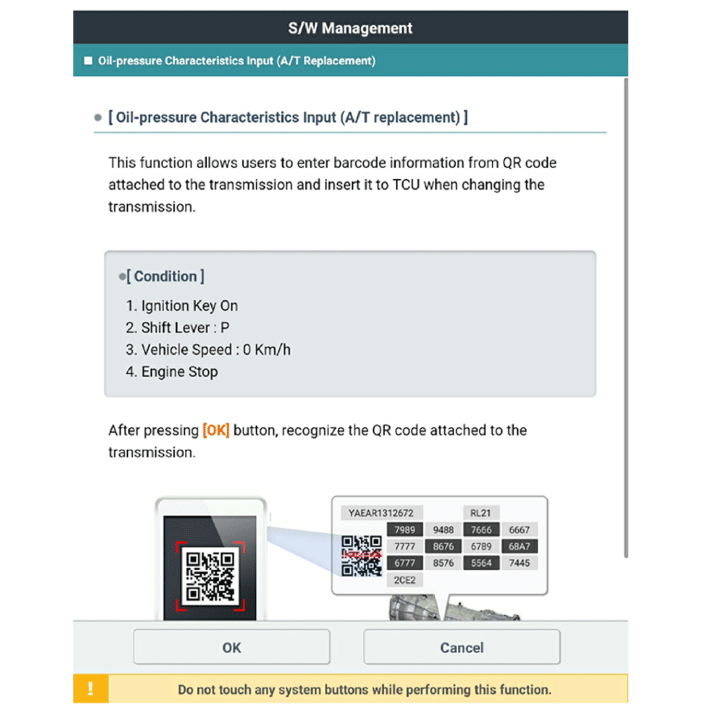
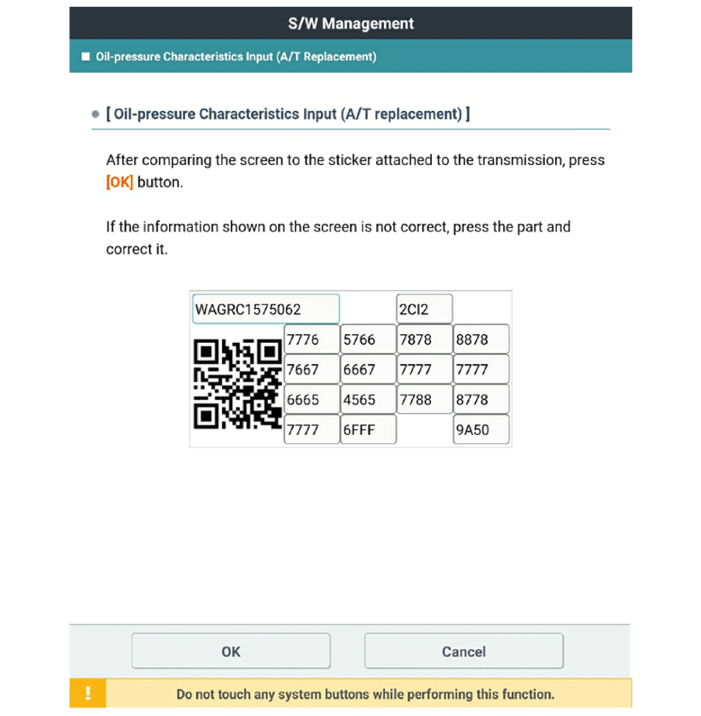
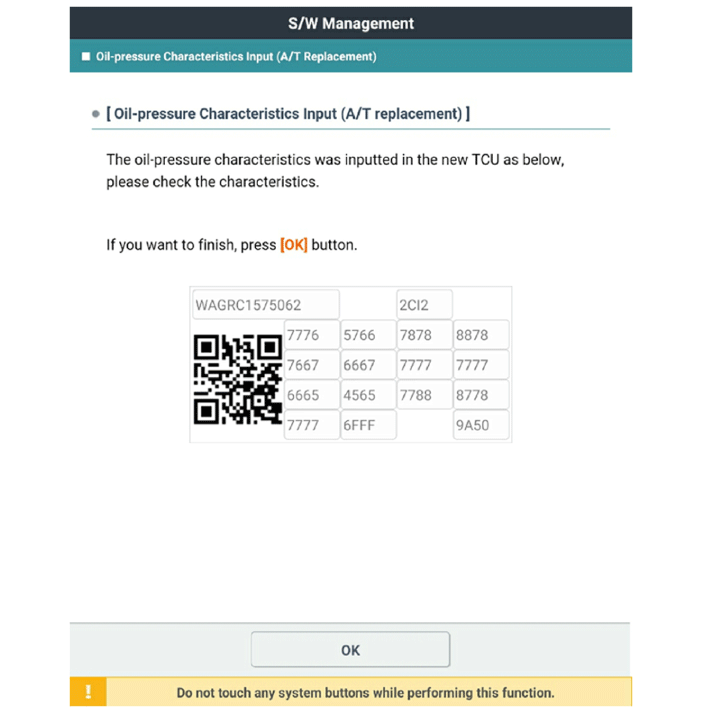
Perform the oil pressure characteristics input procedure using the KDS.

6)

Perform the TCM adaptive values learning procedure.

(Refer to Automatic Transmission Control System - "Repair procedures")

Shift Cable
Components and components location Components 1. Manual control lever 2. Shift cable 3. Shift lever assembly 4. Knob Repair procedures R ...

Hydraulic System
Oil pressure characteristics input Oil-pressure characteristics input Solenoid valve oil-pressure characteristics input procedure 1. Perform the oil-p ...

Other information:

Kia Stinger CK 2018-2024 Service Manual: Heating, Ventilation And Air Conditioning


Special service tools Special Service Tools Tool (Number and name) Illustration Use 09977-3R000 Disc & hub assembly bolt remover Removal and installation of disc & hub assembly. ...

Kia Stinger CK 2018-2024 Service Manual: 6 Clutch Control Solenoid Valve (6/C_VFS)


Specifications Specifications Item Specification Control type N/L (Normal Low) Control pressure kpa (kgf/cm², psi) 0 - 1,569.06 (0 - 16, 0 - 227.57)  Current (mA) 0 ...

Copyright © www.kstinger.com 2015-2024