Kia Stinger CK: Cooling System / Radiator
Components and components location
| Components |
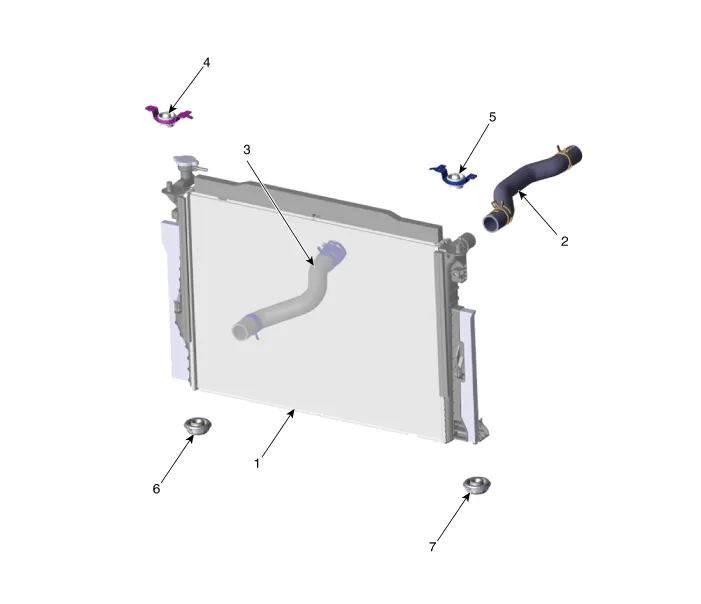
| 1. Radiator 2. Radiator upper hose 3. Radiator lower hose 4. Radiator upper mounting bracket (RH) |
5. Radiator upper mounting bracket
(LH) 6. Radiator lower mounting insulator (RH) 7. Radiator lower mounting insulator (LH) |
Repair procedures
| Removal and Installation |
| 1. |
Disconnect the battery negative terminal. |
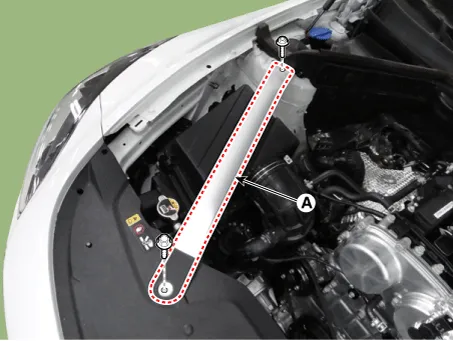
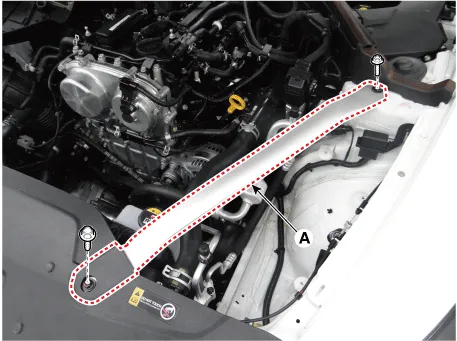
| 2. |
Remove the front strut bar (A). [RH]
[LH]
|
| 3. |
Remove the engine room front under cover. (Refer to Engine and Transmission Assembly - "Engine Room Under Cover") |
| 4. |
Drain the coolant. (Refer to Cooling System - "Coolant") |
| 5. |
Remove the front bumper assembly. (Refer to body (Interior and Exterior) - "Front Bumper Assembly") |
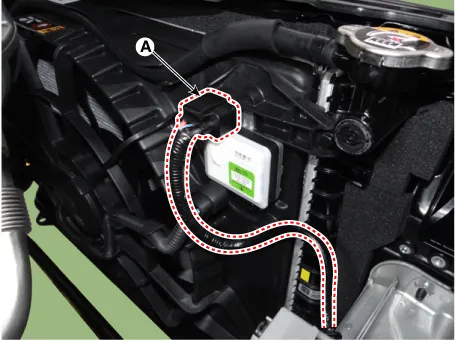
| 6. |
Disconnect the cooling fan connector (A). [BLDC (Brushless DC) motor type]
[DC motor type]
|

| 7. |
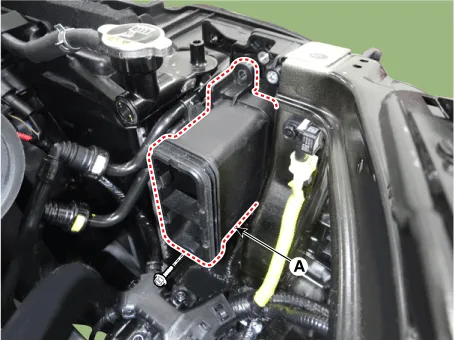
Remove the reservoir tank. (Refer to Cooling System - "Reservoir Tank") |
| 8. |
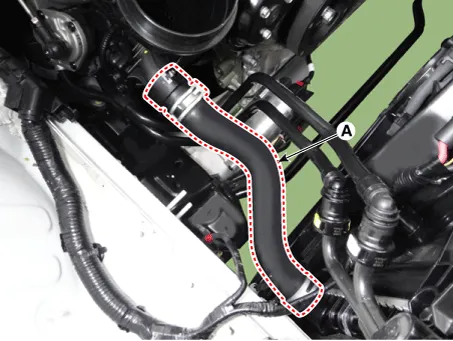
Disconnect the radiator upper hose (A).
|
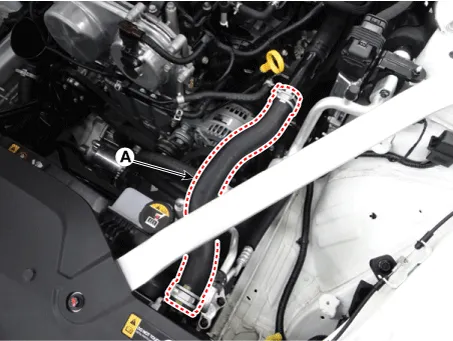
| 9. |
Disconnect the radiator lower hose (A).
|
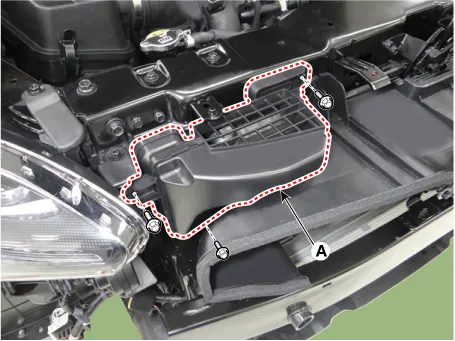
| 10. |
Remove the air duct (A).
|
| 11. |
Disconnect the hood latch release handle cable (A).
|
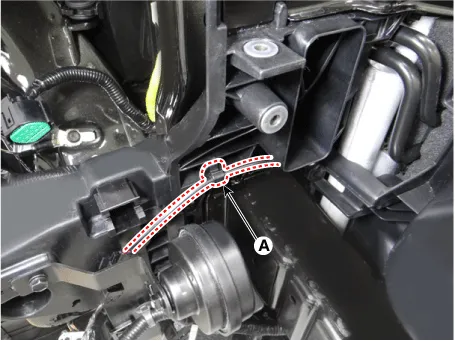
| 12. |
Disconnect the hood switch connector (A).
|
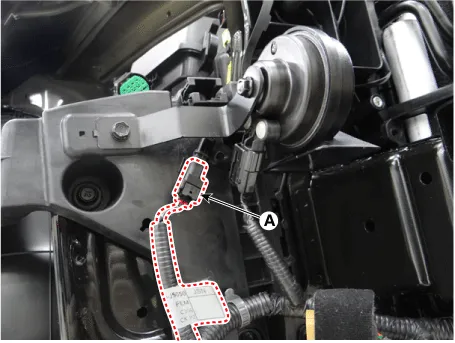
| 13. |
Disconnect the hood switch wiring (A).
|
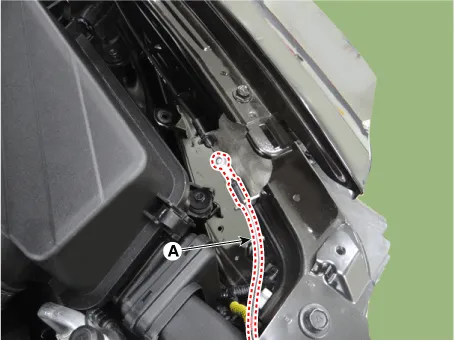
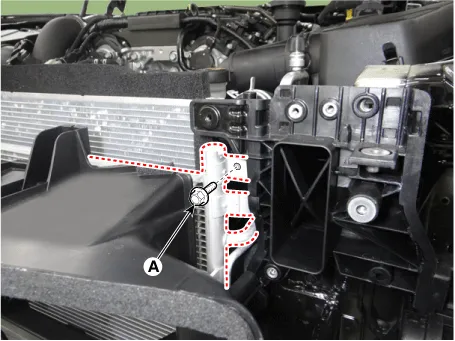
| 14. |
Remove the radiator upper member support bracket (A).
|

| 15. |
Remove the transmission oil cooler mounting bolts (A).
[LH]
[RH]
|

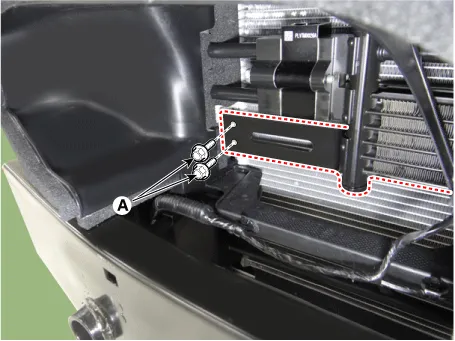
| 16. |
Remove the A/C condenser mounting bolts (A).
[LH]
[RH]
|

| 17. |
Remove the RH air cleaner adapter (A).
|
| 18. |
Remove the transmission oil cooler pipe mounting bolt (A).
|

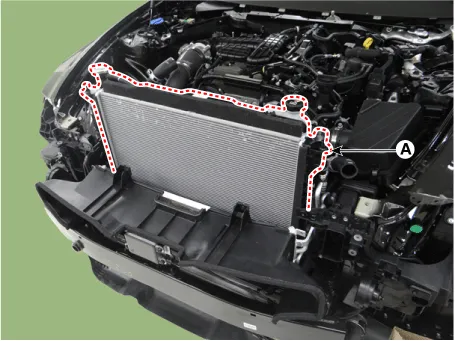
| 19. |
Remove the radiator assembly (A).
|
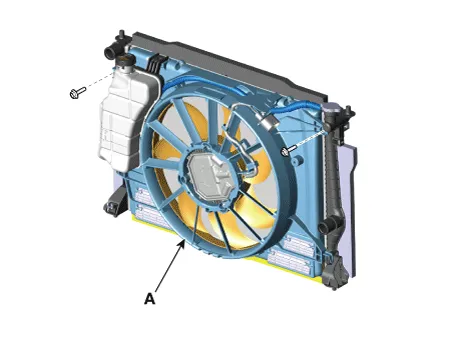
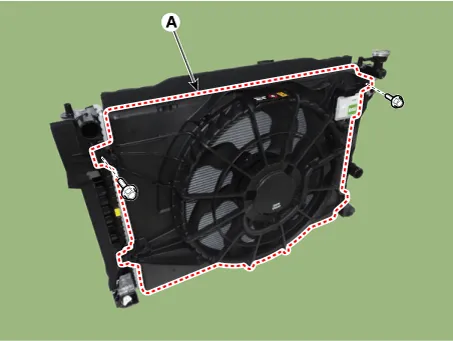
| 20. |
Remove the cooling fan assembly (A).
[BLDC (Brushless DC) motor type]
[DC motor type]
|
| 21. |
Install in the reverse order of removal. |
| 22. |
Fill with engine coolant. (Refer to Cooling System - "Coolant") |
| 23. |
Start engine and check for leaks. |
| 24. |
Recheck engine coolant level. |
| Inspection |
Radiator Cap Testing
| 1. |
Remove the radiator cap, wet its seal with engine coolant, and then install it on a pressure tester.
|
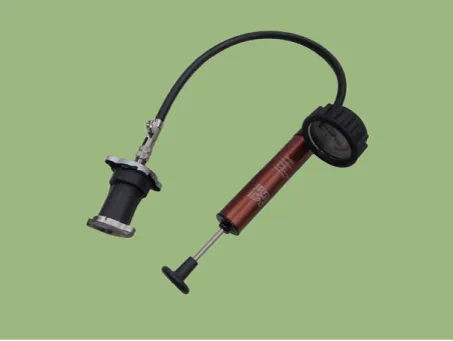
| 2. |
Apply a pressure of 79.4 - 122.58 kPa (0.95 - 1.25 kgf/cm², 11.5 - 17.78 psi). |
| 3. |
Check for a drop in pressure. |
| 4. |
If the pressure drops, replace the cap. |
Radiator Leakage Test
| 1. |
Wait until engine is cool, then carefully remove the radiator cap and fill the radiator with engine coolant, then install it on the pressure tester.
|
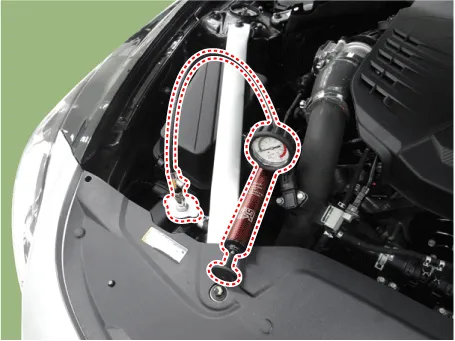
| 2. |
Apply a pressure tester to the radiator and apply a pressure of 93.16 - 122.58 kPa (0.95 - 1.25 kgf/cm², 13.51 - 17.78 psi). |
| 3. |
Inspect for engine coolant leaks and a drop in pressure. |
| 4. |
Remove the tester and reinstall the radiator cap.
|


Other information:
Kia Stinger (CK) 2018-2023 Service Manual: AWD Control System
Components and components location Components Location 1. AWD ECU Description and operation Description The AWD ECU distributes the driving force to the front/rear wheel through controlling the multi plate clutch on the AWD transfer case by analyzing the input information, i.e. the wheel speed, accelerator and steering angle depending on the road condition and driving state.Kia Stinger (CK) 2018-2023 Service Manual: Integrated Memory Seat (IMS) Unit
Components and components location Components Connector Pin Information No Connector A Connector B Connector C 1 Cushion extension motor (Front) Battery (+) Slide switch (Front) 2 Recline motor (Front) Ground Recline switch (Front) 3 Rear height motor (Up) Battery (+) FCategories
- Manuals Home
- Kia Stinger Owners Manual
- Kia Stinger Service Manual
- New on site
- Most important about car
