Kia Stinger CK: Rear Suspension System / Rear Lower Arm
Repair procedures
| Removal |
| 1. |
Remove wheel nuts, wheel and tire (A) from hub.
|


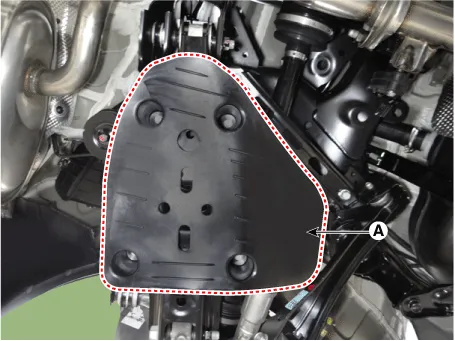
| 2. |
Remove the rear lower arm cover (A).
|
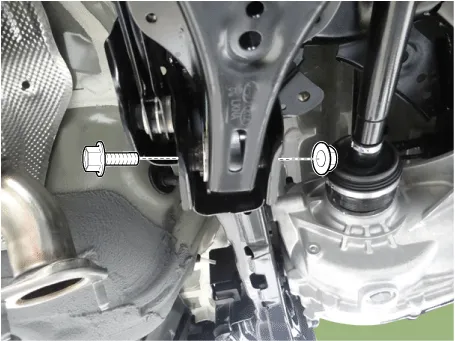
| 3. |
Loosen the rear lower arm bolt & nut and then separate the lower arm from the rear axle.
|
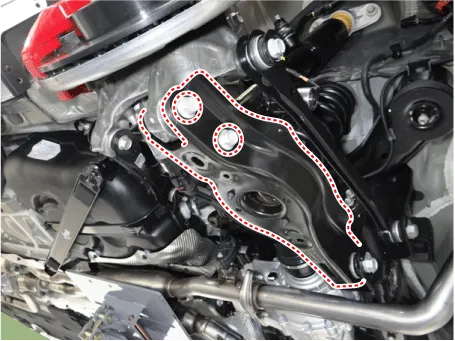
| 4. |
Loosen the bolt & nut and then remove the rear lower arm.
|
| 5. |
Install in the reverse order of removal.
|
| 6. |
Check the alignment. (Refer to Suspension System - "Alignment") |
| Inspection |
| 1. |
Check the bushing for wear and deterioration. |
| 2. |
Check the rear lower arm for deformation. |
| 3. |
Check the coil spring and spring pad for deterioration and deformation. |
| 4. |
Check for all bolts and nuts. |


Other information:
Kia Stinger (CK) 2018-2023 Service Manual: Battery
Specifications Specification ▷AGM80L - DIN Item Specification Capacity [20 hr / 5 hr] (AH) 80 / 64 Cold Cranking Amperage (A) 800 (SAE) / 800 (EN) Reserve Capacity (Min) 155 Specific Gravity 1.Kia Stinger (CK) 2018-2023 Service Manual: Front Seat Assembly
Components and components location Component Location 1. Front seat assembly Repair procedures Replacement Be careful as the seat back may touch peripheral components such as the sunvisor if it is folded forward with its headrest and seat adjusted high and the seat moved forward.Categories
- Manuals Home
- Kia Stinger Owners Manual
- Kia Stinger Service Manual
- New on site
- Most important about car
