Kia Stinger CK: Exhaust Emission Control System / Catalytic Converter
Description and operation
| Description |
The catalytic converter of the gasoline engine is a three way catalyst. It oxidizes carbon monoxide and hydrocarbons (HC), and separates oxygen from the oxides of nitrogen (NOx).
Catalytic Converter (WCC)
Repair procedures
| Removal |
| 1. |
Remove the engine cover. (Refer to Engine Mechanical System - "Engine Cover") |
| 2. |
Disconnect the negative battery terminal. |
| 3. |
Remove the engine room front under cover. (Refer to Engine Mechanical System - "Engine Room Under Cover") |
| 4. |
Drain the coolant. (Refer to Engine Mechanical System - "Coolant") |
| 5. |
Remove the air intake hose. (Refer to Engine Mechanical System - "Air Cleaner") |
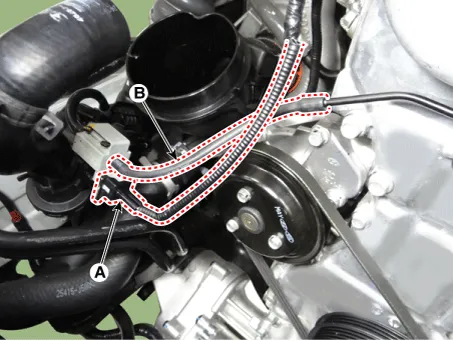
| 6. |
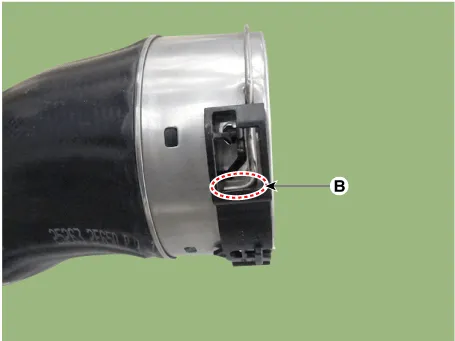
Disconnect the recirculation valve connector (A) and the vacuum hose (B).
|
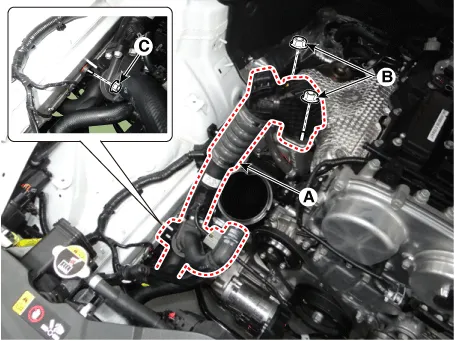
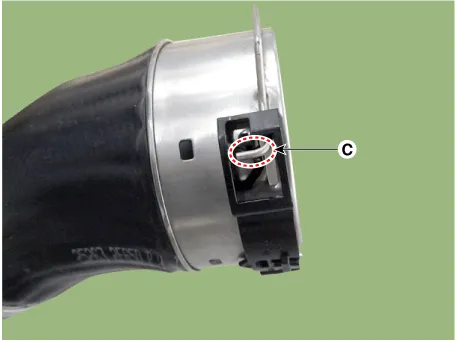
| 7. |
Remove the intercooler inlet hose & pipe assembly (A).
|

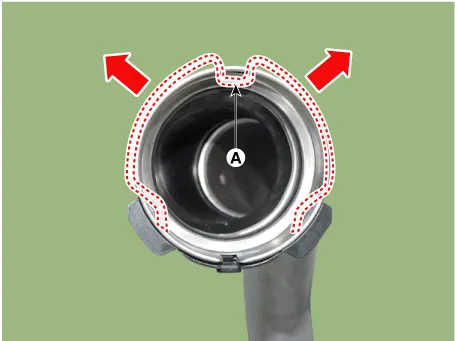
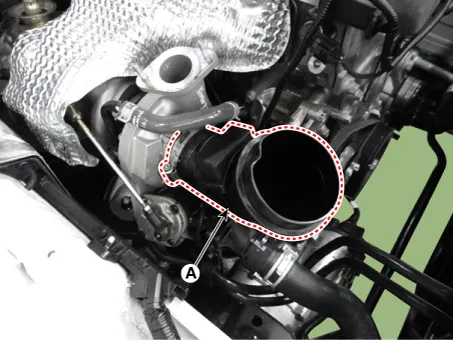
| 8. |
Remove the turbocharger inlet hose (A).
|
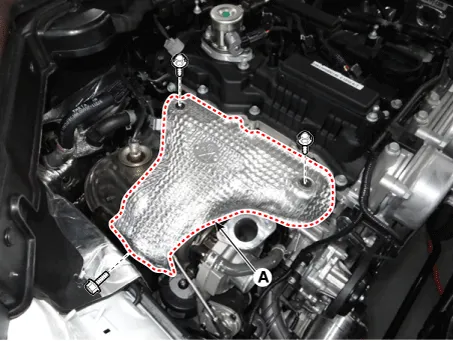
| 9. |
Remove the heat protector (A).
|
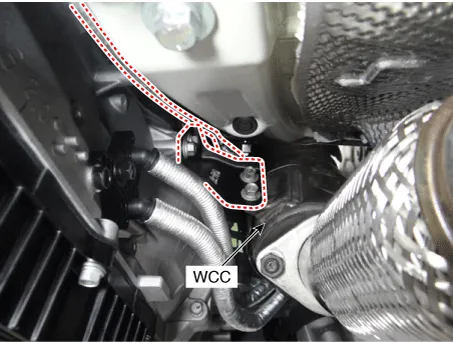
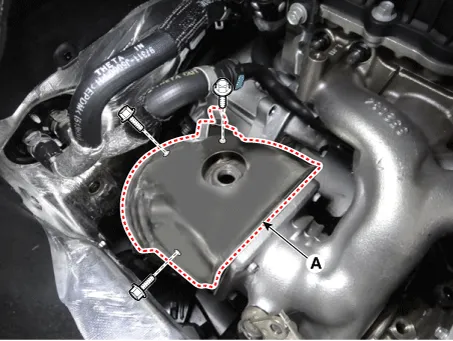
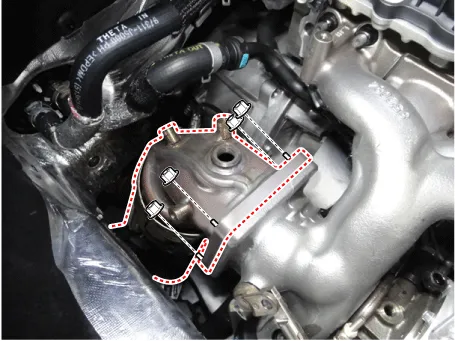
| 10. |
Remove the heated oxygen sensor. (Refer to Engine Control / Fuel System - " Heated Oxygen Sensor ( HO2S)") |
| 11. |
Remove the warm-up catalytic converter (WCC) heat protector (A).
|
| 12. |
Remove the front muffler. (Refer to Engine Mechanical System - "Muffler") |
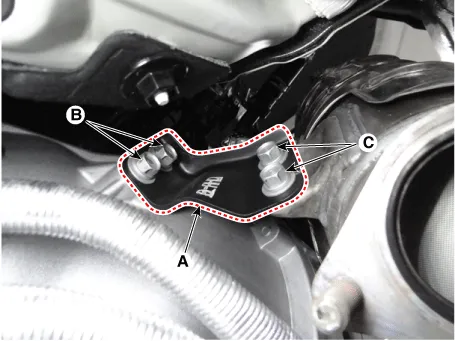
| 13. |
Remove the warm-up catalytic converter (WCC) stay (A).
|
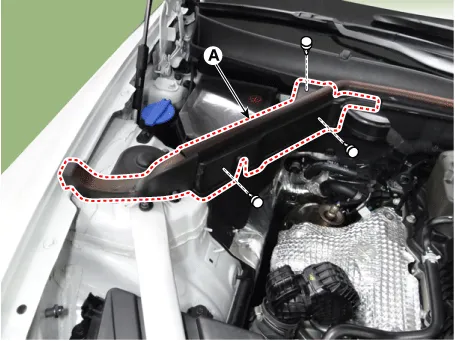
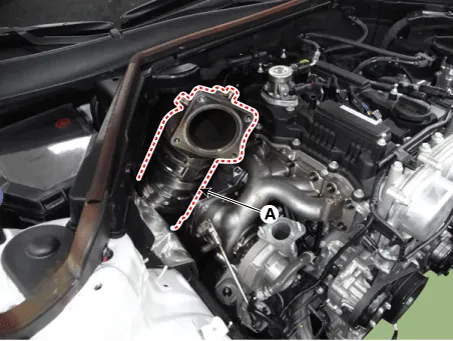
| 14. |
Remove the RH hood sealing cover (A).
|
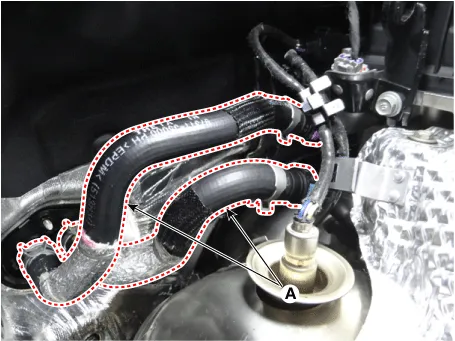
| 15. |
Disconnect the heater hose (A).
|
| 16. |
Remove the warm-up catalytic converter (WCC) (A) and gasket.
|
| Installation |
| 1. |
Install in the reverse order of removal. |


Other information:
Kia Stinger (CK) 2018-2023 Service Manual: Outside Rear View Mirror
Components and components location Component Location 1. Outside rear view mirror Repair procedures Replacement Put on gloves to protect your hands. • Use a plastic panel removal tool to remove interior trim pieces without marring the surface.Kia Stinger (CK) 2018-2023 Service Manual: Auto Defoging Actuator
Description and operation Description Installed on the windshield glass, the auto defogging sensor judges and sends signal to blow out wind for defogging if moisture occurs. The air conditioner control module receives a signal from the sensor and restrains moisture and eliminates defog by the intake actuator, A/C, auto defogging actuator, blower motor rpm and mode actuator.Categories
- Manuals Home
- Kia Stinger Owners Manual
- Kia Stinger Service Manual
- New on site
- Most important about car
