Kia Stinger CK: Cooling System / Coolant
Repair procedures
| Refilling And Bleeding |
Never remove the radiator cap when the engine is hot. Serious scalding could be caused by hot fluid under high pressure escaping from the radiator. |

When pouring engine coolant, be sure to shut the relay box lid and not to let coolant spill on the electrical parts or the paint. If any coolant spills, rinse it off immediately. |

| 1. |
Make sure the engine and radiator are cool to the touch. |
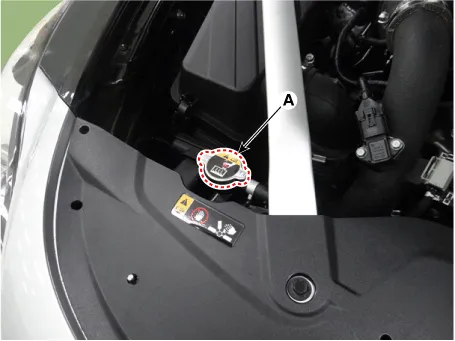
| 2. |
Remove the radiator cap (A).
|
| 3. |
Remove the engine room front under cover. (Refer to Engine and Transmission Assembly - "Engine Room Under Cover") |
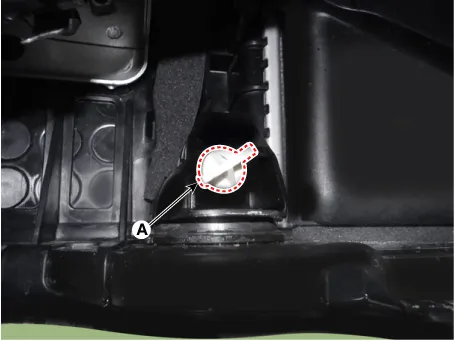
| 4. |
Loosen the drain plug (A), and drain the coolant.
|
| 5. |
Tighten the radiator drain plug securely. |
| 6. |
After draining engine coolant in the reservoir tank, clean the tank. |
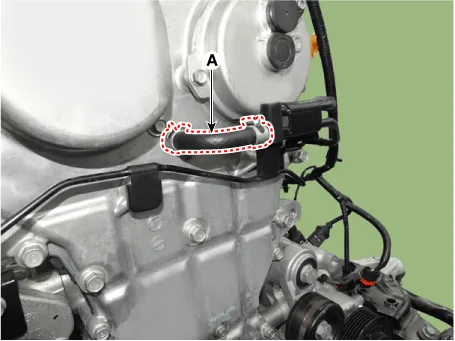
| 7. |
Disconnect the coolant vent hose (A).
|
| 8. |
Fill with fluid mixture of coolant and water (55 - 60% / or 45 - 50% in North America, Europe and China) slowly through the radiator cap. Push the upper/lower hoses of the radiator so as to bleed air easily.
|

| 9. |
When the coolant flows out through the disconnected vent hose, connect the vent hose securely to the nipple. |
| 10. |
Connect the KDS |
| 11. |
Start the engine. |
| 12. |
Turn off the A/C and heater, and then keep it idle for 10 minutes to raise the engine coolant temperature. |
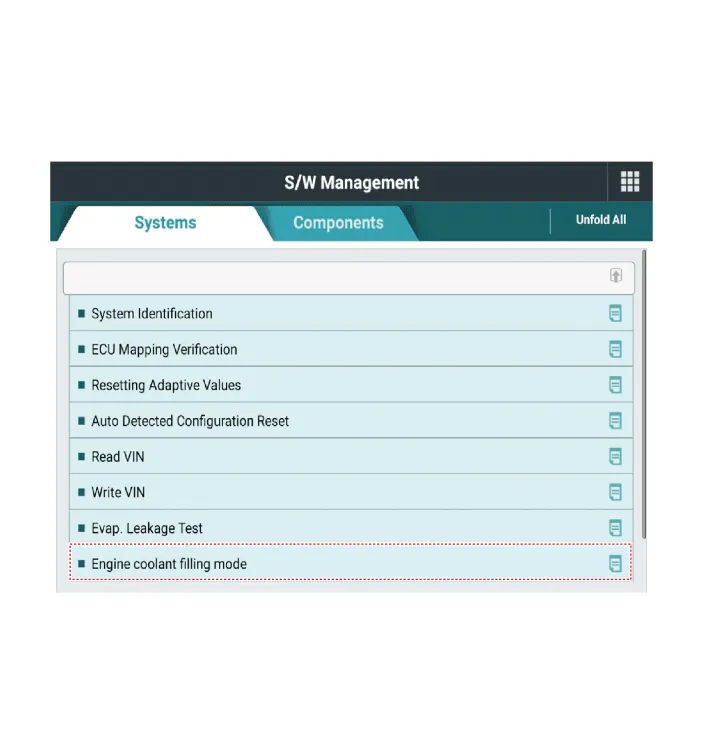
| 13. |
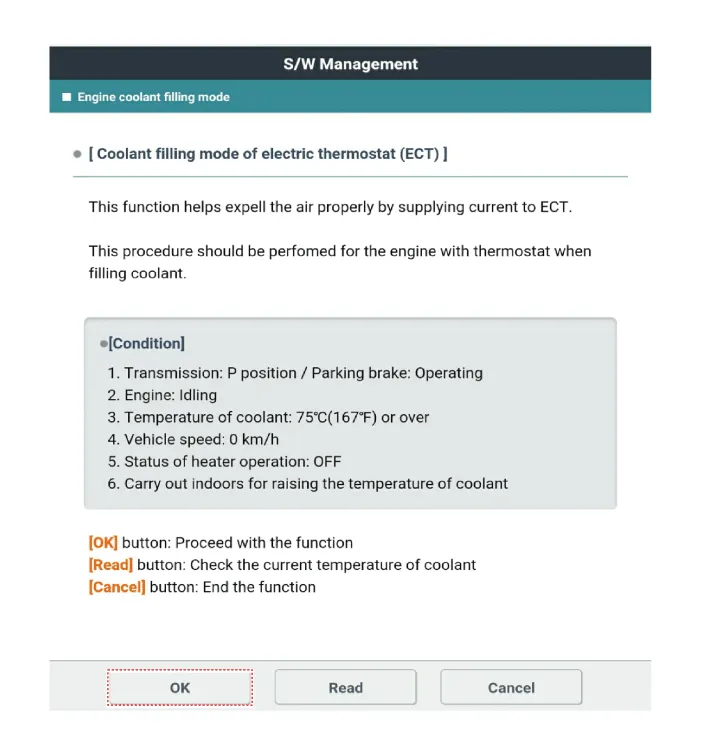
Perform the "Engine coolant filling mode".
|
| 14. |
After confirming that the condition of the vehicle is satisfied with the inspection condition, and then press the "OK" button.
|

| 15. |
Check the engine coolant filling mode entry conditions and then press the "Read" to check the current coolant temperature.
|

| 16. |
Check the current coolant temperature and then press the "OK".
|

| 17. |
If the coolant temperature is above 75°C (167°F), press the "OK" to performing engine coolant fill mode.
|
| 18. |
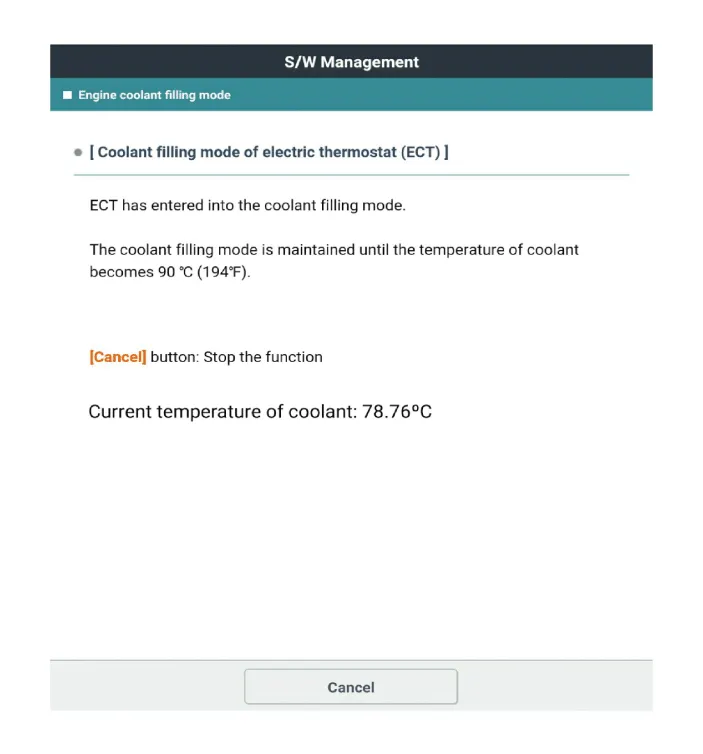
The engine coolant filling mode is maintained until the temperature of coolant becomes 75°C (194°F).
|
| 19. |
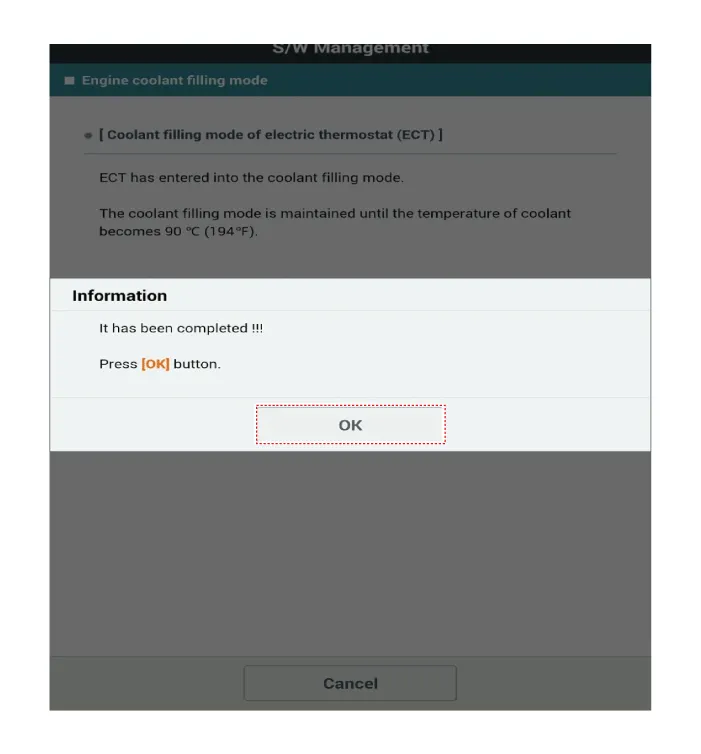
When the engine coolant filling mode completed, press the "OK".
|
| 20. |
Disconnect the KDS. |
| 21. |
Maintain engine RPM at 2,000 to 3,000 for about 3 minutes to promote cooling water circulation. |
| 22. |
Keep the engine idle for 3 minutes to check the cooling fan is operating. |
| 23. |
Maintain 15 minutes after turn off the engine. |
| 24. |
Install the radiator cap (A).
|
| 25. |
Check the coolant level and then fill the reservoir tank to the "F" line with coolant. |
| 26. |
Install the engine room front under cover. (Refer to Engine and Transmission Assembly - "Engine Room Under Cover") |


Other information:
Kia Stinger (CK) 2018-2023 Service Manual: Lift And Support Points
General information Lift And Support Points When heavy rear components such as suspension, fuel tank, spare tire, tailgate and trunk lid are to be removed, place additional weight in the luggage area before hoisting. When substatial weight is removed from the rear of the vehicle, the center of gravity may change and can cause the vehicle to tip forward on the hoist.Kia Stinger (CK) 2018-2023 Service Manual: Air bag inflation conditions
Front air bags Front air bags are designed to inflate in a frontal collision depending on the intensity, speed or angles of impact of the front collision. Side and/or curtain air bags Side and/or curtain air bags are designed to inflate when an impact is detected by side collision sensors depending on the strength, speed or angles of impact resulting from a side impact collision.Categories
- Manuals Home
- Kia Stinger Owners Manual
- Kia Stinger Service Manual
- New on site
- Most important about car
