Kia Stinger CK: Emission Control System / Crankcase Emission Control System
Contents:
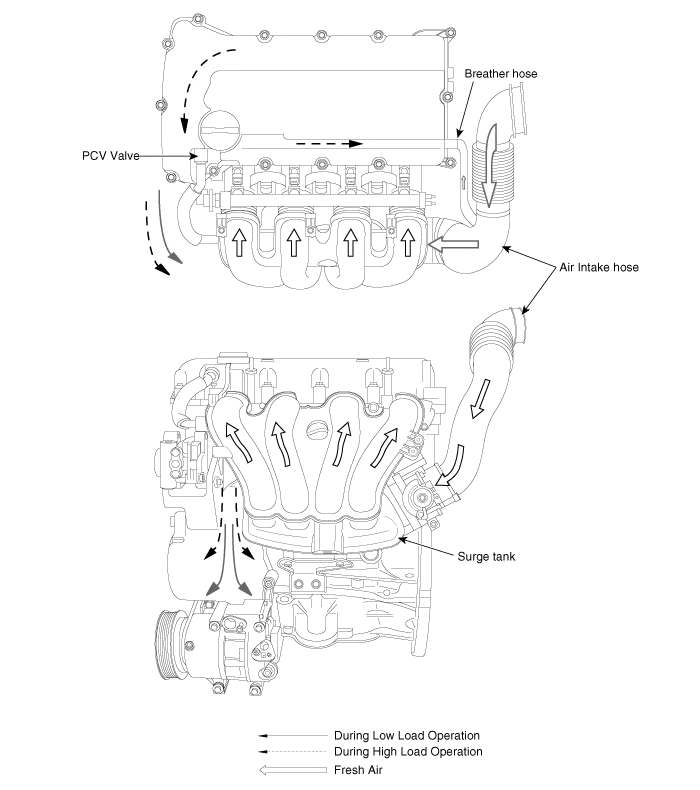
Schematic diagrams
| Schematic Diagram |
Repair procedures
| Inspection |
| 1. |
After disconnecting the vapor hose from the PCV valve, remove the PCV valve. |
| 2. |
Reconnect the PCV valve to the vapor hose. |
| 3. |
Run the engine at idle, then put a finger over the open end of the PCV valve and make sure that intake manifold vacuum can be felt.
|

| 4. |
If vacuum could not be felt, inspect the PCV operation. If operating correctly, clean or replace the vapor hose. |
Positive Crankcase Ventilation (PCV) Valve
Description and operation
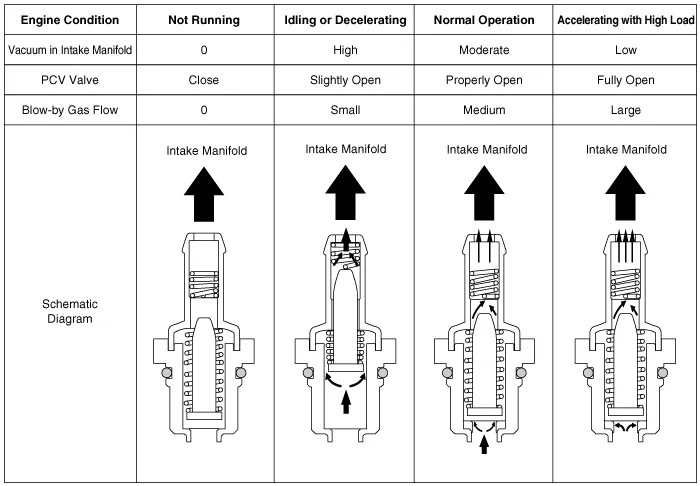
| Operation Principle |
Repair procedures
| Removal |
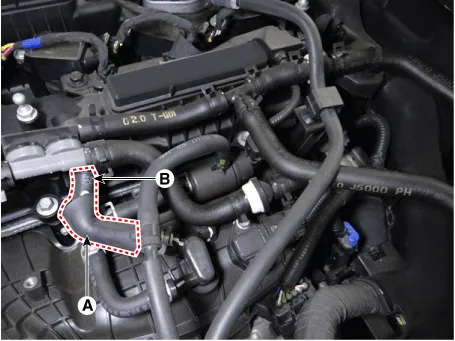
| 1. |
Disconnect the PCV hose (A). |
| 2. |
Remove the PCV valve (B).
|
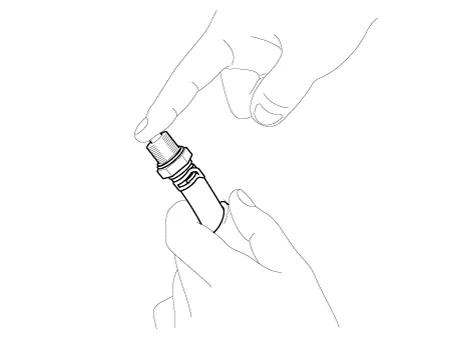
| Inspection |
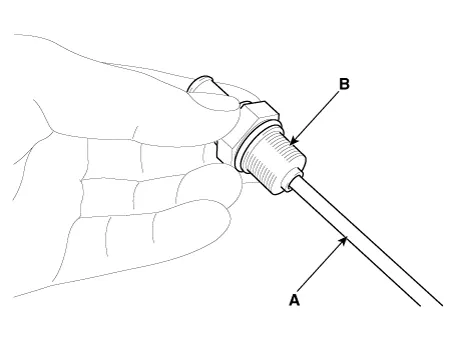
| 1. |
Insert a thin stick (A) into the PCV valve (B) from the threaded side to check for the plunger movement.
|
| Installation |
| 1. |
Install in the reverse order of removal.
|


Other information:
Kia Stinger (CK) 2018-2023 Service Manual: Seat belt restraint system
For maximum restraint system protection, the seat belts must always be used whenever the vehicle is moving. A properly positioned shoulder belt should be positioned midway over your shoulder across your collarbone. Never allow children to ride in the front passenger seat. See child restraint system section for further discussion. WARNING - Twisted seat belt Make sure your seat belt is not twisted when worn.Repair procedures Hub nut tightening sequence Tighten the hub nuts as follows. Tightening torque: 107.9 - 127.5 N·m (11.0 - 13.0 kgf·m, 79.6 - 94.0 lb·ft) When using an impact gun, final tightening torque should be checked using a torque wrench.Categories
- Manuals Home
- Kia Stinger Owners Manual
- Kia Stinger Service Manual
- New on site
- Most important about car
Contents
