Kia Stinger CK: Body (Interior and Exterior) / Fender
Components and components location
| Component Location |

| 1. Fender assembly |
Repair procedures
| Replacement |
Be careful not to damage the fender and body. |

When removing the clips, use a clip remover. |

| 1. |
Remove the front bumper. (Refer to Front Bumper - "Front Bumper Assembly") |
| 2. |
Remove the headlamps. (Refer to Body Electrical System - "Headlamps") |
| 3. |
Remove the side sill molding. (Refer to Body Side Molding - "Side Sill Molding") |
| 4. |
Remove the front wheel guard. (Refer to Body Side Molding - "Front Wheel Guard") |
| 5. |
Remove the fender garnish. (Refer to Body Side Molding - "Fender Garnish") |
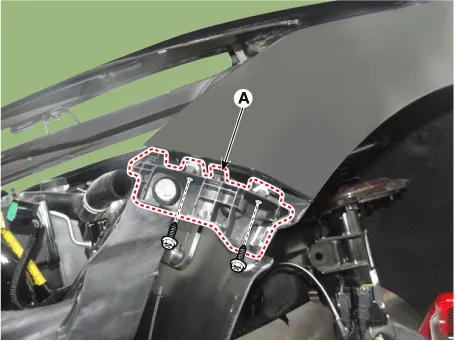
| 6. |
Remove the front bumper side mounting bracket (A) after loosening the screw and bolt.
|
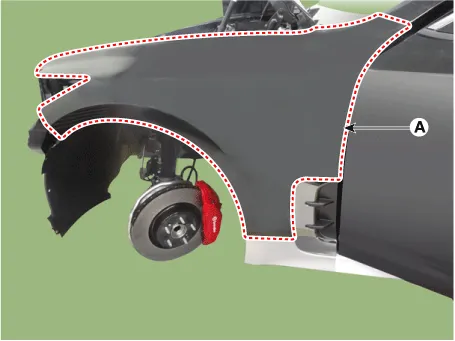
| 7. |
Remove the fender assembly (A) after loosening the nut and bolts.
|
| 8. |
Install in the reverse order of removal.
|


Other information:
Kia Stinger (CK) 2018-2023 Service Manual: Rear Seat Back Cover
Components and components location Component Location 1. Rear back side seat assembly [LH] 2. Rear seat back assembly [LH] 3. Rear seat back assembly [RH] 4. Rear back side seat assembly [RH] Repair procedures Replacement Put on gloves to protect your hands.Repair procedures Replacement 1. Remove the automatic transmission. (Refer to Automatic Transmission System - "Automatic Transmission") 2. Remove the drive plate. (Refer to Cylinder Block - "Drive Plate") 3. Remove the rear oil seal (A). 4.Categories
- Manuals Home
- Kia Stinger Owners Manual
- Kia Stinger Service Manual
- New on site
- Most important about car
