Kia Stinger CK: Rear Seat / Rear Seat Back Cover
Components and components location
| Component Location |
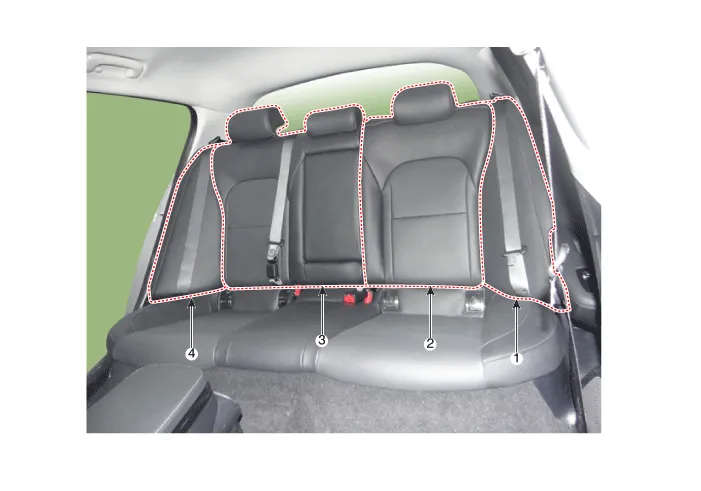
| 1. Rear back side seat assembly
[LH] 2. Rear seat back assembly [LH] |
3. Rear seat back assembly [RH]
4. Rear back side seat assembly [RH] |
Repair procedures
| Replacement |
Put on gloves to protect your hands. |

|

[LH]
| 1. |
Remove the rear seat assembly. (Refer to Rear Seat - "Rear Seat Assembly") |
| 2. |
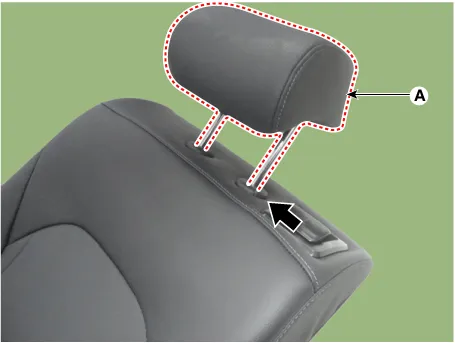
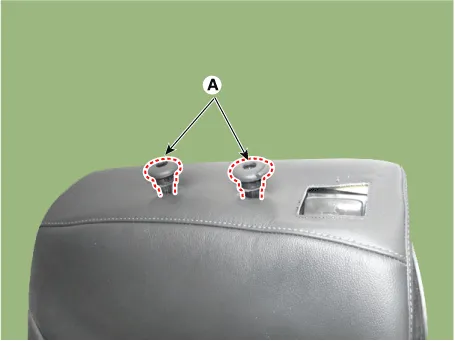
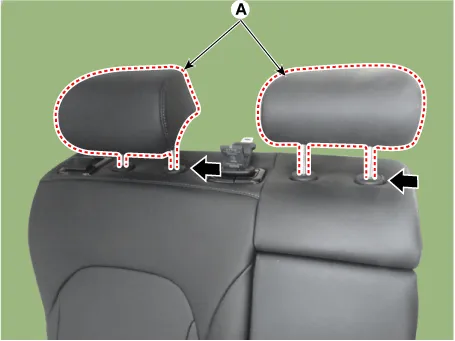
Push the lock pin and remove the rear seat headrest (A).
|
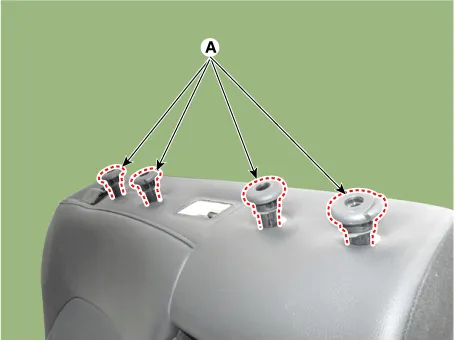
| 3. |
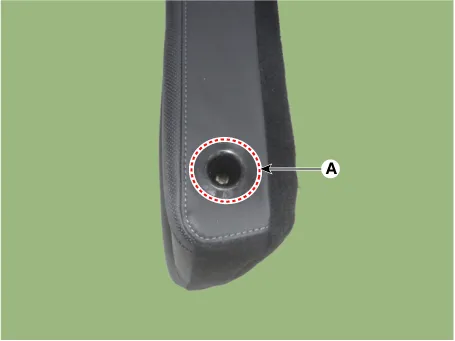
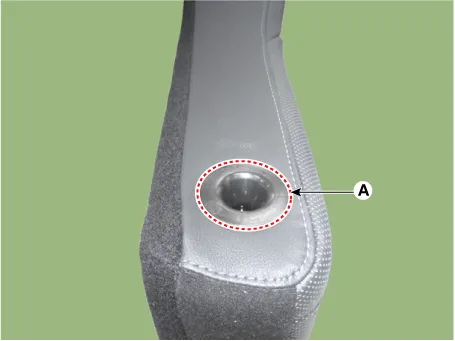
Remove the rear seat back side hinge bush (A) by using a remover.
|
| 4. |
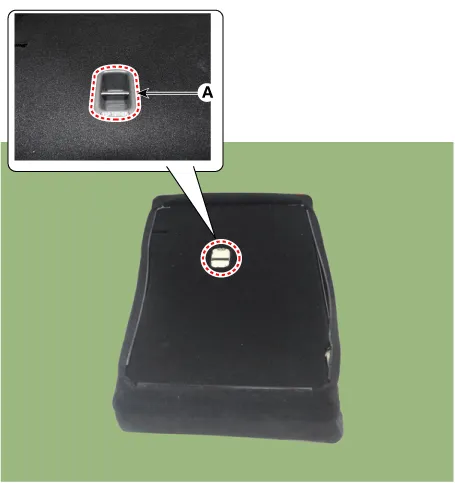
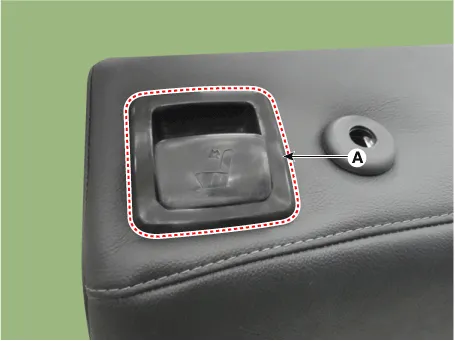
Remove the rear seat back folding knob cover (A) by using a remover.
|

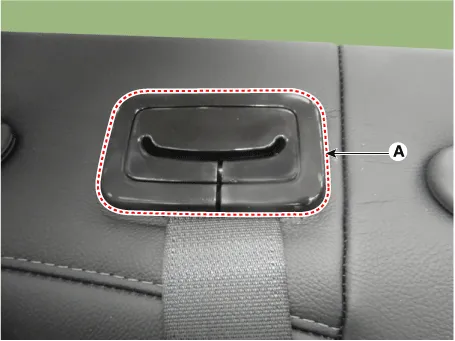
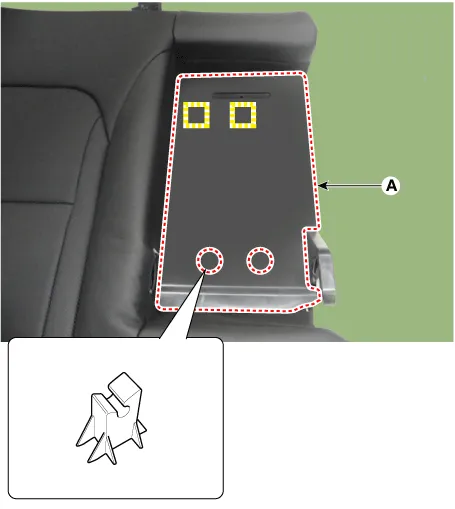
| 5. |
Remove the child anchor cover (A) by using a remover.
|
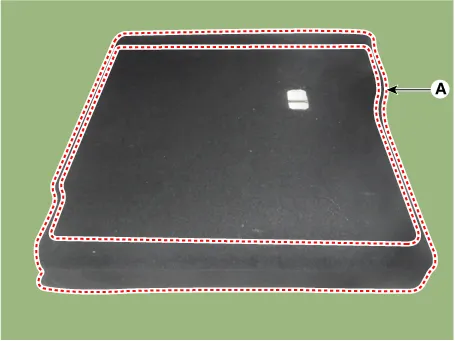
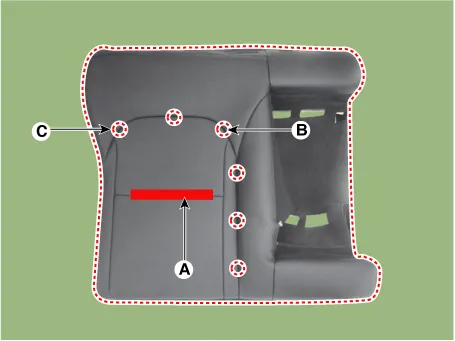
| 6. |
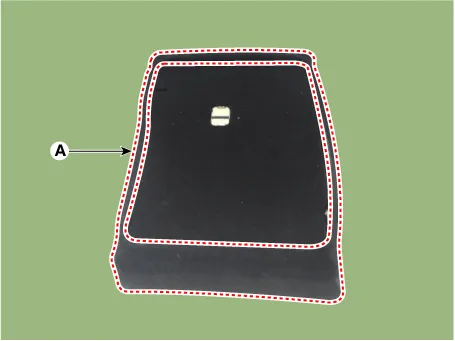
Separate the rear seat back covering (A).
|
| 7. |
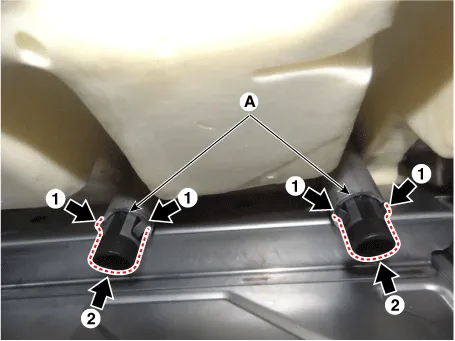
Pull out and remove the rear seat headrest guides (A) while holding both sides of the lower part of the guides.
|
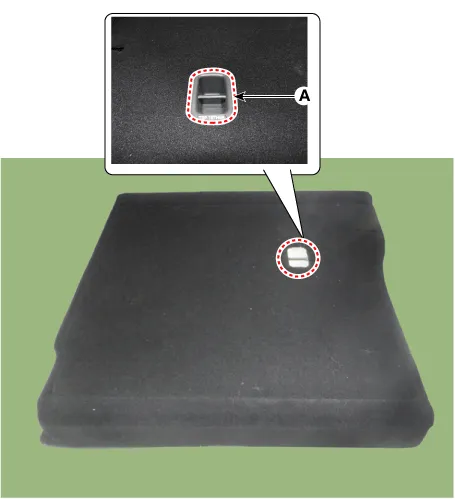
| 8. |
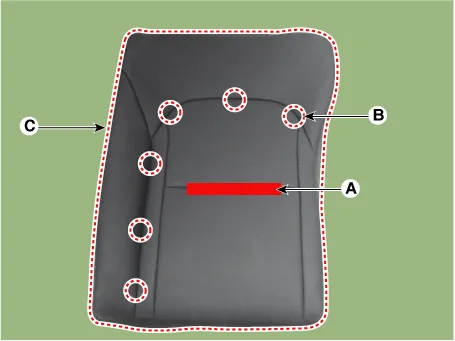
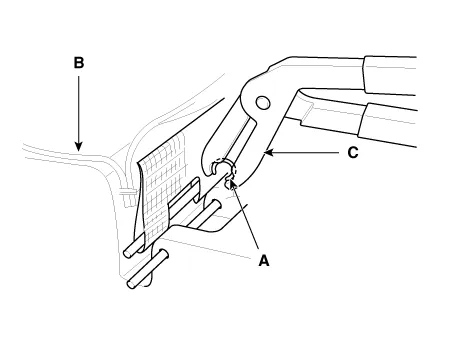
Remove the front seat back covering (C) after removing the velcro tape (A) and hog-ring clip (B).
|
| 9. |
Install in the reverse order of removal.
|
[RH]
| 1. |
Remove the rear seat assembly. (Refer to Rear Seat - "Rear Seat Assembly") |
| 2. |
Push the lock pin and remove the rear seat headrest (A).
|
| 3. |
Remove the rear seat back side hinge bush (A) by using a remover.
|
| 4. |
Remove the rear seat back folding knob cover (A) by using a remover.
|
| 5. |
Remove the rear center seat belt cover (A) by using a remover.
|
| 6. |
Remove the child anchor cover (A) by using a remover.
|
| 7. |
Separate the rear seat back covering (A).
|
| 8. |
Remove the rear back armrest (C) after removing the cap(A) and then loosening the bolt (B).
|
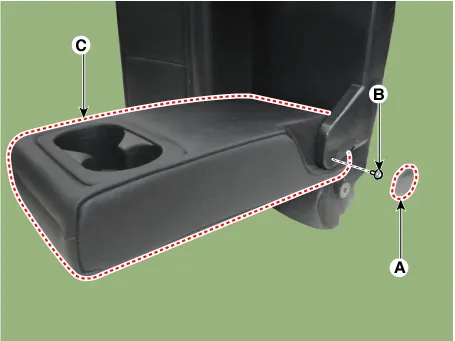
| 9. |
Remove the rear seat armrest back board (A).
|
| 10. |
Pull out and remove the rear seat headrest guides (A) while holding both sides of the lower part of the guides.
|
| 11. |
Remove the front seat back covering (C) after removing the velcro tape (A) and hog-ring clip (B).
|
| 12. |
Install in the reverse order of removal.
|


Other information:
Kia Stinger (CK) 2018-2023 Service Manual: CVVT Oil Control Valve (OCV) [Bank1/Exhaust]
Specifications Specification Item Specification Coil Resistance (Ω) 6.9 - 7.9 [20°C(68°F)] Description and operation Description Continuous Variable Valve Timing (CVVT) system advances or retards the valve timing of the exhaust valve in accordance with the ECM control signal which is calculated by the engine speed and load.General market Maintenance Under Severe Usage Conditions - Except Europe (Including Russia) MAINTENANCE ITEM MAINTENANCE OPERATION MAINTENANCE INTERVALS DRIVING CONDITION Engine oil and engine oil filter Gasoline Theta II 2.0L T-GDI Except China R Every 5,000 km (3,000 miles) or 6 months A, B, C, D, E, F, G, H, I, J, K For China R Every 5,000 km (3,000 miles) or 3 months Gasoline Lambda II 3.Categories
- Manuals Home
- Kia Stinger Owners Manual
- Kia Stinger Service Manual
- New on site
- Most important about car
