Kia Stinger CK: Rear Seat / Rear Seat Assembly
Components and components location
| Component Location |
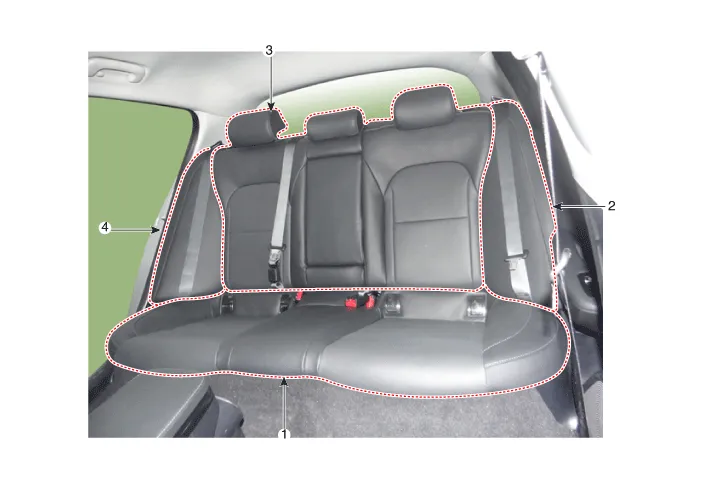
| 1. Rear seat cushion assembly
2. Rear back side seat assembly [LH] |
3. Rear seat back assembly
4. Rear back side seat assembly [RH] |
Repair procedures
| Replacement |
Put on gloves to protect your hands. |

|

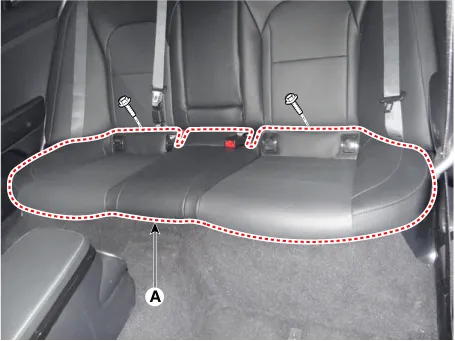
| 1. |
Separate the rear seat cushion assembly (A).
|
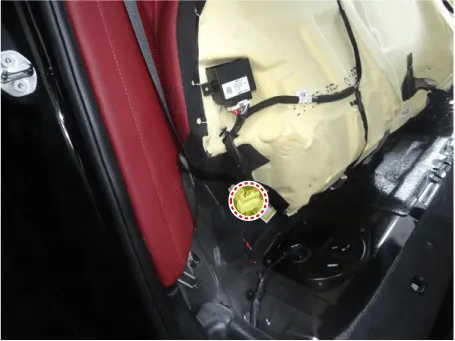
| 2. |
Remove the rear seat cushion assembly after disconnecting the rear seat heater connector (A).
|
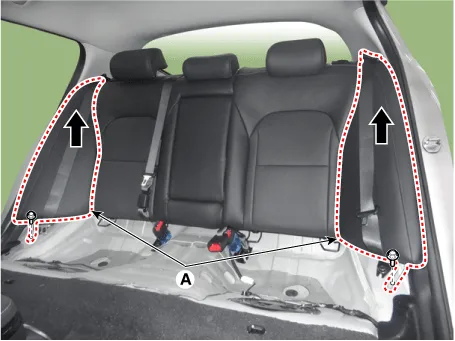
| 3. |
Remove the rear back side seat (A) by pulling it up after loosening the mounting bolts.
|
| 4. |
Disconnect the rear center seat belt (A) after pressing the groove in the direction of the arrow.
|

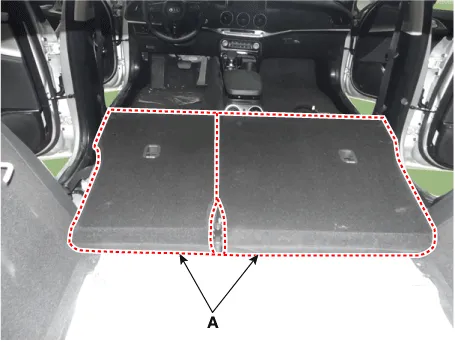
| 5. |
Fold the rear seat back assembly (A).
|
| 6. |
Open the hinge bracket cap (A) after loosening the mounting bolt.
|

| 7. |
Remove the rear seat back assembly (A).
|
| 8. |
Install in the reverse order of removal.
|


Other information:
Kia Stinger (CK) 2018-2023 Service Manual: Air Conditioner Refrigerant/Compressor
Repair procedures Refrigerant Recovery When removing HFC-134a (R-134a) from the air conditioning system, use only U.L.-listed service equipment certified to meet the requirements of SAE J2210. • Air conditioning refrigerant or lubricant vapor can irritate your eyes, nose, or throat.Kia Stinger (CK) 2018-2023 Service Manual: Recommended lubricants and capacities
To help achieve proper engine and powertrain performance and durability, use only lubricants of the proper quality. The correct lubricants also help promote engine efficiency that results in improved fuel economy. These lubricants and fluids are recommended for use in your vehicle. *1 : Refer to the recommended SAE viscosity numbers on the next page.Categories
- Manuals Home
- Kia Stinger Owners Manual
- Kia Stinger Service Manual
- New on site
- Most important about car
