Kia Stinger CK: Crash Pad / Cowl Cross Bar Assembly
Components and components location
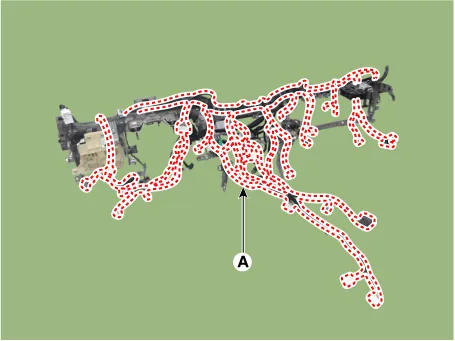
| Component Location |
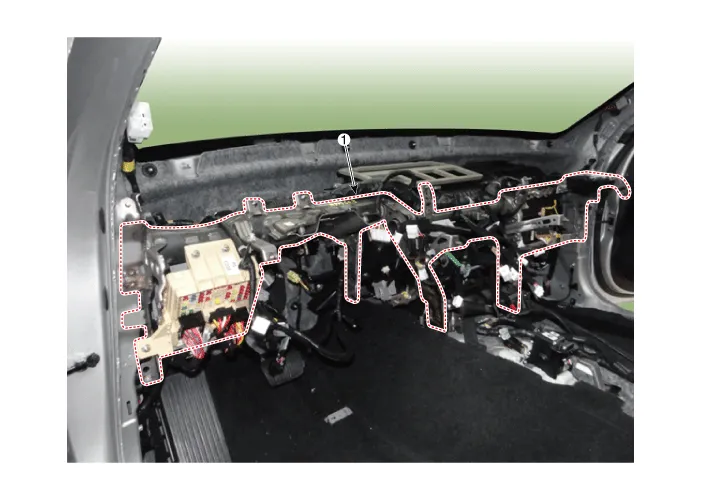
| 1. Cowl cross bar assembly
|
Repair procedures
| Replacement |
Put on gloves to protect your hands. |

|

| 1. |
Remove the main crash pad assembly. (Refer to Crash Pad - "Main Crash Pad Assembly") |
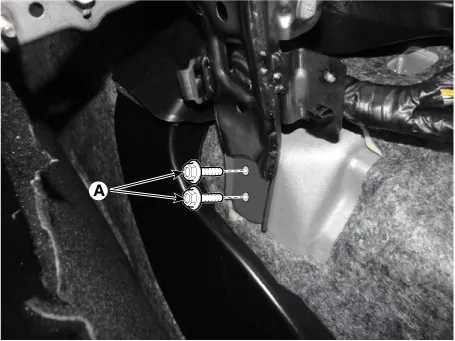
| 2. |
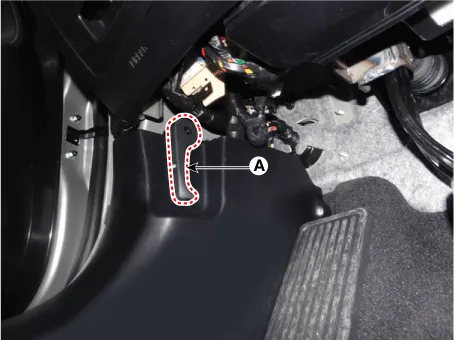
Remove the accelerator pedal mounting bolt caps (A).
|
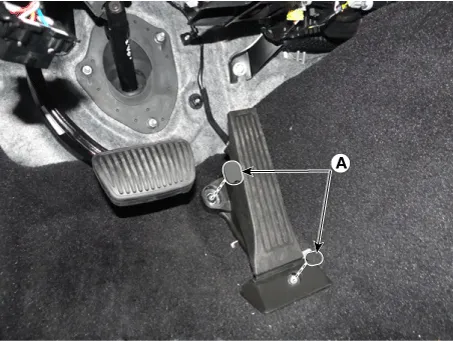
| 3. |
Separate the accelerator pedal (A) after loosening the mounting bolts.
|

| 4. |
Remove the accelerator pedal (B) after disconnecting the connector (A).
|
| 5. |
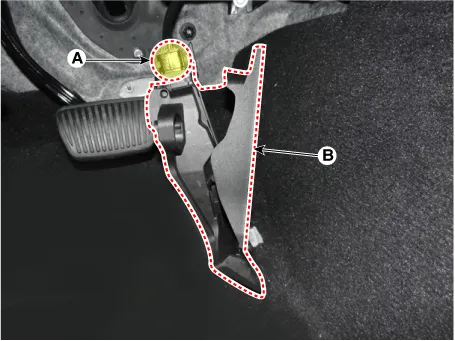
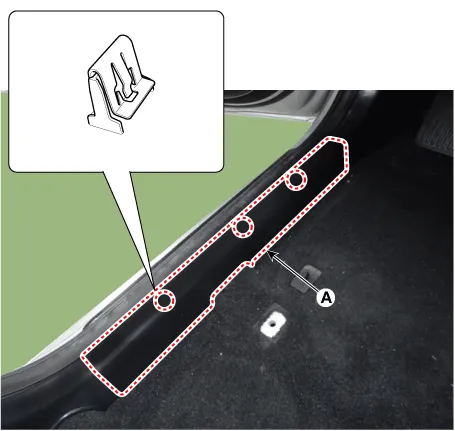
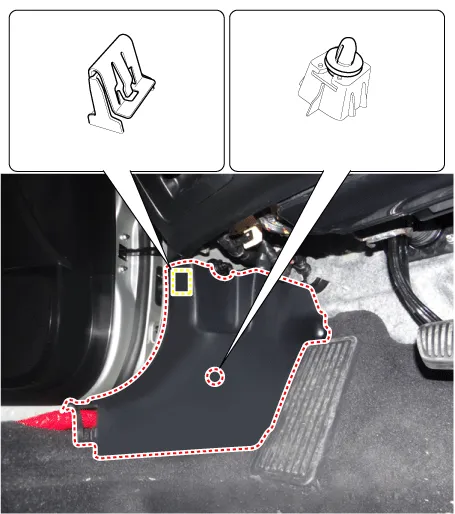
Remove the front door scuff trim (A) by using a remover.
|
| 6. |
Remove the hood latch release handle(A).
|
| 7. |
Remove the cowl side trim (A) by using a remover.
|
| 8. |
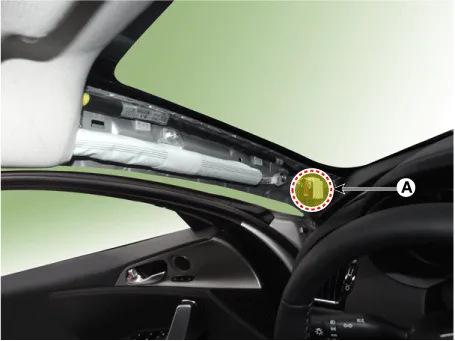
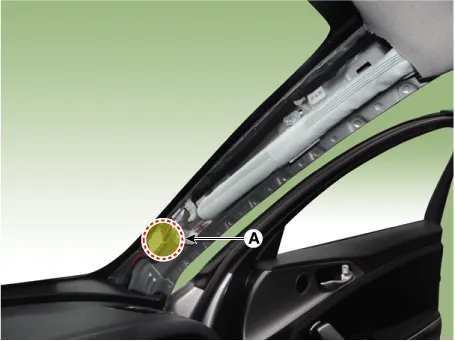
Disconnect the roof trim connectors (A). [Driver Side]
[Passenger Side]
|
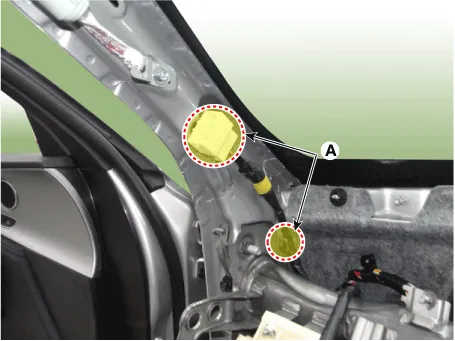
| 9. |
Disconnect the wiring mounting clips (A) in the front pillar. [Driver Side]
[Passenger Side]
|

| 10. |
Disconnect the passenger compartment junction box connectors (A).
|

| 11. |
Disconnect the multi box connectors (A). [Driver Side]
[Passenger Side]
|
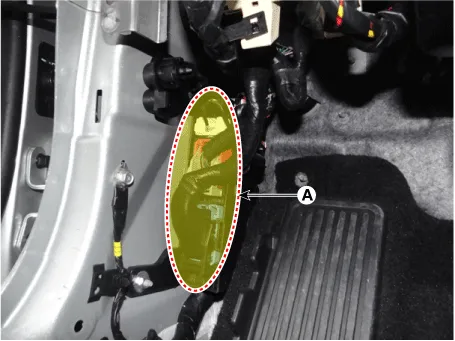
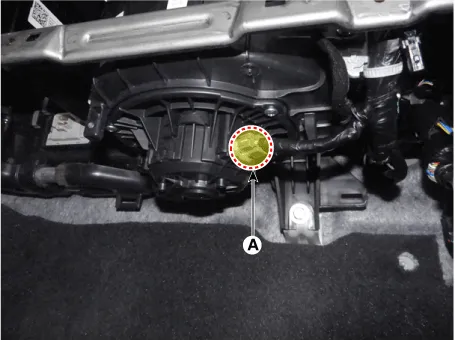
| 12. |
Disconnect the parking release actuator connector (A).
|
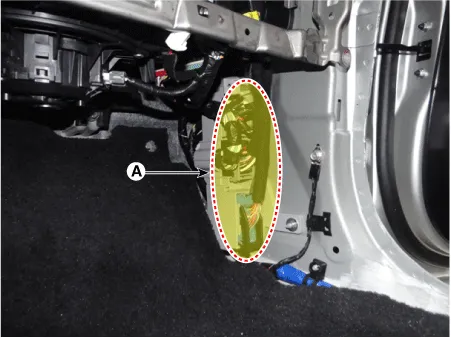
| 13. |
Disconnect the airbag control module connector (A) and wiring mounting clips.
|
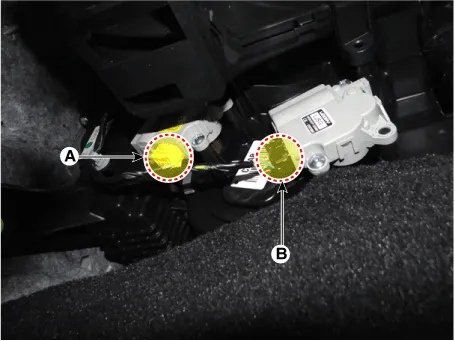
| 14. |
Disconnect the console on/off actuator connector (A) and console temperature actuator connector (B).
|
| 15. |
Disconnect the driver side intake actuator connector (A).
|
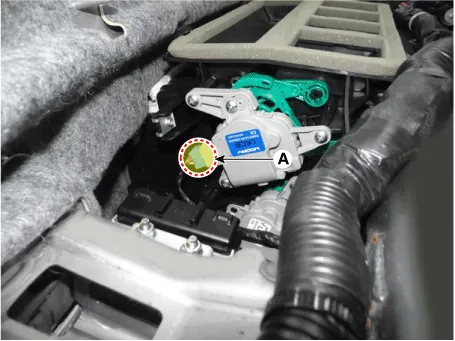
| 16. |
Disconnect the mode actuator connector (A).
|
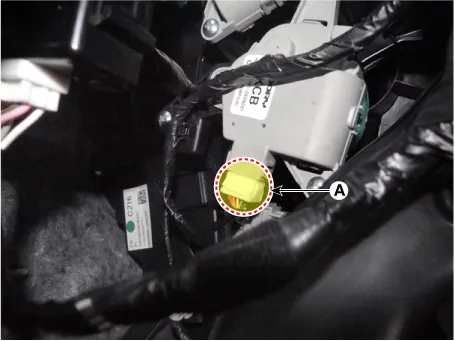
| 17. |
Disconnect the evaporator temperature sensor connector (A).
|

| 18. |
Disconnect the temperature actuator connector (A) and FET connector (B) and heater control unit connector (C).
|
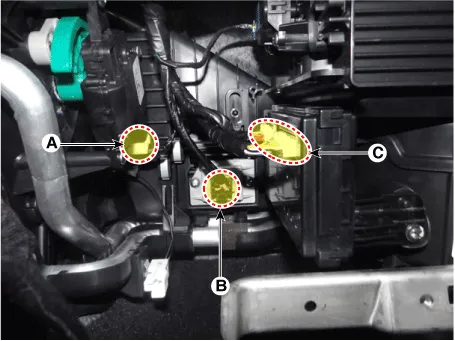
| 19. |
Disconnect the passenger side intake actuator connector (A).
|
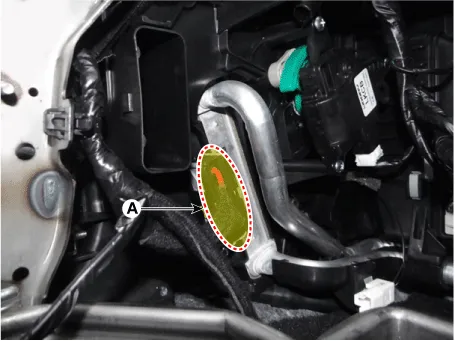
| 20. |
Disconnect the PTC heater connector (A).
|
| 21. |
Disconnect the ADS actuator connector (A).
|
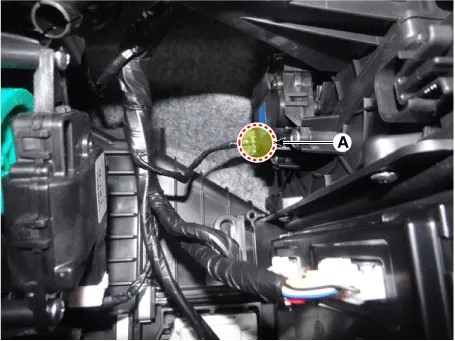
| 22. |
Disconnect the blower motor connector (A), and then remove the wiring mounting clips.
|
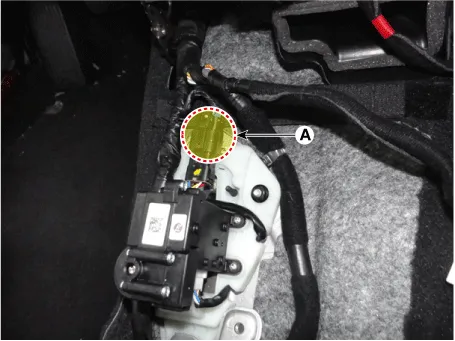
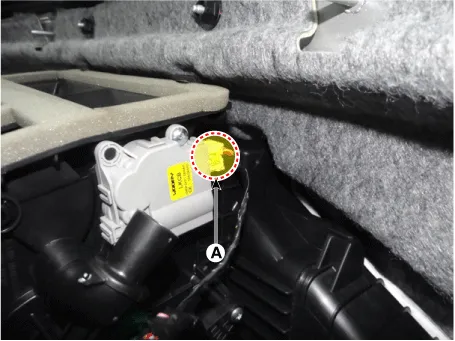
| 23. |
Disconnect the IBU unit connector (A).
|
| 24. |
Remove the reservoir cover (A) after removing the mounting clips.
|

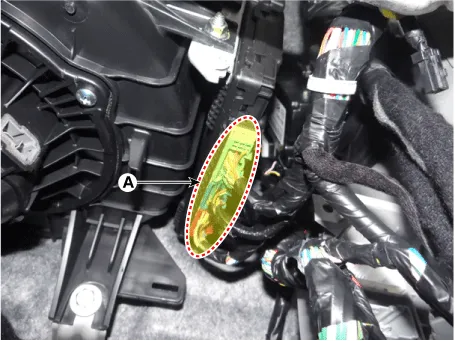
| 25. |
Remove the cap (A) and then loosen the nuts (B).
|
| 26. |
Remove the both sides wiper arm (A).
|
| 27. |
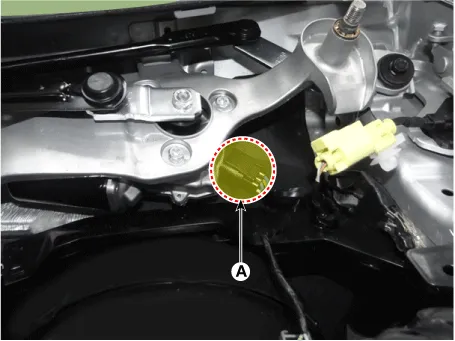
Disconnect the nozzle hose (A).
|

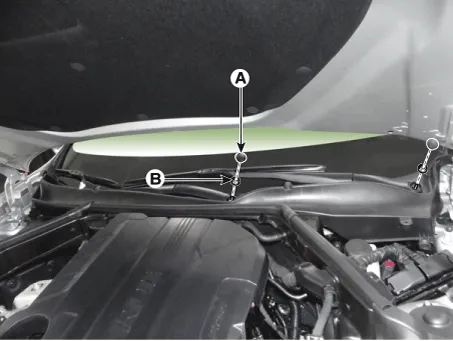
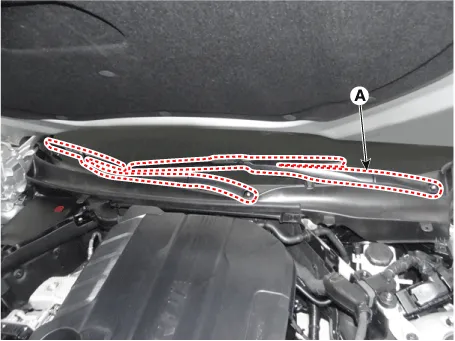
| 28. |
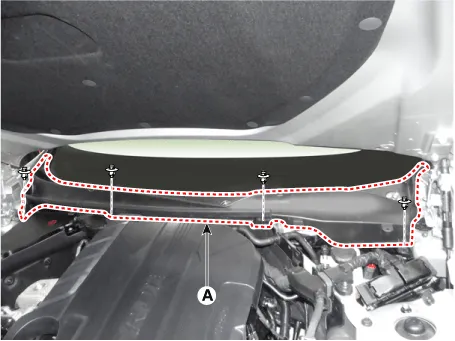
Remove the cowl top cover (A) after removing the mounting clips.
|
| 29. |
Disconnect the windshield glass wiper mortor connector (A).
|
| 30. |
Remove the windshield glass wiper mortor (A) after loosening the mounting bolts
|

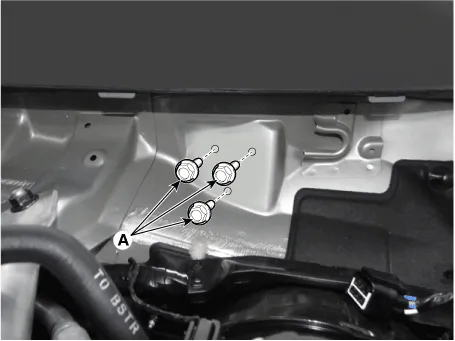
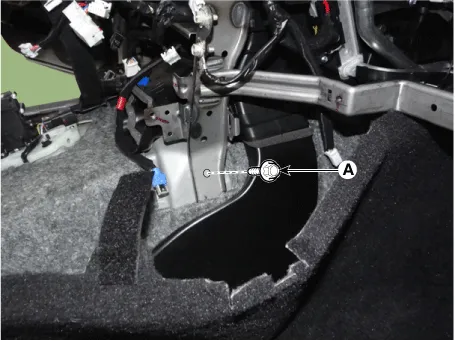
| 31. |
Loosen the cowl cross bar mounting bolts (A).
|
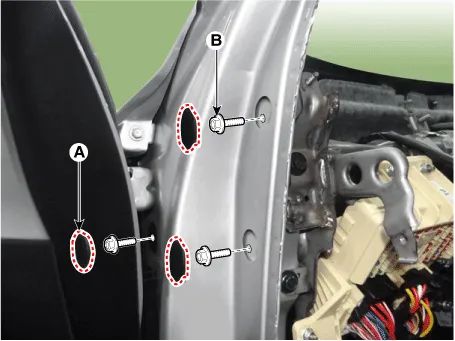
| 32. |
Loosen the mounting bolts (B) after removing the cowl cross bar mounting bolt caps (A).
|
| 33. |
Loosen the cowl cross bar lower mounting bolts (A). [LH]
[RH]
|
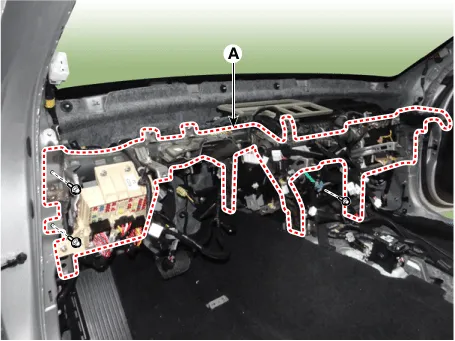
| 34. |
Remove the cowl cross bar assembly (A) after loosening the installation bolts and nuts (A). [Driver Side]
[Passenger Side]
|
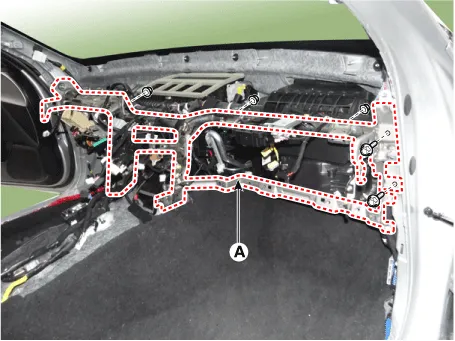
| 35. |
Remove the cowl cross bar assembly (A) after loosening the mounting bolts & nuts.
|
| 36. |
Install in the reverse order of removal.
|


Other information:
Kia Stinger (CK) 2018-2023 Service Manual: Engine Control / Fuel System
Special service tools Special Service Tools Tool Name / Number Illustration Description Fuel Pressure Gauge 09353-24100 Used for measuring the pressure in fuel line Fuel Pressure Gauge Adaptor 0K353-D4100 Used for connecting between high pressure fuel pump and low pressure fuel feed tube to measure the pressure in fuel line ※SST 09353-02100 also can be used Heated Oxygen Sensor Socket Wrench 09392-1Y100 Removal and installation of the heated oxygen sensor ※ SST No.Kia Stinger (CK) 2018-2023 Service Manual: Around View Monitor (AVM) Unit
Components and components location Components Schematic diagrams Circuit Diagram Repair procedures Removal Put on gloves to protect your hands. • When prying with a flat-tip screwdriver or use a prying trim tool, wrap it with protective tape, and apply protective tape around the related parts, to prevent damage.Categories
- Manuals Home
- Kia Stinger Owners Manual
- Kia Stinger Service Manual
- New on site
- Most important about car
