Kia Stinger CK: Lubrication System / Oil Pan
Repair procedures
| Removal |
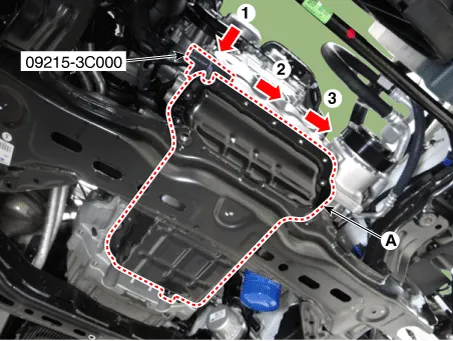
| 1. |
Remove the engine room front under cover and side cover. (Refer to Engine and Transmission Assembly - "Engine Room Under Cover") |
| 2. |
Drain the engine oil. (Refer to Lubrication System - "Engine Oil") |
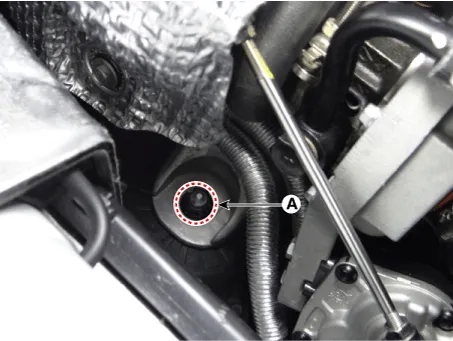
| 3. |
Remove the engine mounting support bracket nut (A).
[LH]
[RH]
|

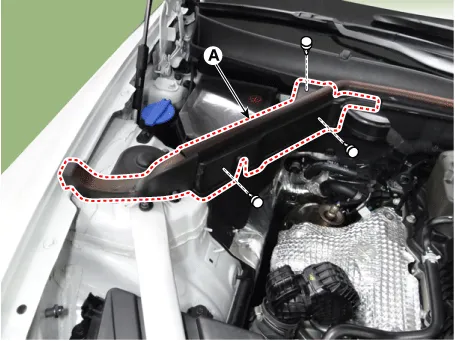
| 4. |
Remove the RH hood sealing cover (A).
|
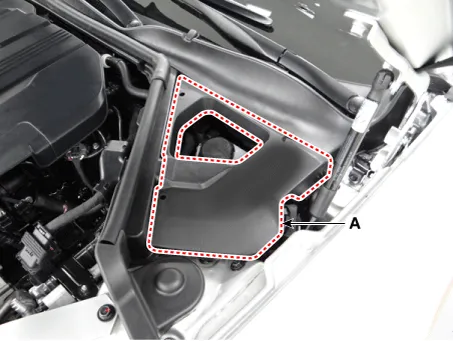
| 5. |
Remove the engine room cover (A).
|
| 6. |
Remove the LH hood sealing cover (A).
|
| 7. |
Remove the cowl top cover. (Refer to Body (Interior and Exterior) -"Cowl Top Cover") |
| 8. |
Remove the hood assembly .(Refer to Body (Interior and Exterior) -"Hood Assembly") |
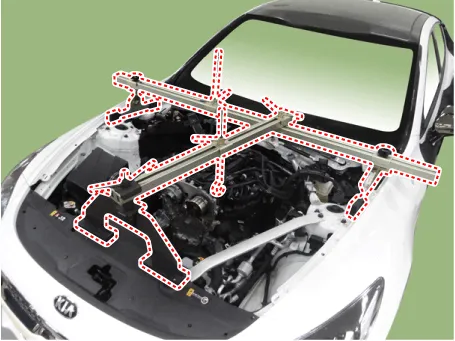
| 9. |
Assemble the engine support fixture on the engine room. (Refer to Special Service Tools - "Engine support fixture assembly drawing")
|
| 10. |
Turn the handle clockwise and then lift up the engine. |
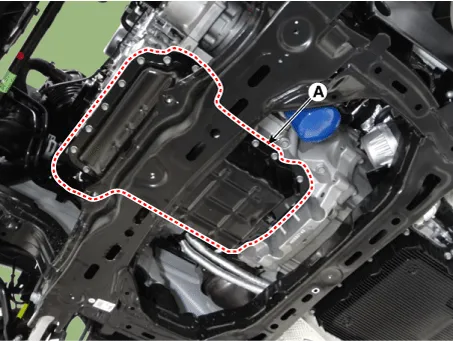
| 11. |
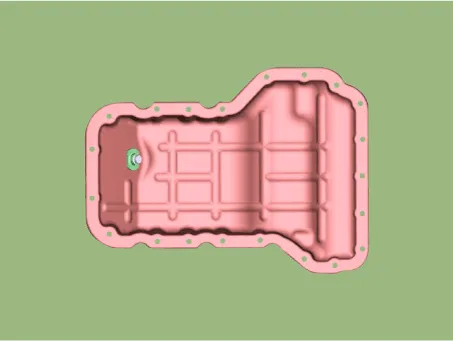
Remove the oil pan
|


| Installation |
| 1. |
Install the oil pan.
|
| 2. |
Install in the reverse order of removal. |
| 3. |
Fill the engine oil. (Refer to Lubrication System - "Engine Oil") |
| 4. |
Refill engine with engine oil. |


Other information:
Kia Stinger (CK) 2018-2023 Service Manual: Wireless smart phone charging system
A wireless smart phone charging system is located in front of the center console. Firmly close all doors, and turn the ignition to ACC or IGN ON. To start wireless charging, place the smart phone equipped with wireless charging function on the wireless charging pad. For best wireless charging results, place the smart phone on the center of the charging pad.Oil pressure characteristics input Oil-pressure characteristics input Solenoid valve oil-pressure characteristics input procedure 1. Perform the oil-pressure characteristics input procedure using the KDS. 2. Click the "OK" button after checking the condition.Categories
- Manuals Home
- Kia Stinger Owners Manual
- Kia Stinger Service Manual
- New on site
- Most important about car
