Kia Stinger CK: Lubrication System / Oil Pressure Switch
Repair procedures
| Removal |
| 1. |
Disconnect the battery negative terminal. |
| 2. |
Remove the alternator. (Refer to Engine Electrical System - "Alternator") |
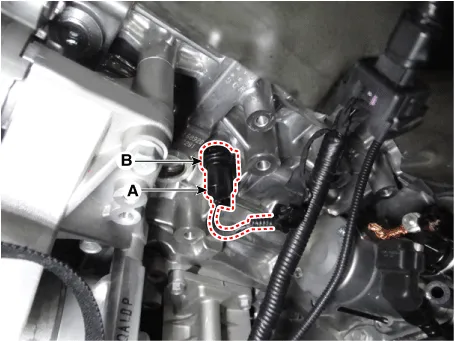
| 3. |
Disconnect the oil pressure switch connector (A) and then remove the oil pressure switch (B).
|
| 4. |
Install in the reverse order of removal.
|


| Inspection |
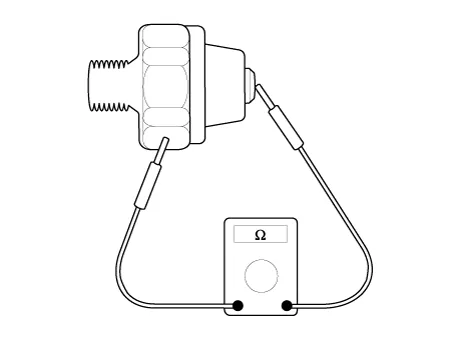
| 1. |
Check the continuity between the terminal and the body with an ohmmeter. If there is no continuity, replace the oil pressure switch.
|
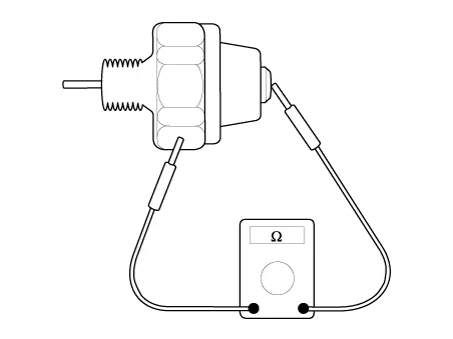
| 2. |
Check the continuity between the terminal and the body when the fine wire is pushed. If there is continuity even when the fine wire is pushed, replace the switch. |
| 3. |
If there is no continuity when a 50kPa (0.50kgf/cm², 7.25psi) is applied through the oil hole, the switch is operating properly. Check for air leakage. If air leaks, the diaphragm is broken. Replace it.
|


Other information:
Kia Stinger (CK) 2018-2023 Service Manual: Emergency fuel filler lid release
If the fuel filler lid does not open using the fuel filler lid opener button, you can open it manually. Remove the panel in the cargo area. Pull the handle out slightly. CAUTION Do not pull the handle excessively, otherwise the luggage area trim or release handle may be damaged. WARNING - Refueling Always remove the fuel cap carefully and slowly.Kia Stinger (CK) 2018-2023 Service Manual: Front Wheel Guard
Repair procedures Replacement Put on gloves to protect your hands. • Use a plastic panel removal tool to remove interior trim pieces without marring the surface.Categories
- Manuals Home
- Kia Stinger Owners Manual
- Kia Stinger Service Manual
- New on site
- Most important about car
