Kia Stinger CK: Emission Control System / Crankcase Emission Control System
Contents:
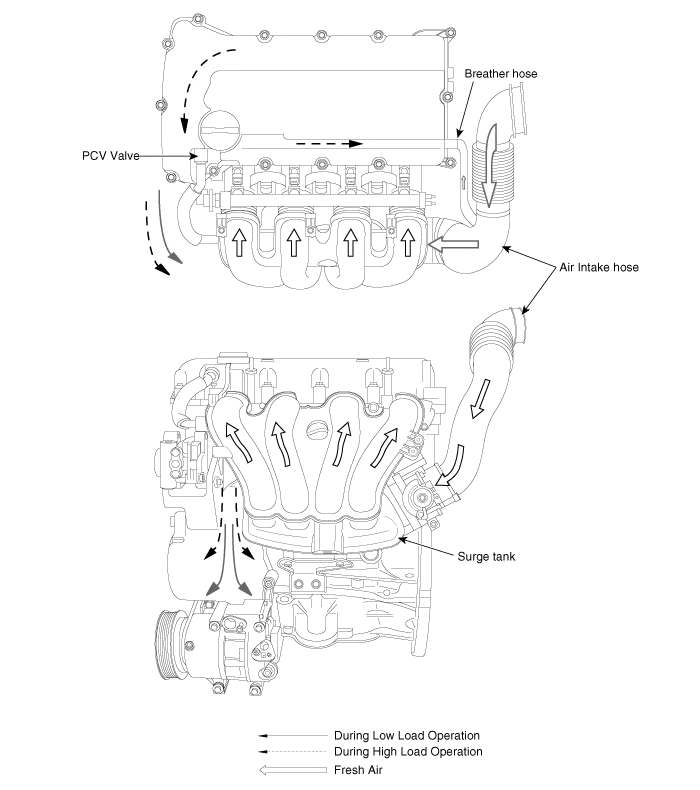
Schematic diagrams
| Schematic Diagram |
Repair procedures
| Inspection |
| 1. |
After disconnecting the vapor hose from the PCV valve, remove the PCV valve. |
| 2. |
Reconnect the PCV valve to the vapor hose. |
| 3. |
Run the engine at idle, then put a finger over the open end of the PCV valve and make sure that intake manifold vacuum can be felt.
|

| 4. |
If vacuum could not be felt, inspect the PCV operation. If operating correctly, clean or replace the vapor hose. |
Positive Crankcase Ventilation (PCV) Valve
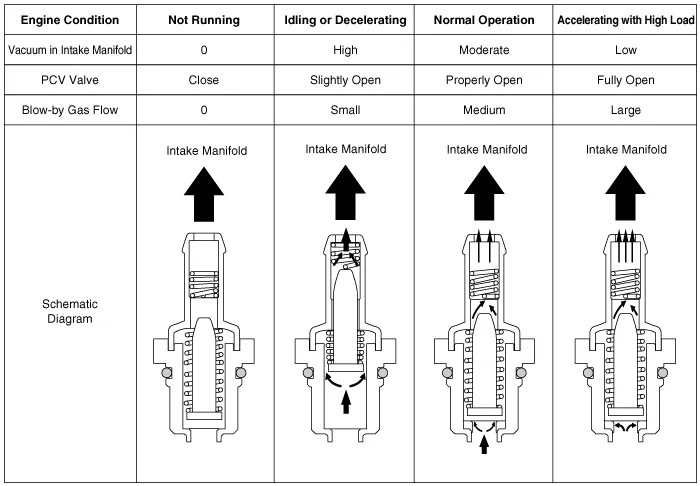
Description and operation
| Operation Principle |
Repair procedures
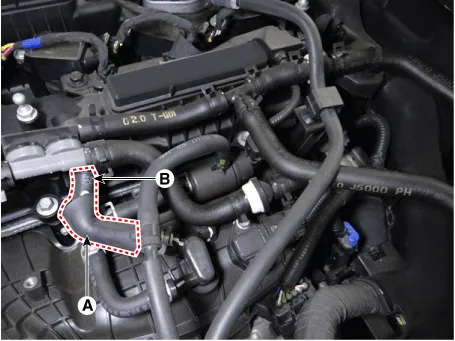
| Removal |
| 1. |
Disconnect the PCV hose (A). |
| 2. |
Remove the PCV valve (B).
|
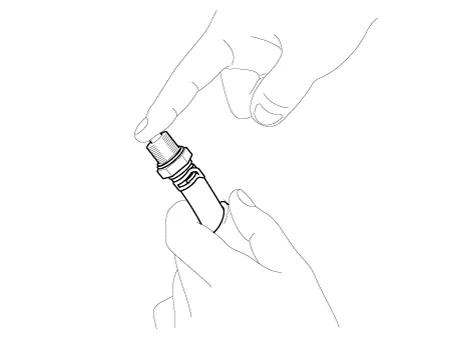
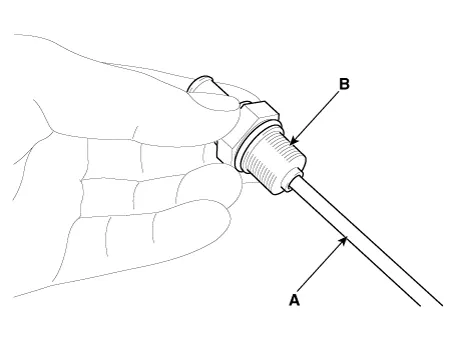
| Inspection |
| 1. |
Insert a thin stick (A) into the PCV valve (B) from the threaded side to check for the plunger movement.
|
| Installation |
| 1. |
Install in the reverse order of removal.
|


Other information:
Kia Stinger (CK) 2018-2023 Service Manual: Explanation of scheduled maintenance items
Engine oil and filter The engine oil and filter should be changed at the intervals specified in the maintenance schedule. If the vehicle is being driven in severe conditions, more frequent oil and filter changes are required. Drive belts Inspect all drive belts for evidence of cuts, cracks, excessive wear or oil saturation and replace if necessary.Components and components location Components 1. Manual control lever 2. Shift cable 3. Shift lever assembly 4. Knob Repair procedures Removal 1. Shift the gear to "N". 2. Loosen the nut (A) and remove the shift cable fixing clip (B).Categories
- Manuals Home
- Kia Stinger Owners Manual
- Kia Stinger Service Manual
- New on site
- Most important about car
Contents
