
Kia Stinger CK: Propeller Shaft Assembly / Propeller Shaft
Repair procedures
| Inspection |
CV Joint and boots
| 1. |
Shift the transmission lever to Neutral. |
| 2. |
Raise the vehicle off the ground, and support it with safety stands in the proper locations. |
| 3. |
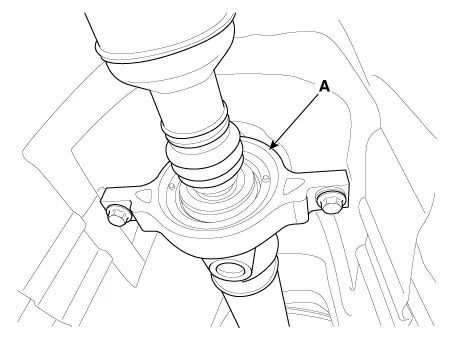
Check the center bearing (A) for excessive play or rattle and rubber for rent. If the center bearing has excessive play or rattle and rubber has rent, replace the propeller shaft assembly.
|
| 4. |
Check the CV joint boot for damage and deterioration. If the boot is damaged or deteriorated, replace the propeller shaft assembly. |
| 5. |
Check the CV joint for excessive play or rattle. If the CV joint have excessive play or rattle, replace the propeller shaft assembly. |
Inspect Flexible Coupling
| 1. |
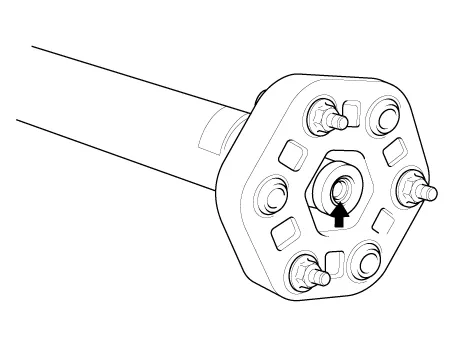
Check the front and rear flexible couplings for cracks or damage. |
| 2. |
Inspect the flexible coupling centering bushing.If the busing is damaged, replace the propeller shaft assembly.
|
Universal Joint Inspect
| 1. |
Check that the spider bearing rotates smoothly. |
| 2. |
Check that there is no play in the spider bearing if necessary, replace the propeller shaft.
|

Propeller shaft runout
| 1. |
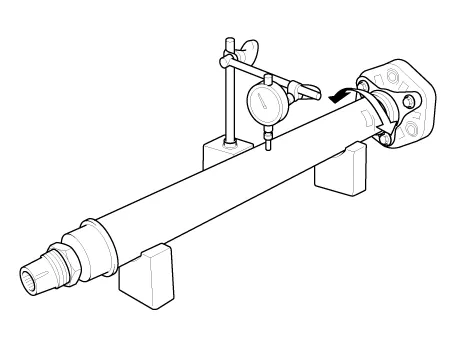
Install a dial indicator with its needle on the center of front propeller shaft or rear propeller shaft. |
| 2. |
Turn the propeller shaft slowly and check the runout. Repeat this procedure for the other propeller shaft.
|
| Removal |
| 1. |
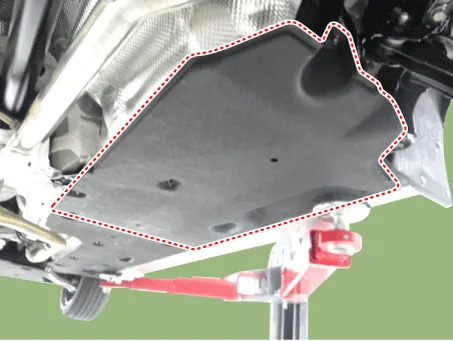
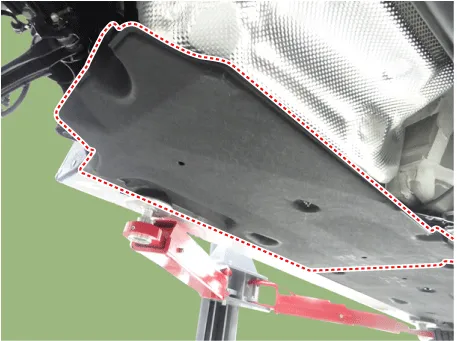
Remove the floor under cover.
|
| 2. |
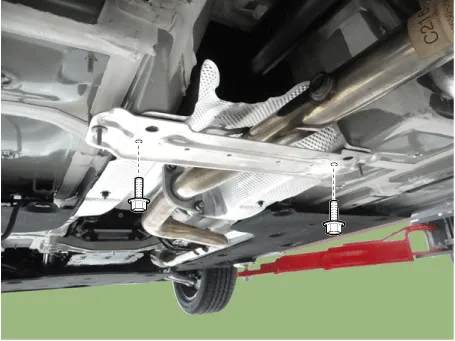
Remove the stiffener bar bracket. [LH, RH]
|

| 3. |
Remove the stay bracket.
|
| 4. |
Remove the center muffler. D 2.2 R VGT (Refer to Engine Mechanical System - "Muffler") G 2.0 T-GDI THETA II (Refer to Engine Mechanical System - "Muffler") G 3.3 T-GDI LAMBDA II (Refer to Engine Mechanical System - "Muffler") |
| 5. |
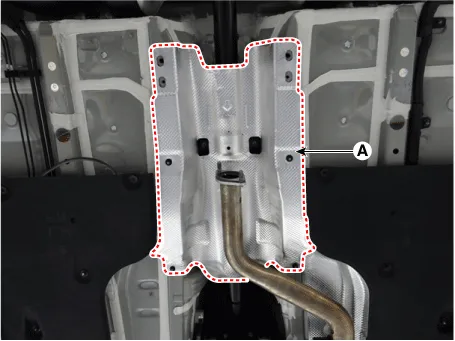
Remove the heat protector (A).
|
| 6. |
Remove the front muffler. D 2.2 R VGT (Refer to Engine Mechanical System - "Muffler") G 2.0 T-GDI THETA II (Refer to Engine Mechanical System - "Muffler") G 3.3 T-GDI LAMBDA II (Refer to Engine Mechanical System - "Muffler") |
| 7. |
Loosen the bolts and then separate the front propeller shaft.
|


| 8. |
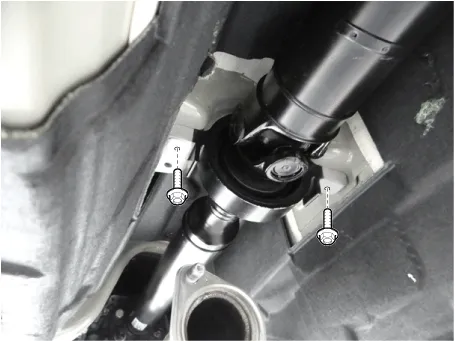
Loosen the center bearing propeller shaft bolts.
|
| 9. |
Loosen the rear propeller shaft bolts and then remove the propeller shaft.
|
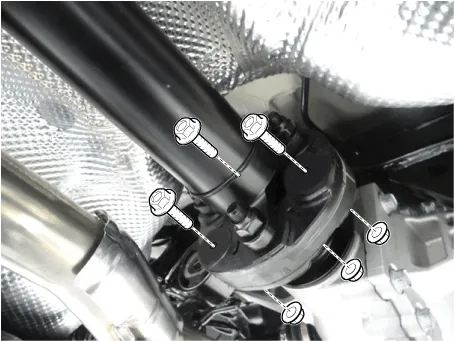
| 10. |
Install in the reverse order of removal. |


Other information:
Kia Stinger (CK) 2018-2023 Service Manual: Side air bag
❈ The actual air bags in the vehicle may differ from the illustration. Your vehicle is equipped with a side air bag in each front seat. The purpose of the air bag is to provide the vehicle's driver and/or the front passenger with additional protection than that offered by the seat belt alone. The side air bags are designed to deploy during certain side-impact collisions, depending on the crash severity, angle, speed and point of impact.Kia Stinger (CK) 2018-2023 Service Manual: Windshield defrosting and defogging
WARNING - Windshield heating Do not use the or position during cooling operation in extremely humid weather. The difference between the temperature of the outside air and the windshield could cause the outer surface of the windshield to fog up, causing loss of visibility. In this case, set the mode selection to the position and fan speed control to the lower speed.Categories
- Manuals Home
- Kia Stinger Owners Manual
- Kia Stinger Service Manual
- New on site
- Most important about car
