Kia Stinger CK: Driveshaft and axle
Kia Stinger (CK) 2018-2023 Service Manual / Driveshaft and axle
Contents:
- Specifications
- Front Axle Assembly
- Rear Axle Assembly
- Front Driveshaft Assembly
- Rear Driveshaft Assembly
- Propeller Shaft Assembly
- Differential Carrier Assembly
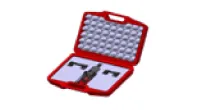
Special service tools
| Special Service Tools |
|
Tool Name / Number |
Illustration |
Description |
|
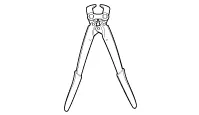
09495-3K000 Band installer |
|
Installation of ear type boot band |
|
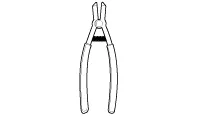
09495-39100 Band installer |
|
Installation of hook type boot band |
|
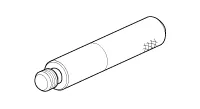
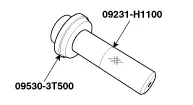
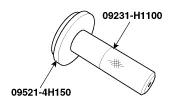
09231-H1100 Bar |
|
|
|
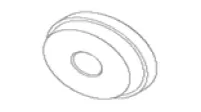
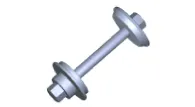
09500-11000 Bar |
|
|
|
09432-3D900 Front differential carrier side bearing race installer |
|
Installation of the side bearing race. (Use with 09231-H1100 ) |
|
09474-4E100 Front differential carrier side oil seal installer |
|
Installation of the differential carrier oil seal installer. (Use with 09231-H1100) |
|
09474-4E200 Front/Rear differential bearing remover |
|
Used for removing differential bearing |
|
09474-4E300 Pinion cage oil seal installer |
|
Installation of pinion cage oil seal. |
|
09474-4E400 Front differential assembly working stand |
|
Removal & Installation of the differential assembly working stand. |
|
09474-4E500 Front differential pinion front bearing race installer |
|
Installation of pinion front bearing race. (Use with 09231-H1100) |
|
09432-3D500 Front differential side bearing installer |
|
Installation of the differential carrier side bearing. (Use with (09231-H1100) |
|
09432-33700 Front/Rear differential pinion rear bearing race installer |
|
Installation of the pinion bearing. (Use with 09231-H1100) |
|
09452-1P100 Front differential carrier cover oil seal installer |
|
Installation of differential carrier cover oil seal. (Use with 09231-H1100) |
|
09452-2W300 Front differential side bearing race remover adapter |
|
Removal of differential side bearing race. |
|
0K530-4J100 Rear differential assembly working stand |
|
Removal & Installation of the differential assembly working stand. |
|
0K530-4J200 Rear differential pinion inner bearing race installer |
|
Installation of pinion bearing race. |
|
0K530-4J300 Rear differential bearing installer |
|
Installation of differential bearing. |
|
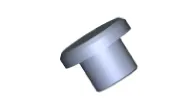
09530-3T500 Differential side oil seal installer |
|
Installation of the differential side oil seal. (Use with 09231-H1100) |
|
09530-3T600 Differential pinion oil seal installer |
|
Installation of the differential pinion oil seal. |
|
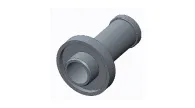
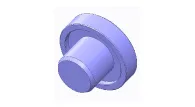
09521-4H150 Rear differential pinion outer bearing race installer |
|
Used for installing drive pinion outer bearing outer race Used with the handle (09231-H1100) |
|
09530-3C200 Rear differential carrier side bearing installer |
|
Installation of the differential bearing. |
|
09453-3B500 Differential case side race installer |
|
Installation of the differential bearing race. (Use with 09231-H1100) |
|
0K517-J5100 |
|
Knuckle expand tool |


Troubleshooting
| Troubleshooting |
|
Trouble Symptom |
Probable cause |
Remedy |
|
Vehicle pulls to one side |
Scoring of driveshaft ball joint |
Replace |
|
Wear, rattle or scoring of wheel bearing |
Replace |
|
|
Defective front suspension and steering |
Adjustment or Replace |
|
|
Vibration |
Wear, damage or bending of driveshaft |
Replace |
|
Driveshaft rattle and hub serration |
Replace |
|
|
Wear, rattle or scratching of wheel bearing |
Replace |
|
|
Shimmy |
Defective wheel balance |
Adjustment or Replace |
|
Defective front suspension and steering |
Adjustment or Replace |
|
|
Excessive noise |
Wear, damage or bending of driveshaft |
Replace |
|
Rattle of driveshaft and worn hub splines |
Replace |
|
|
Wear, rattle or scoring of wheel bearing |
Replace |
|
|
Loose hub nut |
Adjustment or Replace |
|
|
Defective front suspension and steering |
Adjustment or Replace |
Specifications ➤
Front Axle Assembly ➤
Rear Axle Assembly ➤
Front Driveshaft Assembly ➤
Rear Driveshaft Assembly ➤
Propeller Shaft Assembly ➤
Differential Carrier Assembly ➤


Other information:
Kia Stinger (CK) 2018-2023 Service Manual: Specifications
Service data Specifications Item Specification Type Motor Driven Power Steering Steering gear Type Rack & Pinion Rack stroke 2WD : 152.0 ± 1 mm (5.9842 ± 0.0393 in.) AWD : 146.0 ± 1 mm (5.7480 ± 0.Kia Stinger (CK) 2018-2023 Service Manual: Headlamp Leveling System
Components and components location Component Location 1. Headlamp leveling unit (Auto) 2. Headlamp leveling actuator (Built in leveling actuator) 3. Headlamp leveling switch (Manual)Categories
- Manuals Home
- Kia Stinger Owners Manual
- Kia Stinger Service Manual
- Specifications
- Front Axle Assembly
- Rear Axle Assembly
- Front Driveshaft Assembly
- Rear Driveshaft Assembly
- Propeller Shaft Assembly
- Differential Carrier Assembly
- New on site
- Most important about car
Contents

Copyright © 2026 www.kstinger.com 0.0088