Kia Stinger CK: Rear Suspension System / Rear Upper Arm
Repair procedures
| Removal |
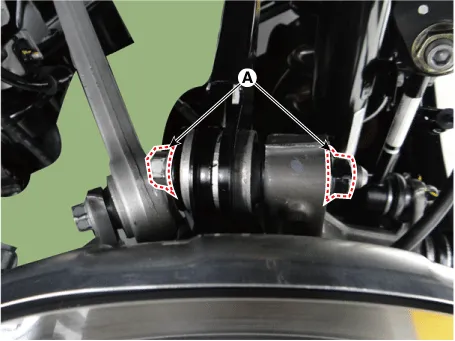
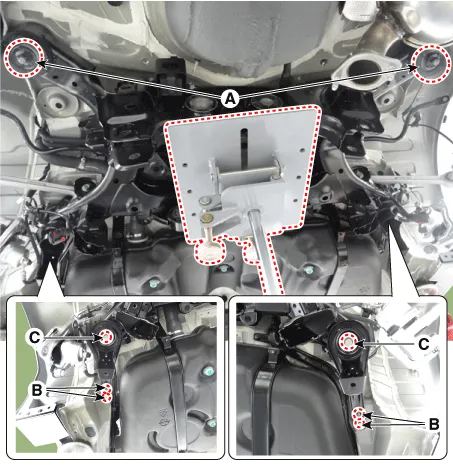
[Rear upper arm rear]
| 1. |
Remove wheel nuts, wheel and tire (A) from hub.
|


| 2. |
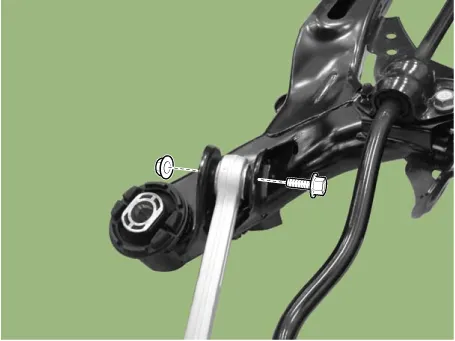
Loosen the rear upper arm bolt & nut and then separate the rear upper arm rear from the rear axle.
|
| 3. |
Loosen the upper arm rear bolt and then remove the rear upper arm.
|

| 4. |
Install in the reverse order of removal.
|
[Rear upper arm front]
| 1. |
Remove wheel nuts, wheel and tire (A) from hub.
|
| 2. |
Remove the brake caliper. (Refer to Brake system - "Rear disc brake") |
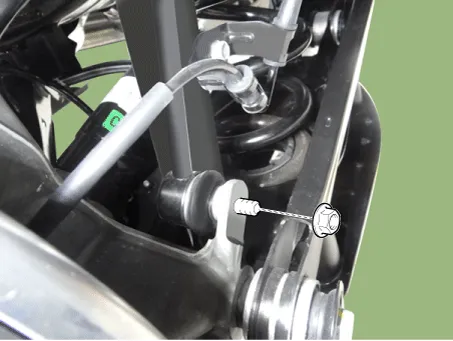
| 3. |
Disconnect the EPB connector (A).
|

| 4. |
Loosen the stabilizer link nut and then separate the rear axle.
|
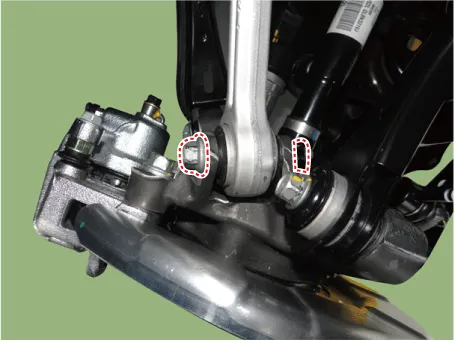
| 5. |
Loosen the rear upper front bolt & nut from the rear axle.
|
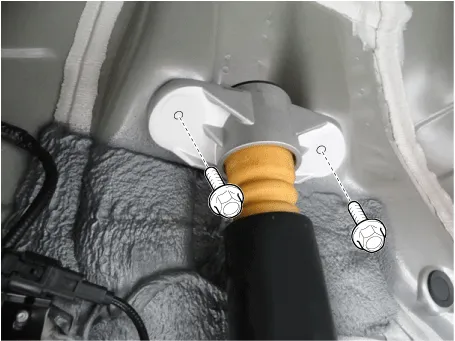
| 6. |
Loosen the rear shock absorber upper bolts and the remove the rear shock absorber.
|
| 7. |
Remove the propeller shaft. (Refer to Driveshaft and axle - "Propeller shaft") |
| 8. |
Remove the rear muffler. D 2.2 R VGT (Refer to Engine Mechanical System - "Muffler") G 2.0 T-GDI THETA II (Refer to Engine Mechanical System - "Muffler") G 3.3 T-GDI LAMBDA II (Refer to Engine Mechanical System - "Muffler") |
| 9. |
Loosen the rear cross member nuts & bolts and then remove the rear cross member.
|
| 10. |
Loosen the rear upper arm front nut & bolt and then remove the rear upper arm front from the rear cross member.
|
| 11. |
Install in the reverse order of removal.
|
| 12. |
Check the alignment. (Refer to Suspension System - "Alignment") |
| Inspection |
| 1. |
Check the bushing for wear and deterioration. |
| 2. |
Check the ball joint for rotating torque. |


Other information:
Kia Stinger (CK) 2018-2023 Service Manual: Power Tailgate Module
Components and components location Components No. Connector A Connector B Connector C 1 Power supply Cinching motor (+) Spindle motor (RH)_Close (-) 2 Illumination (Tailgate inner switch) Tailgate full open switch Hall sensor (RH)_Power 3 - Tailgate full lock switch SpinKia Stinger (CK) 2018-2023 Service Manual: Evaporator Temperature Sensor
Description and operation Description The evaporator temperature sensor detects the evaporator core temperature and interrupts compressor relay power in order to prevent evaporator from freezing by excessive cooling. Repair procedures Inspection 1. Turn the ignition switch OFF. 2. Disconnect the evaporator temperature sensor connector.Categories
- Manuals Home
- Kia Stinger Owners Manual
- Kia Stinger Service Manual
- New on site
- Most important about car
